Tweening in Flash
Tweening in Flash. A closer look at Motion, Shape, and Classic Tweening EDT 512 Tuesday Kathleen Freimuth Kristin DePodesta. What is “ tweening ”?. Creates animation where you tell Flash where to start and where to end Flash does all the work in the middle Three types Classic Motion

Tweening in Flash
E N D
Presentation Transcript
Tweening in Flash A closer look at Motion, Shape, and Classic Tweening EDT 512 Tuesday Kathleen Freimuth Kristin DePodesta
What is “tweening”? • Creates animation where you tell Flash where to start and where to end • Flash does all the work in the middle • Three types • Classic • Motion • Shape
Classic Tweening • Will animate an object between two keyframes • If your animation does not require special easing or other features
Next, insert a keyframe where you want it to end. (We chose frame 20).
Third, click and drag your instance (object) to a new location on the stage with the selection tool.
Finally, on Layer 1, click and highlight between your keyframes and click Insert—Create Classic Tween.
Motion Tweening • Animate movement, filters, color effects, and apply complex easing
1. Place a symbol (basketball) on the stage where you want your animation to begin. 2. Choose where you want your tween to end and click Insert Frame. We chose slide 15. 3. Go to Insert—Create Motion Tween. A dotted line will appear as you drag your symbol to where you want it to end.
4. Since we want our ball to bounce, at 15 the ball is on the ground and at 35, the ball is back in the air. We will insert another keyframe at 35 with the repeated Motion Tween (now down to up).
4. At 35, the symbol (basketball) will be moved to its final position. Notice on the timeline there are two places where motion has been inserted (15 and 35).
For this example, we have moved the ball from a start to an end point where it moves like someone was shooting the ball into the hoop. To show its starting and ending point, it will first show a straight path.
Our end point is frame 35. Next, you will use the Convert Anchor Point tool which is behind the pen tool on your toolbar. Click and drag the path’s anchor points until you reach the desired curve.
On the Properties panel, check the box that says Orient to Path. Once that is clicked, your symbol will travel the desired path. Be sure you click on Frame 1 of your tween on the timeline!
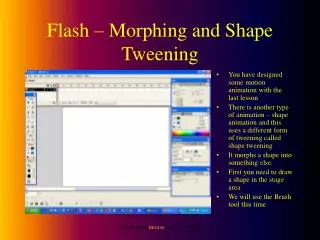
Shape Tweening • Morph from one shape to another • Examples: morph a circle into a square, or morph the numeral 1 into a numeral 2
Example: Basketball to hoop (from the shooter’s perspective)
In frame 1, select the frame in which you want to start a shape tween. Draw the object you want to animate in frame 1 (Here it is the basketball).
Right click where you want the shape tween to end. Click Insert Blank Keyframe.
Draw the shape in which you want your image to morph (smaller ball in hoop at Frame 15).
Right click a frame in the middle of the tween sequence. Click on Create Shape Tween.