Download
1 / 11
110 likes | 315 Vues
Portrait Photo Retouching. 2 Methods Karen Smale GSFC Photo Club Aug 14, 2013. Before & After (& After). Original Photoshop Portrait Professional. Photoshop.

E N D
Portrait Photo Retouching 2 Methods Karen Smale GSFC Photo Club Aug 14, 2013
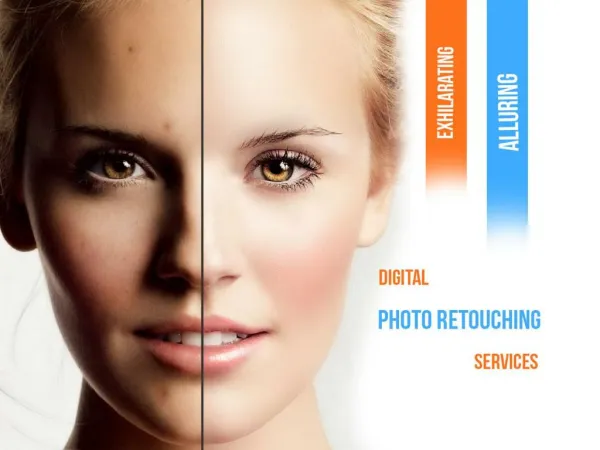
Before & After (& After) Original Photoshop Portrait Professional
Photoshop • Fix major problems first (cropping, white balance, exposure, major skin blemishes) • Smooth skin • Copy original layer, blur (radius~14; threshold~24) • Create layer mask (fill with black) and paint with white at ~40% where you want the blur to come through (soften wrinkles, blemishes, shine) – not eyes or edges
Photoshop (cont’d) • Enhance the Eyes • Increase color saturation • adjustment layer (hue/saturation) & increase saturation, fill mask with black and paint eyes with ~50% white • Darken pupil, add catch light and exit point for that light on the opposite side • new layer, fill 50% grey and select “overlay” blending mode • paint with black to make darker, paint with white to make things lighter • Clear red veins from white of eyes – desaturate, don’t whiten!
Photoshop (cont’d) • Draw the viewer’s eye into the subject • Vignette: new layer 50% grey in overlay blending mode, paint with big black brush in the corners/background • OR adjustment layer (levels) and paint person back in • Blur background: Same process as blurring skin
Portrait Professional • Load image, select male/female & child/adult • Basic changes are made based on the above selection • Further refinements to face/mouth/nose/eye shape, eye color, lighting, skin smoothing, hair, etc. as sliders • Brush to remove blemishes / smooth skin
Pros & Cons • Photoshop • Pros: extreme fine-tuning, total control, total photo adjustments (background mods, vignetting, etc) • Cons: time consuming, huge learning curve, much harder to do shaping changes • Portrait Professional • Pros: very quick results, can make non-model material look great without effort • Cons: adjusts face, not much else
More Befores & Afters Photoshop Portrait Professional & Photoshop
More and more… Portrait Professional