Download
1 / 52
791 likes | 1.63k Vues
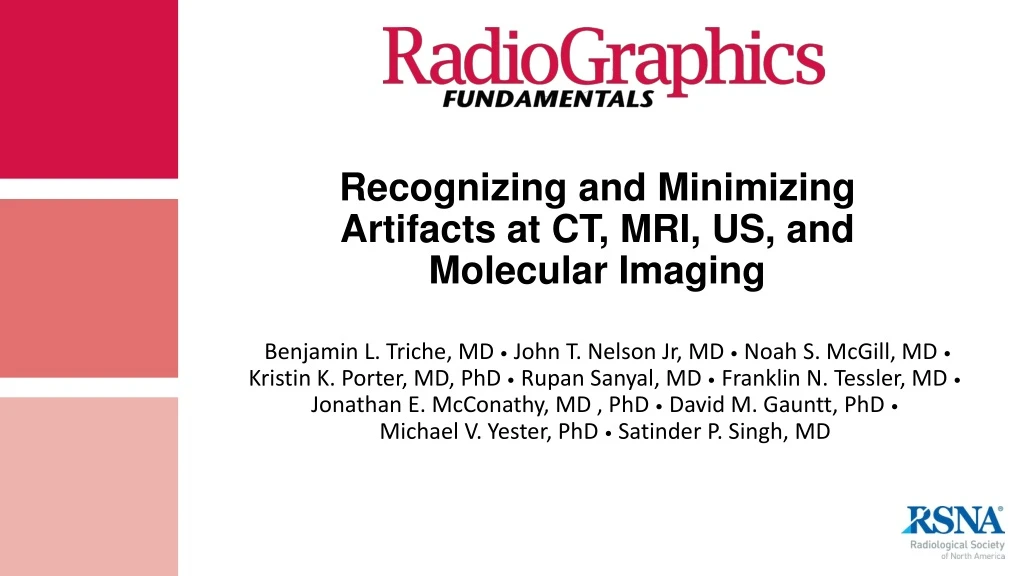
Recognizing and Minimizing Artifacts at CT, MRI, US, and Molecular Imaging. Benjamin L. Triche, MD • John T . Nelson Jr, MD • Noah S. McGill, MD • Kristin K. Porter, MD, PhD • Rupan Sanyal, MD • Franklin N. Tessler, MD • Jonathan E. McConathy, MD , PhD • David M. Gauntt, PhD •

E N D
Recognizing and Minimizing Artifacts at CT, MRI, US, and Molecular Imaging Benjamin L. Triche, MD • John T. Nelson Jr, MD • Noah S. McGill, MD •Kristin K. Porter, MD, PhD • Rupan Sanyal, MD • Franklin N. Tessler, MD • Jonathan E. McConathy, MD , PhD • David M. Gauntt, PhD • Michael V. Yester, PhD • Satinder P. Singh, MD
Authors’ Affiliation: Department of Radiology University of Alabama at Birmingham 619 19th Street South Birmingham, AL 35233 Address correspondence to: BLT (e-mail: btriche1@tulane.edu) Current address: Department of Radiology,Tulane University School of Medicine, 1430 Tulane Avenue, 8654 New Orleans, LA 70112. Presented as an Educational Poster at the 2017 RSNA Annual Meeting Acknowledgment: The authors thank Patricia D. Moore for her assistance in the design of the RSNA poster. Disclosures of Conflicts of Interest.—K.K.P. Activities related to the present article: disclosed no relevant relationships. Activities not related to the present article: stockholder in Pfizer. Other activities: disclosed no relevant relationships. F.N.T. Activities related to the present article: disclosed no relevant relationships. Activities not related to the present article: legal consultation fees from Lamb, Goldman, and Cullaro, PA and a speaker’s fee from the American College of Radiology, North Carolina chapter. Other activities: disclosed no relevant relationships. J.E.M.Activities related to the present article: disclosed no relevant relationships. Activities not related to the present article: research consultant for Eli Lily, Blue Earth Diagnostics Ltd, Siemens, and General Electric. Other activities: disclosed no relevant relationships. D.M.G. Activities related to the present article: disclosed no relevant relationships. Activities not related to the present article: patent agreement with Radcal Corporation. Other activities: disclosed no relevant relationships.
Recognize common artifacts at CT, MRI, US, and molecular imaging. • Review the physical principles that result in these artifacts and their implications for image interpretation. • Explain how to resolve or accentuate artifacts to improve diagnostic quality and accuracy. • Evaluate this material in a quiz or review format.
Introduction In this presentation, we illustrate artifacts that are commonly encountered in nonradiographic modalities—CT, MRI, US, and molecular imaging and therapeutics—that are widely used across a broad range of practices. We describe how artifacts are generated, how to recognize them, and how to mitigate them as images are acquired.
MRI (slides 17-28) Molecular Imaging and Therapeutics (slides 40-50) CT (slides 6-16) US (slides 29-39) • Beam Hardening Related to Metal • Beam Hardening in the Posterior Fossa • Volume Averaging • Photon Starvation • Respiratory Motion • Cardiac Motion • Truncation • Stair Step • Ring • Blooming • Windmill • Motion • Pulsation • Zipper • Susceptibility • Truncation/Gibbs • Chemical Shift (First Kind) • Chemical Shift (Second Kind) • Bounce Point • Aliasing • Magic Angle • Dielectric Effect • Moiré Fringes • Reverberation • Comet Tail and Ring Down • Mirror Image • Acoustic Shadowing • Increased Through Transmission • Incorrect Dynamic Range (DR) • Partial Volume Averaging • Twinkling • Aliasing • Spectral Mirroring • Faulty Angle Correction • Star Pattern • Off Peak • Ring/Nonuniformity • Nonlinearity • Photomultiplier Tubes (PMT) Malfunction • Damaged Scintillation Crystal • Metallic Objects and Contrast Material • Truncation • Incorrect Data Entry • Contamination • Patient Preparation
CT Back to Home Beam-hardening Artifact due to Metal • Appearance: • Dark and bright streaks radiating from and between high-density objects, such as dental amalgam (arrow), as depicted on the CT axial image. • Cause: • The filtered back-projection algorithm assumes that all projections have the same beam hardness. Lower-energy photons are absorbed and/or attenuated in high-density tissue, leaving higher-energy photons to continue on, hardening the beam. A similar artifact (nonlinear partial volume artifact) is caused when high-density objects cover part of a single-detector channel. • Resolution: • Increase the voltage to better penetrate dense objects. • Use a dual-energy acquisition technique. • Turn on the metal artifact reconstruction algorithm (eg, iterative reconstruction with beam-hardening correction). • Acquire data using narrow detector channels (eg, 0.625 mm) to reduce nonlinear partial volume averaging. References 1, 2.
CT Back to Home Beam-hardening Artifact in the Posterior Fossa Appearance: Alternating dark and bright streaks in a narrow band extending across the posterior fossa (arrow) are depicted on the axial CT image. The position of the band moves vertically from one plane to another. Cause: Beam-hardening streaks from the dense skull base follow the acquisition plane. When using a nontilted gantry, these beams can pass through the posterior fossa. When the reconstructed images are tilted, the streaks appear in multiple image planes. Resolution: Tilt the gantry to move the artifact from the posterior fossa to the neck. Tilt the patient's head forward. Adjust the parameters as one would to reduce beam hardening due to metal. References 1, 2.
CT Back to Home Volume Averaging Artifact a b 1.5 mm 3 mm Appearance: The left upper lobe segmental arterial branch appears to have a low-attenuating filling defect (arrow) on the CT image obtained with 3-mm section thickness (a), which resolves on the CT image obtained with 1.5-mm section thickness (b). Cause: The wide array of tissues occupying a voxel leads to the average attenuation of all the materials contained in the voxel being expressed in a single pixel. This is most pronounced at differing tissue density interfaces. Resolution: Acquire data with narrow detector channels (eg, 0.625 mm) to reduce nonlinear partial volume averaging. Reconstruct thinner images (eg, 1.25 mm instead of 2.5 mm). References 2, 3.
CT Back to Home Photon Starvation Artifact a b Appearance: Sagittal CT image (a) of the cervical spine shows significant noise and decreased contrast discrimination (oval) through the lower cervical and upper thoracic vertebral bodies. A similar appearance is depicted on the axial CT image (b) of the chest, secondary to lateral body soft-tissue thickness. Cause: This artifact is secondary to photons traversing a dense structure, limiting the number of photons that strike the detector, which results in increased noise. Resolution: (1) In automatic exposure control mode, increase the milliampere-second (mAs) setting or reduce the noise index setting. (2) Increase the maximum mAs setting (eg, increase the maximum tube current, increase rotation time, or reduce the pitch). (3) In manual milliampere (mA) mode, increase technique affect (effective mAs) by increasing the tube current or rotation time or reducing pitch. (4) If there is variation among the thickness of the body tissues being imaged (eg, as in a thorax to neck examination), turn on the longitudinal tube current modulation. (5) Use an iterative reconstruction algorithm. Reference 2.
CT Back to Home Respiratory Motion Artifact Appearance: An apparent coronary artery filling defect and/or occlusion (arrow in a; oval in b) is depicted in these prospectively gated cardiac CT angiograms. The defect is related to respiratory motion, which is best appreciated on CT images obtained in the lung window (c). Cause: Distortion of anatomy by dark and/or bright bands and loss of image resolution secondary to respiratory motion between axial acquisitions causes this artifact. Resolution: Prevent voluntary movement with proper patient preparation and breath-hold coaching prior to the examination initiation. Acquire the images during a single breath-hold by reducing rotation time and increasing the detector coverage. Use an overscan acquisition mode (specific to axial acquisitions; rotation angle greater than 360°). c a b References 2, 4.
CT Back to Home Cardiac Motion Artifact a b Appearance: Apparent coronary artery filling defect and/or occlusion (arrow in a) resolved on the CT image (b) after the vendor-provided intelligence correction was applied. Cause: Distortion of anatomy by dark and/or bright bands and loss of image resolution secondary to misregistration related to motion Resolution: (1) Use cardiac gating. (2) If retrospective gating is used, look at images obtained from other phases of the cardiac cycle. (3) Use overscan acquisition (specific to axial acquisitions; rotation angle greater than 360°). (4) Reduce rotation time and increase the detector coverage. (5) Use a vendor-provided intelligence correction. References 4, 5.
CT Back to Home Truncation Artifact Appearance: Axial CT image through the abdomen shows increased curvilinear attenuation (arrows) along the edges of the image. Cause: Occurs when the anatomy of interest is outside the scan field of view (FOV) (eg, a large patient, or patient’s arms resting at their side), which results in the disruption of the accurate attenuation measurement along image edges. The selection of the display field of view does not affect this artifact. Resolution: Use proper patient positioning, if possible (eg, arms placed above head at imaging). Use an extended FOV reconstruction, if available. References 2, 6.
CT Back to Home Stair-step Artifact a b • Appearance: • (a) Jagged margins along high-attenuating borders of the right axillary vessels (oval) and right hemidiaphragm (arrow) on a reconstructed coronal image obtained with 5-mm section thickness axial acquisitions. (b) This resolved on image b, which was reconstructed from 2-mm section thickness axial acquisitions. • Cause: • Arises when axial images with a large image interval (thick nonoverlapping images) are used to create coronal or sagittal reformatted images. • Resolution: • Generate reformatted images from thin overlapped axial images. The interval of the axial images should be half of the axial image thickness, if possible. For example, use 1.25 × 0.625–mm axial images for generating soft-tissue reformatted images and 0.625 × 0.625–mm axial images for generating bone reformatted images. Reference 7.
CT Back to Home Ring Artifact a b c Appearance: Concentric circular structures expanding from the scanner isocenter (arrows) are depicted on axial CT images. Cause: Related to miscalibrated detector (a), insufficient dose (b), or contrast material on the polyester film window that covers the detector (c). As the assembly rotates, the detector gives an incorrect value at each location, causing the ring artifact. Resolution: (1) Recalibrate the faulty detector. (2) Perform routine preventative maintenance on the detector. (3) Acquire images with sufficient radiation doses. (4) Evaluate for the presence of contrast material on the detector window cover. References 1, 2, 5.
CT Back to Home Blooming Artifact Appearance: Small highly dense structures such as calcifications and stents appear larger than they truly are, as depicted on the accompanying CT images. The circumferential coronary artery calcification (arrow) appears progressively smaller from left to right, with the changing window width (W) and level (L). Cause: Very high CT numbers of the structure cause pixel saturation when using typical lookup table (LUT) windows, causing the structure to appear larger than it is. Also, using a smoothing filter kernel makes small bright objects appear larger. Resolution: Use a LUT window that is wide enough so that the displayed pixels are not saturated. Use a standard or sharper filter kernel with an iterative noise reduction algorithm. Reduce the display FOV to improve the spatial resolution. Use a high kiloelectron-volt (keV) monoenergetic reconstruction (dual-energy acquisitions only). Use small section thicknesses. W/L: 1650/750 HU W/L: 800/350 HU W/L: 1000/500 HU Reference 5.
CT Back to Home Windmill Artifact • Appearance: • Regular equidistant streaks (arrow) radiating from high-density foci scattered throughout the soft tissues are depicted on the axial CT image. The streak pattern rotates and continues from one image to another. • Cause: • This is caused by inadequate sampling in the z direction (aliasing). This artifact occurs when multiple rows of detectors intersect the plane of reconstruction during a rotation. The number of pairs in the windmill correspond to the number of detectors intersecting the reconstructed image plane. • Resolution: • Decrease the pitch. • Use axial acquisition. Reference 2.
MRI Back to Home Motion Artifact Appearance: Multiple image ghosts (arrow) are depicted on the axial MR image, with blurring in the phase-encoding direction. Cause: Signal-producing voxels change position between the radiofrequency (RF) pulses. Random motion produces smearing in the phase-encoding direction, while periodic motion produces discrete ghosts in the phase-encoding direction. Resolution: Use pulse sequences that shorten acquisition time. Educate the patient about the imaging procedure or consider patient sedation. References 8–10.
MRI Back to Home Pulsation Artifact Appearance: On the axial MR image, a round isointense structure (arrow) is depicted in the lateral hepatic segment in the phase-encoding direction, representing a pulsation artifact from the abdominal aorta. Cause: This is a form of motion artifact in which the signal-producing voxels change position during the application of the RF pulse. This always occurs in the phase-encoding direction. Resolution: Use pulse sequences with shorter acquisition times. Change the phase-encoding direction. Use spatial presaturation bands. Increase the number of signal averages. References 8–10.
MRI Back to Home Zipper Artifact Appearance: Alternating dark and bright bands (arrows) are seen extending across the length of the MR image. Cause: An extrinsic RF signal creates this artifact. It occurs in the phase-encoding direction. Resolution: Examine the Faraday cage, especially the door seal. Turn off any unnecessary electronics in the examination room. Reference 8.
MRI Back to Home Susceptibility Artifact Appearance: Axial MR image shows markedly low signal intensity in the pineal region, secondary to susceptibility artifact related to blood products within a highly vascular tumor (arrow). Cause: Materials with markedly different susceptibility values generate local field inhomogeneities, resulting in faster spin dephasing and thus signal loss. The artifact is also referred to as blooming artifact. Benefit: Can be used beneficially to detect materials that differ significantly in susceptibility values compared with those of the remainder of the field, such as the blood products within the lesion depicted on the axial MR image. Resolution: Use spin-echo imaging. Reduce echo time and increase the acquisition matrix. References 9, 10.
MRI Back to Home Truncation/Gibbs Artifact Appearance: Sagittal MR image shows a linear hyperintense signal (arrow) depicted at the cerebrospinal fluid–spinal cord interface, mimicking a syrinx in the cervical spinal cord. Cause: The Fourier transform analysis corresponds to an infinite number of frequencies at high-contrast boundaries, but as sampling is finite, a series of lines of alternating high and low signal intensities will form at high-contrast tissue interfaces. This artifact is seen more frequently in the phase-encoding direction because the number of phase-encoding steps is usually smaller (and thus the high-contrast interface is undersampled) to reduce scan time. Resolution: Increase the matrix size. Use imaging with fat suppression if fat is a boundary. Apply smoothing filters. Change the phase-encoding direction. References 9, 10.
MRI Back to Home Chemical Shift of the First Kind Appearance: Axial MR image obtained at the level of the kidneys shows dark bands (arrows) with low signal intensity at the right medial and left lateral renal borders, with a concurrent high-signal-intensity bright band with high signal intensity (arrowheads) at the right lateral and left medial renal borders. Cause: Differences in the precessional frequencies of protons in water and fat result in spatial misregistration of the MR signal at fat–soft-tissue interfaces. This spatial MR signal misregistration results in a dark band with low signal intensity at the higher-frequency side of the RF pulse and a bright band with high signal intensity at the lower-frequency side of the RF pulse. This occurs in the frequency-encoding direction, which is right to left in the accompanying image. Resolution: • Increase the receiver bandwidth. • Decrease the FOV. • Use imaging with fat saturation. References 8–11.
MRI Back to Home Chemical Shift of the Second Kind Appearance: Distinct dark band ("India ink" artifact, arrow) is depicted along the fat–soft-tissue interfaces on this out-of-phase gradient-echo MR image. Cause: This artifact is depicted on out-of-phase gradient-echo images in which signals from fat and water are out-of-phase and partially cancel each other, reducing signal intensity, and thus creating a peripheral black line at the fat–soft-tissue interface. This artifact occurs independent from the frequency and phase directions of the RF pulse. Benefit: This can help in the detection of intravoxel and/or microscopic fat. Resolution: Adjust the echo time. Use spin-echo imaging. References 8–11.
MRI Back to Home Bounce Point Artifact • Appearance: • Null signal (India ink artifact) (arrow) is depicted at tissue interfaces containing both fluid and soft tissue in the same voxel on this axial inversion-recovery MR image. Note that motion artifact is also seen through the nasal region. • Cause: • This occurs by phase cancellation of the MR signal in boundary pixels with inversion-recovery sequences when two tissues of different T1 values recover to the same magnitude but opposite signs. • Resolution: • Change the inversion time or repetition time. • Phase-sensitive reconstruction inversion-recovery techniques. Reference 8.
MRI Back to Home Aliasing at MRI • Appearance: • The soft tissues of the jaw were not included within the sampling FOV on this axial MR image. The excluded soft tissues are displayed on the posterior aspect of the image, which have "wrapped around" the image on the displayed FOV (arrow). • Cause: • This occurs when the acquisition FOV is smaller than the object being imaged and always occurs in the phase-encoding direction. • Resolution: • Increase sampling bandwidth or the FOV. References 9, 10.
MRI Back to Home Magic Angle Artifact Appearance: Apparent intermediate signal intensity (arrow in a) is depicted within the supraspinatous tendon on the intermediate-weighted MR image (a), which resolves (arrow in b) on the T2-weighted MR image (b). Note that motion artifact is also seen on b. Cause: Lengthening of T2 times in tightly bound collagen molecules occurs when molecules lie at 54.74 degrees from the main magnetic field on sequences with a short echo time (TE), resulting in high signal intensity. Resolution: Use longer TE sequences versus shorter TE sequences. Compare images with shorter TE values to those with longer TE values. a b Reference 8, 12.
MRI Back to Home Dielectric Effect • Appearance: • Dark shaded ovoid area with peripheral bright areas is depicted on the center of these T1- and T2-weighted MR images (arrows) in a patient with cirrhosis and ascites. • Cause: • As the magnetic field strength increases from 1.5 T to 3 T, the RF wavelength decreases from 52 cm to 26 cm, which approximates the diameter of patients with large body habitus or ascites. This leads to interference patterns from opposing wavelengths entering from opposite sides of the patient, with subsequent darkening with peripheral brightness in the center of the image. • Resolution: • Perform imaging with 1.5 T instead of 3 T or use dielectric pads. Reference 10.
MRI Back to Home Moiré Fringes • Appearance: • Alternating curvilinear bright and dark bands (arrows) are depicted throughout the accompanying balanced steady-state free-precession gradient-echo MR image. • Cause: • Interference patterns, predominantly depicted with gradient sequences, may be generated from the inhomogeneity of the main magnetic field, a defect in shielding, aliasing, or differing excitation modes (ie, echo times). This results in the superimposition of signals of different phases, which add and cancel each other. • Resolution: • Decrease the magnetic field inhomogeneity by using a shimming process. • Use spin-echo sequences. • Use a surface coil. Reference 8.
US Back to Home Reverberation Artifact Appearance: (a) US image shows low-medium level echoes (arrow) immediately deep relative to the abdominal wall in a patient with ascites. (b) Gray-scale US image shows multiple equidistant linear echoes posterior to the biopsy needle (arrow), secondary to multipath reflections between the anterior and posterior needle walls. Cause: Ultrasound pulses that undergo additional reflections on the way back to the transducer take longer to return than those that follow an unimpeded path. They are interpreted by the US system as originating from a deeper location than they actually are. In a, the pulses bounce back and forth between the fluid–body wall interface and overlying structures. In b, the pulses reflect between the needle walls one or more times. No echoes are depicted deep relative to the needle bevel (arrowhead in b), as there is effectively only one wall. Resolution: Lower the gain setting. Change the angle of insonation. Use harmonic imaging. a b Reference 13.
US Back to Home Comet Tail and Ring-down Artifacts • Appearance: • US images show a thyroid nodule with colloid (arrow in a) and a scrotum with soft-tissue gas (arrow in b). • Cause: • Multipath reflections within small structures: • Comet tail: Most commonly depicted in cases of colloid thyroid nodules; V-shaped echo train deep relative to echogenic foci • Ring down: Multiple reflections within fluid-filled tetrahedral spaces between air bubbles; often change dynamically at real-time imaging • Benefit: • These are helpful to identify colloid and gas. • Resolution: • Adjust the insonation angle. a b Reference 13.
US Back to Home Mirror-Image Artifact Appearance: Color Doppler US image shows a patent transjugular intrahepatic portosystemic shunt (TIPS) in the liver and a duplicate (arrow) above the diaphragm. Cause: The ultrasound beam is reflected by a highly reflective surface (eg, the diaphragm) and encounters another structure (eg, the TIPS) on its return to the transducer, reflects back to the diaphragm, and ultimately back to the transducer. This can be recognized by the duplication of a structure in an atypical location. Resolution: Manipulate the angle of insonation. Reference 13.
US Back to Home Acoustic Shadowing Artifact a b Appearance: US images show shadowing artifacts (arrows) from gallstones and medullary nephrocalcinosis. Cause: Structure reflects the most sound back to the transducer, leaving a much lower amplitude to interrogate deeper tissues. This is depicted as dark regions deep relative to the highly reflective structures. Benefit: This helps diagnose gallstones and similar abnormalities. Resolution: Resolve by scanning from another vantage point. However, eliminating the artifact may make it more difficult to characterize the structure that caused it. Reference 13.
US Back to Home Increased Through-Transmission Appearance: Gray-scale US image obtained through the right upper quadrant shows increased echogenicity (arrow) deep relative to the gallbladder. Cause: Fluid-filled structure attenuates the ultrasound beam less than the adjacent tissues, resulting in stronger echoes deep relative to the beam. Benefit: Useful to identify fluid or characterize homogeneously hypoechoic solid lesions Resolution: Decrease the gain setting. Manipulate the focal zone if the area of artifact is too bright to see detail. Reference 13.
US Back to Home Incorrect Dynamic Range (DR) a b Appearance: US image (a) (DR = 40 dB) shows an apparent patent vessel. US image (b) (DR = 68 dB) shows a nonocclusive thrombus (arrow). Cause: DR is the ratio of the strongest to weakest echoes processed and displayed. Images with a low DR have high contrast, which may hide a thrombus or other low-level echoes. Resolution: Set the DR to an intermediate level that does not obscure low-level echoes.
US Back to Home Partial–Volume Averaging Artifact Appearance: Artifactual echoes within an anechoic structure, such as the carotid artery (arrow) as seen in this US image. Cause: The ultrasound beam, which has finite thickness, partly interrogates adjacent tissues. Resolution: Be aware of the location of the scanning plane relative to the margin of the vessel. Confirm this by scanning in an orthogonal plane.
US Back to Home Twinkling Artifact a b Appearance: US image shows shadowing calculus in the distal ureter (arrow in a), with mixed signal (arrow in b) on the color Doppler US image (b). Cause: This may be caused by broadening of bandwidth of inherent machine noise interacting with a rough surface. Benefit: This helps increase the specificity of urolithiasis detection. Resolution: The artifact varies by adjusting the scanner settings, including the focal zone and insonation angle. Reference 14.
US Back to Home Aliasing at US Appearance: In this US image with a spectral Doppler US waveform, the internal carotid artery “wraps around” (arrow) to the opposite side of the velocity (ie, frequency) display. Cause: The sampling rate is less than the Nyquist limit (one-half the pulse repetition frequency), predominately a phenomenon of spectral Doppler US. A similar phenomenon occurs in the accompanying color Doppler US image. Flow that exceeds the velocity limit on the color scale bar wraps around to the color bar in the opposite direction. Resolution: Use a lower-frequency transducer. Increase the Doppler angle. Sample at a shallower depth. Increase the Doppler scale. Lower the Doppler baseline. Reference 15.
US Back to Home Spectral Mirroring Artifact Appearance: Duplication (arrows) of the Doppler US waveform is depicted above and below the baseline on the accompanying US image and waveform. Cause: This can be caused by using an insonation angle close to 90 degrees and/or a gain setting that is too high. This can be related to pulsation thrill. Resolution: Decrease the angle of insonation. Reduce the Doppler gain setting. Reference 15.
US Back to Home Faulty Angle Correction a b Appearance: (a)US Doppler image and waveform of the common carotid artery shows that the Doppler angle correction cursor (arrow) is incorrectly set. (b) US Doppler image and waveform show the appropriate angle correction cursor (arrow), which demonstrates higher velocity. Cause: The machine uses an angle correction set by the operator to calculate velocity. If incorrectly set, the velocity measurement may be incorrect. Resolution: Set the angle correction parallel to the flow stream, as depicted on b. Reference 15.
Molecular Imaging and Therapeutics Back to Home Star Pattern Artifact Appearance: Iodine 131 (131I) whole-body scans obtained post-treatment show a six-pointed star pattern (arrow) over the lower neck and upper thorax, indicating residual thyroid tissue. Cause: This is related to high radiotracer concentration and/or activity and septal penetration of hexagonal collimator holes. Resolution: Use a high-energy collimator. However, due to other high-energy photons in 131I decay, star pattern artifacts may still occur. Reference 16.
Molecular Imaging and Therapeutics Back to Home Off-Peak Artifact Appearance: Thallium 201 (201Th) scintigraphic images obtained with the same camera show decreased resolution, increased scatter, and poor contrast discrimination between off-peak images (a) and corrected images (b). Cause: Incorrect energy peak and/or peak drift; typically results in low-resolution images owing to increased acceptance of Compton scattering (eg, lower-energy photons being imaged). If cobalt 57 (Co-57) flood source is used for daily uniformity, peaking at 122 keV may not produce the correct peak at 140 keV for technetium-99m (99mTc). Resolution: Repeat the study after properly setting the energy peak for the radionuclide that is being used at imaging. Perform energy peaking daily. a b References 17, 18.
Molecular Imaging and Therapeutics Back to Home Ring/Nonuniformity Artifact Appearance: SPECT images show concentric rings (arrow) projecting over the liver. Cause: This is caused by variability in detector response and/or voltage assignment at various points along the scintillation crystal owing to either ineffective light transfer or poorly balanced PMTs or an incorrect pulse height analyzer setting. A nonuniformity of 5% is typically allowed at planar imaging and 1%–3% at SPECT. It is similar in appearance to that of the CT ring artifact. Resolution: Perform flood testing daily. If the correction cannot be made within 5%, the manufacturer needs to be notified. Reference 18.
Molecular Imaging and Therapeutics Back to Home Nonlinearity Artifact a b Appearance: Image of a bar phantom shows subtle curves along the bars in the lower left quadrant (rectangle in a), which resolves after a new linearity map is acquired (b). Cause: This is related to PMT balance relative to that of the neighboring tubes and/or a linearity correction issue. It produces bowing and distortion of straight lines and margins. Resolution: Service reacquires linearity map. Monitor with spatial resolution and/or linearity testing weekly with a bar phantom. Reference 18.
Molecular Imaging and Therapeutics Back to Home PMT Malfunction a b Appearance: Quality control image (a) shows a large circular defect (arrow) from PMT decoupling. Off-peak image (b) with circumferential distortion (arrow) around the decoupled PMT shows the influence of a single PMT. Cause: PMTs convert light produced by the scintillation camera into proportionate measureable electrical signals. Damaged or improperly tuned PMTs could produce cold or hot areas within the imaging field. Resolution: Perform flood testing daily. If unable to correct to within 5%, manufacturer needs to be notified. Reference 17.
Molecular Imaging and Therapeutics Back to Home Damaged ScintillationCrystal Appearance: Large irregular photopenic area on the accompanying quality control images show a cracked crystal defect (arrows). Cause: Focal distortion of the image is related to a damaged or cracked scintillation crystal, the result of either mechanical or thermal shock. Resolution: Replace the scintillation crystal. Reference 17.
Molecular Imaging and Therapeutics Back to Home Metallic Objects andContrast Material Appearance: Falsely elevated standardized uptake value (SUV) surrounding the right hip (arrow in b) is depicted on the CT attenuation-corrected PET image (b), related to the presence of a right hip prosthesis. However, the CT attenuation-noncorrected image shows a focal increase of hypermetabolic activity, suggesting infection and/or inflammation (arrowhead on d). Cause: High-attenuating objects at CT result in overcorrection on CT attenuation-corrected PET images, leading to falsely interpreted elevated SUVs. Resolution: Evaluate the CT andnon-attenuation–corrected PET images and correlate that the findings are in the same region to determine if there is overcorrection from high-attenuating objects. a b c d Coronal CT image (a), CT attenuation-corrected PET image (b), coronal PET/CT image (c), and non-attenuation–corrected PET image (d) show increased activity around the right hip that is a mixture of artifact and increased fluorodeoxyglucose (FDG) uptake. Reference 19.
Molecular Imaging and Therapeutics Back to Home Truncation Artifact Appearance: Axial FDG PET (a) and CT (b) images show falsely decreased activity of the lateral flanks, with apparent increased curvilinear activity (arrows) along the medial flanks secondary to truncation at CT. As depicted in the axial PET (c) and CT (d) images obtained following a 70-cm FOV reconstruction at CT, the falsely increased and decreased areas of activity resolved. Cause: The standard FOV for PET and CT is 50 cm. If portions of the patient’s body are outside of the CT FOV, this causes high attenuation at the margins of the CT images, leading to PET activity overcorrection in these regions and activity underestimation outside of these regions. Resolution: Use the truncation correction techniques available on PET/CT systems. Reconstruct PET and CT images to 70 cm using interpolation. a c b d Reference 19.
Molecular Imaging and Therapeutics Back to Home Incorrect Data Entry Appearance: Abnormal mean SUV of the liver related to a patient dose recording error. Whole-body FDG PET images that were similarly scaled show an incorrect mean SUV for the liver in a (20 mCi) and a correct mean SUV in b after the correct dose was entered (9 mCi). Cause: This is caused by under- or overestimation of object SUV related to incorrect patient and/or study data, including patient body mass, tissue radioactivity at initial time point, or injected dose activity. A quick way to assess this is to look at the SUV in the liver, which should be about 2.0–3.5. Resolution: Ensure proper data entry by the technologist. a b
Molecular Imaging and Therapeutics Back to Home Contamination Artifact Appearance: Whole-body FDG maximum intensity projection (MIP) image (a) shows multiple superficial hypermetabolic foci, a finding consistent with external contamination (ovals). Whole-body FDG MIP image obtained during reimaging (b) through the chest and abdomen shows significant improvement after cleaning and changing clothes (right). Cause: This artifact is caused by radiotracer contamination on skin or clothing. Resolution: Repeat the study after cleaning the skin or removing the contaminated clothes. a b
Molecular Imaging and Therapeutics Back to Home Artifacts fromIncorrect Patient Preparation Appearance: Diffuse skeletal and cardiac muscular uptake of FDG on an MIP image (a) in a patient who consumed coffee with sugar prior to undergoing imaging. Repeat MIP image (b) obtained after the patient followed specific dietary restrictions shows typical FDG distribution. Cause: Insulin stimulation from either the lack of fasting or administration of insulin prior to injection of FDG leads to an increase in glucose transporter type 4 (GLUT4) receptors and to glucose transport into skeletal and cardiac muscle. Resolution: Ask all patients about caloric intake and insulin use before FDG injection. Repeat the study with specific dietary instructions for the patient. a b