STIF INTRA ARTICULAR CCL RECONSTRUCTION
130 likes | 281 Vues
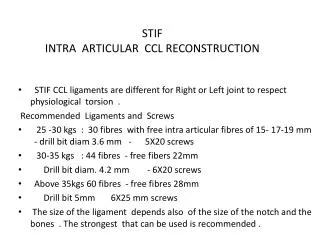
STIF INTRA ARTICULAR CCL RECONSTRUCTION. STIF CCL ligaments are different for Right or Left joint to respect physiological torsion . Recommended Ligaments and S crews

STIF INTRA ARTICULAR CCL RECONSTRUCTION
E N D
Presentation Transcript
STIFINTRA ARTICULAR CCL RECONSTRUCTION STIF CCL ligaments are different for Right or Leftjoint to respect physiological torsion . Recommended Ligaments and Screws 25 -30 kgs : 30 fibres with free intra articular fibres of 15- 17-19 mm - drill bit diam 3.6 mm - 5X20 screws 30-35 kgs : 44 fibres - free fibers 22mm Drill bit diam. 4.2 mm - 6X20 screws Above 35kgs 60 fibres - free fibres 28mm Drill bit 5mm 6X25 mm screws The size of the ligament dependsalso of the size of the notch and the bones . The strongestthatcanbeusedisrecommended .
THE FREE INTRA ARTICULAR FIBERS 30 fibers 17mm intra articular Right CCL 30-17 R
Femalescrewdriver Telescopic tubes For soft tissue protection Male screwdriver 2 blunt K wires Drill bits 5mm -4.2mm- 3.6mm 6x wireloops 2 K wires 2mmX20cm Double endedshqrp Passing tube 20 cm 2 hexagonal K wires
CCL FEMORAL INSERTION EXIT POINT ENTRANCE POINT 60% 40%
STEP 1 : femoral guide K wire A medial parapatellar arthrotomy approach offers a better view
STEP 2:the guide K wire is drilled down into the tibia STEP 2 : the K wire is inserted downwards into the tibia from the femoral side. The flexion is ajusted to allow the penetration of the Kwire at the posterior part of the tibial CCL foot print
STEP 2b is :another option for the tibial K wire If the orientation of the Kwire in the femur does not allow a proper direct placement in the tibia or leads to a friction of the ligament against the notch , the Kwire can be drilled separately with the joint in hyper flexion The Kwire is placed into the foot print and drilled down towards the medial tibial cortex
STEP 3 : drilling of the tunnels Hold the Kwire during the tibial drilling Protection tube The telescopic tubes are inserted on the K wire to protect the soft tissues; The cannulated drill bit adapted to the size of the ligament is guided by the K wire . The drillings are performed from outside-in to avoid damages to remnants and cartilage
STEP 4 :passage of the ligament The Wire passing tube is placed through the tunnels followed by the wire loop . The passing tube is removed The threads of the ligament are inserted through the loop and the ligament is pulled until the free fibres are adjusted intra articularly
STEP 5 : femoral fixation Cannulated screw Hexagonal K wire 1or 2 cm of the hexagonal K wire are inserted into the tunnel parallel to the ligament. Then the appropriate screw is driven down and inserted with the female screw-driver until 1 mm remains outside the cortex . The telescopic tubes can be used if needed .
STEP 6 : adjustment of tension and tibial fixation The ligament is tensioned once and then the joint is put in full flexion and extension. If the placement is isometric there should not be any movement in the tibial tunnel . A small sliding of 1or 2 mm is admissible and the tibial fixation must be completed to allow a full range of motion . The ligament must never be over tight The insertion of the screw is made like on the femoral side with the help of the hexagonal K wire ; The male screw driver is used to adjust the insertion when the K wire has been removed
Note about fixation The screws have to be tight in the bony tunnels. If there is a doubt about the strength of the fixation ( bone density –heavy and active dog ) it is recommended to drill a second transverse tunnel . Insert the extremity of the ligament in it and put a second screw
POST OPERATIVE CARE • No immobilisation or brace are necessary • Full weight bearing • Control the activity of the dog for one month


![STIF [Security Tools Integration Framework] STIF-WARE EVOLUTION](https://cdn2.slideserve.com/4537354/slide1-dt.jpg)