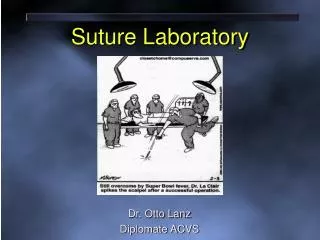
Suture Laboratory
Suture Laboratory. Dr. Otto Lanz Diplomate ACVS. Tissue Forceps. Function As Extension Thumb Opposing Fingers Pencil Grip Only Acceptable Grip Widest Maneuverability While Not In Use Palm Instrument Flexing the Little, Ring, and Middle Fingers. Tissue Forceps.

Suture Laboratory
E N D
Presentation Transcript
Suture Laboratory Dr. Otto Lanz Diplomate ACVS
Tissue Forceps • Function As Extension • Thumb • Opposing Fingers • Pencil Grip • Only Acceptable Grip • Widest Maneuverability • While Not In Use • Palm Instrument • Flexing the Little, Ring, and Middle Fingers
Tissue Forceps • “Use” to “Hold” Position • One Motion • Easier to Perform • Palms Down • Gravity
Needle Holder • Holding Instrument • Thumb and Ring Finger • Index Finger Supporting the Shank of the Instrument • Needle Positioning • Very Important • Perpendicular to the Needle Holders
Positioning Needle • Grasp Needle • Near the Eye • Midpoint • Near the Point • Best Position • Midpoint • Less Risk of Bending Needle
Driving The Needle • Curved Needle • Two Forces • Driving Force • Rotating Force • Position of Surgeon • Comfortable Body Attitude • Turn Your Body to Some Degree
Suturing • Start With the Far Side of the Incision • Gently Grasp the Tissue • Tissue Forceps • Retract Tissues • Upward and Outward • Don’t Block Vision With Tissue Forceps • Move Your Hands • Not Your Entire Body
Suturing • Focus On a Spot • 5 mm From the Wound Edge • Drive the Needle • Continue Holding Tissue With Forceps • Release Needle • Extract the Needle • Needle Drivers • Rolling Your Wrist
Suturing • Following Extraction of Needle • Support Needle with Forceps • Re-grasp Needle • Midpoint • Perpendicular • Repeat Process • Near Side
Suturing • Properly Maintain • Excess Suture Material • Needle • Thumb and Index Finger • Make a Loop With Excess Suture • Place Loop in the Palm Of Your Hand
Knot • Four Throws • Square Knot • Role Your Wrist • Dominant Hand • Make Your Throws • Properly Cut Suture • Prepare Operative Field • Next Stitch
Cutting Suture • Long or Short Tags • Blunt • Long Tags • Taper • Short Tags • Rotate Wrist • See Suture • Before You Cut