Download
1 / 25
250 likes | 271 Vues
Keep your camping equipment in top shape with our comprehensive repair guide. Learn how to fix various items like sleeping bags, Dutch ovens, trekking poles, and more. Discover essential materials, tools, and techniques for gear maintenance and repair. From repairing a ripped sleeping bag to waterproofing boots, this guide covers it all!

E N D
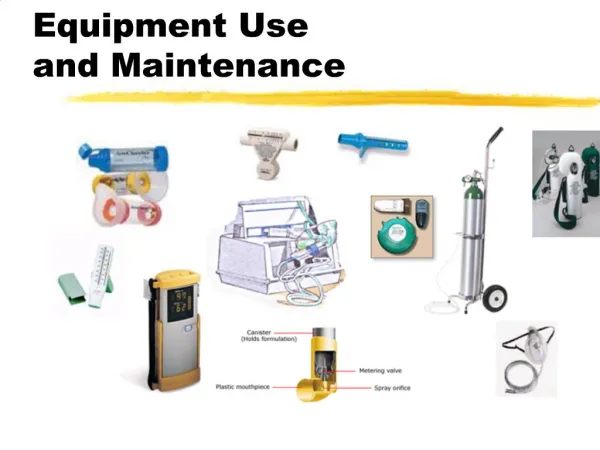
Maintenance and Repair of Camping Equipment University of Scouting Pete Ziolkowski
Repair a ripped sleeping bag Dutch oven Care Taking care of trekking poles What’s in a repair kit? Repair of a self inflating mattress Useful materials for repair Patching a tent Useful repair tools Basic seams for sewing Fixing an ax handle Water Bladders Equipment storage Year end maintenance of a water filter Zipper repair Stitch for field repair of heavy gear Washing down filled items MSR Stove maintenance and trouble shooting Fixing a hole in a sock Boot Repair Boot waterproofing
Fixing an Axe Handle Repairing the Handle Step1 Remove the old handle by placing the head of the axe in a vise and sawing the handle off close to the head. Step2 Drill a hole in the wood inside the axe head and insert a screw driver to push the wood out. Step3 Shop for a new handle by taking the head along on the trip. Make certain that new handle fits tightly, even if sanding will be necessary. Ask for a wood wedge when you buy the handle. Step4 Sand or rasp the handle to fit the axe head. Put the handle in the axe head. Place the handle in a vise so that the head is slightly above the vise. Step5 Drive the wood wedge into the handle by placing it directly in the slit in the handle. Put a board on top of the wood wedge and hammer it with a mallet. This should separate the wood up to the ax head. Step6 Saw the excess wood from the end, until it is flush with the head. Sand with fine sandpaper and apply linseed oil to the top with a soft cloth. http://www.ehow.com/how_2094229_repair-axe.html Sources of Axe handles- Central Tractor
http://papadutch.home.comcast.net/~papadutch/dutch-oven-care.htmhttp://papadutch.home.comcast.net/~papadutch/dutch-oven-care.htm Cleaning Your Dutch OvenDutch oven care starts with the seasoning of the metal, but the second step is to make sure you clean your ovens properly after each use. More often than not, cleaning cast iron Dutch ovens is much easier than scrubbing pots and pans. For cast iron, the cleaning process is in two steps. First, food is removed and second, maintenance of the protective coating. To remove stuck on food, place some warm clean water into the oven and heat until almost boiling. Using a plastic mesh scrubber or coarse sponge and No Soap, gently break loose the food and wipe away. After all traces have been removed, rinse with clean warm water. Soap is not recommended because it will break down the protective covering and will get into the pores of the metal to taint the flavor of your next meal.After cleaning and rinsing, allow the oven to air dry. Then heat it over the fire just until it is hot to the touch. Apply a thin coating of oil to both the inside and outside of the oven and the top and underside of the lid. Allow the oven to cool completely. If you do not oil the outside of the oven, then with use, the protective barrier will break down and the oven will start to rust. As a suggestion, it is a good idea to keep a scrubber for cast iron and never use it with soap.For aluminum ovens, the cleaning is the same as for ordinary pots and pans. Use soap and water and scrub them as you would your other pans. Stripping Rusty Or Rancid Dutch Ovens nevitably there will come a time when you will need to strip and re-season a rusting or rancid Dutch oven. Relax! It's not that difficult. I've found the easiest way to strip an oven is to place it upside down on the bottom rack of a self cleaning oven with the lid placed on top of the legs. Set the oven to self clean for 2 hours and let it be. Allow the oven to cool completely before removing the Dutch oven.If you don't have a self cleaning oven or would prefer not to heat up your house then you can use an outdoor propane stove to accomplish the same thing. I like to use my Cache Cooker for this because it has a large burner that generates a lot of heat. The secret to successfully stripping an oven over a propane burner is to keep moving the oven around so every surface of the oven has a chance to be diretly over the burner, this also helps prevent warping should the metal become to hot. Light the burner and adjust it to generate a medium blue flame. Place the Dutch oven upside down over the flame and let it slowly heat for 10 minutes or so. Once the oven is hot turn up the burner to it's hottest setting and let the oven heat until it smokes heavily for about 5 minutes then rotate the oven to burn a new surface. Make sure to burn both the inside and the outside of the oven. As the metal burns it will take on a shiny oily look and may look white in some areas which is fine, keep heating the oven until all surfaces inside and out have this look then remove the oven from heat and allow it to cool slowly.Once the Dutch oven has been burned and allowed to cool the remaining detritus must be removed from the oven surfaces. This is done by scrubbing the oven with a piece of steel wool or a metal scouring pad under hot running water until all surfaces are clean. Once clean, towel dry the oven then allow it to air dry. The Dutch oven is now ready to re-season.Recently I came across this interesting web page authored by Bill Dickerson entitled Rust Removal By Electrolysis where Bill has documented how to clean rusty metal and cast iron using electricity, water, and a little washing soda. He has included pictures of his setup so you can see how the process works. The setup takes a little time and a few items but the results look fantastic (he's cleaning car parts but rusty Dutch oven's or cast iron pans will clean just as well).
http://www.hiking-gear-and-equipment-used-for-camping.com/camping-stove-maintenance.htmlhttp://www.hiking-gear-and-equipment-used-for-camping.com/camping-stove-maintenance.html • Camping Stove Maintenance Tips. • These camping stove maintenance ideas will help make your camp stove last longer, perform better and be more efficient. • What would happen if you never changed or added oil to your new car?At first it would be fine, but in relatively quick fashion the performance would suffer and eventually the engine would die. If you compare this to someone with the same car that does routine care, there would be a huge difference. The well-maintained car will run for hundreds of thousands of miles or more. The same idea applies to camping stove maintenance. Save yourself some time and money with these quick ideas... • Avoid stove clogs by using white gas instead of dirty burning fuels like unleaded gasoline if you have a choice. Gasoline is notorious for burning dirty and it will clog your burner and generator more quickly which can require replacement. Also store your stove in a sealable plastic bin or tie a dry plastic bag around the fuel lines, etc. to keep dust and bugs from clogging the fuel lines. • 2. Don't store fuel for long periods of time in your stove. Standing fuel will gum up the fuel pick-up and coat other parts it comes in contact with, with varnish. This can eventually restrict fuel delivery so much that the stove won't work properly if at all. Instead simply empty the fuel from your stove's fuel tank back into the original fuel tin. • 3. Oil the pump cup on the stove's plunger with lightweight machine oil every 6 months, or more often if needed. The oil helps to seal the pump against the inside of the compression tube so that it can be pressurized to deliver fuel to the burner. If the pump doesn't work the stove won't light. • 4. Clean up food spills as soon as possible. Besides attracting unwanted wildlife, spills that fall near the manifolds or other working parts can quickly clog your stove. • 5. Keep fuel clean by pouring it through a screened funnel or if need be, a coffee filter. This simple camping stove care idea will prevent contaminants from clogging the fuel tubes, generator and burner manifolds(s) saving you the trouble of having to tear it apart later. • 6. Clean your stove with warm water and mild soap. Once you've washed your stove, rinse it thoroughly and turn it upside down to let the water drain out. After it has drip-dried for a couple of minutes, thoroughly dry the entire stove. Be careful to get all the water out of the burner manifold, generator and fuel tubing if it somehow found its way inside. Otherwise standing water might cause rust which can disrupt the flow of gas and create problems later. • 7. As with most camping gear and hiking equipment, it's a good idea to do thorough end-of-season cleaning and camping stove maintenance to prepare it for storage. That way any food that may have fallen onto your camping stove won't have all winter to sit around and corrode it. • 8. Camping stove maintenance can help to increase your stove's performance if it seems to be going down hill. If the flame seems weak, or it's taking longer and longer to cook your food it might just need a good cleaning. • Fuel lines, jets and needle valves collect deposits that eventually slow or clog your stove. You can use a cleaning cable, or sometimes a pipe cleaner, to clean the fuel lines. • 9. Bring a camping stove maintenance and repair kit with you in case you need it. Sometimes a simple fix like cleaning a manifold or replacing an o-ring can save a trip.
READING THE INSTRUCTIONS While there are no instructions included with the Insulator or on the retail hangtag, the Platypus website has a helpful FAQ section which answered any questions I had, most importantly on the care and maintenance of the Platypus reservoirs. I couldn't find anything at all regarding the Insulator itself.To clean the Platypus reservoir, it is advised for me to "use hot, soapy water and rinse thoroughly with hot water." For tougher cleaning jobs, adding 1/4 cup of baking soda to 3/4 cup of water and shaking for 30 seconds is suggested. Followed by adding 1/4 cup lemon juice, shaking 10 seconds. Venting by loosening cap away from face is necessary to relieve pressure. It is recommended to repeat these steps three times, expel as much air as possible, cap bottle, and allow the reservoir to soak 20 minutes. Next, Platypus instructions call for rinsing three times with hot water. A "Caution" is stated: "When adding lemon juice to baking soda, effervescence occurs and will cause pressure to build in a capped Platypus."To dry; the Platypus reservoirs can be "dried by blowing a little air into them and letting them stand uncapped until the water evaporates." The Big Zip reservoir which is included in the Insulator can be dried with a dishtowel through the large opening. Of course, the reservoirs can always be propped open with a spoon or other utensil to air dry.The website FAQ also has helpful easy to read and understand instructions on disinfection, boiling, freezing and using the Platypus reservoir. There is also a very good section on hydration, in general. Again, there is no mention of the Insulator. • Another approach • Fill reservoir with warm water and mild soap. • Clean with Reservoir Brush and Delivery Tube Brush. • Re-fill reservoir with 1L of water. • Add 1 cleaning tablet. • Shake reservoir until tablet is dissolved. • Let stand 5 minutes. • Remove water from reservoir. • Rinse reservoir thoroughly. • Re-fill for drinking or dry completely before storage. • By following these disinfecting guidelines you can reduce common micro-organisms and build-up over 99.99%. In an emergency, you can also add a tablespoon of bleach after Step 3. Be sure to rinse thoroughly, however. • http://cotradeco.com/pages/14-camelbak-cleaning-maintenance
Top 7 Ways to Clean and Deodorize Hydration Bladders and Camelbaks By Wendy Bumgardner, About.com Created: June 21, 2007 1. Camelbak Cleaning Kit The Camelbak Cleaning Kit comes with a curved brush for cleaning inside the water bladder, and a small brush on a line for cleaning the sucker tube. It comes with a couple of cleaning tablets for deep cleaning the water bladder once a month. It also has a handy drying kit including a hanger to attach and a frame to prop the water bladder open to help it dry. While you could find similar household items to use, it is very handy to buy the kit and have the brushes and hanger. 2. Camelbak Cleaning Tablets Camelbak cleaning tablets are similar to the denture cleansing tablets in their action. They contain chlorine dioxide, which is basically bleach. You use the tablet in a liter of water in the hydration bladder for just 5 minutes, then rinse thoroughly and use. You may find that you want to follow this with a rinse of baking soda, lemon, or vinegar to help remove the chlorine taste. 3. Baking Soda - Bicarbonate of Soda Mix baking soda with water and allow it to soak in the bladder - anywhere from an hour to overnight. If you are getting ready to use it the next day, it's best to allow it to dry overnight. How much baking soda? I've seen recommendations from 2 tablespoons to half a cup, mixed with hot water to help it dissolve. After it soaks, rinse thoroughly with warm water. 4. Baking Soda and Lemon or Lime Juice This combination is also recommended, but be warned that it produces a foaming action. Mix a couple of tablespoons of baking soda in a couple of cups of water, put it into the hydration bladder. Now add a similar amount of lemon juice or lime juice and be prepared for the bubbling. Allow that to sit for 30 minutes to overnight and rinse thoroughly with warm water. 5. Denture Cleaning Tablets Here's the easy way - use denture cleaning tablets. Drop them into water in the pack and allow it to work for 15 minutes as they recommend for detures. Rinse thoroughly. Some recommend not getting the ones with mint flavor unless you want your water to always taste minty fresh. 6. Baking Soda and Vinegar Fill the bladder, add 1 tablespoon of vinegar and shake it, then add 1 tablespoon baking powder then shake it. Now drain and rinse thoroughly. This is reported to be good to remove the chlorine taste after bleaching the bladder. 7. Bleach Solution Add a capful or teaspoon of bleach to enough water to fill the reservoir. Allow to bleach for an hour to overnight. Rinse very thoroughly with 4 or more changes of water. I would recommend then following that with the baking soda and lemon juice or vinegar to help remove the bleach flavor. But this is the best way to kill fungus and bacteria, especially if you see visible growth. http://walking.about.com/od/hydration/tp/camelbackclean.htm
Backpacker Magazine – April 2003 Make your trekking poles last forever Try these easy cleaning tricks to keep using your hiking poles out on the trail longer. by: John Kemple http://www.backpacker.com/april_2003_gear_hiking_pole_maintenance_tips/gear/5465?page=1 More hikers are toting trekking poles, and with good reason: They absorb shock with each step, improve your balance, and help you cross streams and snowfields. But have you ever planted an adjustable pole only to stumble or fall when it collapsed? Few things are more unnerving-and so easily avoided. That's because a pole usually slides or sticks due to poor maintenance. These few simple steps can keep your locking mechanisms working smoothly. Expander Poles Most adjustable poles use an internal expander to adjust length. When you twist the pole sections, a screw inside the joint threads up into a plastic plug, making it expand against the inside of the next pole section. Expanders fail when the pole's interior gets dirty, wet, or oxidized, or when the screw threads get gummed up. Here's how to avoid trouble. > Regularly disassemble poles, especially after wet trips. Always follow the manufacturer's instructions. After drying, inspect the components for wear or breakage. > Clean the interior of the female pole ends with a coarse gun-barrel brush, or a damp rag attached to a coat-hanger wire. Be gentle with poles that have anodized interiors, because scratches create areas where ice or contamination can settle. Never use lubricants to clean the pole's interior. > If dirt has infiltrated the inner mechanisms, remove the retainer clip and plug, and clean the central screw threads. > To increase friction, sand the plug's surface using fine, grit-free sandpaper. Thoroughly clean the components before reassembling. > Replace the inexpensive expanders if slipping persists after a cleaning. Push-Button Poles > Cleaning methods are similar to the expander models. However, the absence of expander plugs means you can use lubricants, both for cleaning and oiling the push buttons. > Check shafts regularly for cracks that can appear around the adjustment holes. If you find a crack, contact the manufacturer for a replacement section immediately. Snap-Lock Poles > Clean these as you would other poles, sans the lube. > Check the screw and pin on the snap-lock for excessive wear or rust. Replace the locking mechanism if it becomes loose in the locked position.
Backpacker Magazine – March 1998 Water Filter Maintenance Tips to keep water filters filtering. by: Dave Getchell An often-overlooked part of getting the most from your water filter is proper cleaning after use and before long-term storage. If you're nice to your new filter, you can triple or quadruple its service life—not to mention help it filter more effectively. Most filters come with elaborate manufacturer's cleaning/maintenance instructions, which we advise you to follow exactly. Below is a rundown of the typical procedures, with time-tested tips from the field for better results. Start with the cleanest water you can find: Don't burden your filter with unnecessarily dirty raw material. Seek out still pools rather than running current; moving water roils up sand and debris. Using a foam float, keep the intake hose off the bottom of the creek, where it tends to suck up sand, mud, muck, leaf detritus, and who knows what else. Let Muddy water settle: Dip a pot full of water, set it aside, and let the suspended solids settle out; an hour or two helps a lot, but leave water overnight if possible. This simple step gives you clearer water to process, which can triple the time between cleanings or filter replacement. Backwash: Some filters can be backwashed when output starts to slow down. Just detach the intake hose and attach it to the filter outlet. Pumping will send a "backwash" of clean water through the filter, loosening some of the accumulated gunk. Following backwashing or before storage, the filter element usually must be sanitized with a diluted bleach solution. Scrub a scrubbable filter element: If pumping lots of dirty water has slowed the flow, scrub the cylinder with a toothbrush to restore normal output. Read the manufacturer's recommendations—if you scrub a filter that is not designed to be scrubbed, you could compromise its integrity. Disinfect periodically: Microorganisms can multiply inside the filter element. Unless the manufacturer recommends otherwise, flush the element after each trip with a diluted chlorine solution of 1 capful of household bleach to 1 quart water. Pump it about 25 strokes until empty, then let it dry. http://www.backpacker.com/march_1998_skills_gear_water_filter_maintenance/gear/2380?page=1
Backpacker Magazine – March 1998 Fixing An Inflatable Sleeping Pad A few simple precautions will prevent punctures and preserve the foam in your self-inflating pad. by: Jonathan Dorn Around camp, keep the pad away from fires, stoves, and abrasive surfaces, and minimize its exposure to ultraviolet rays and DEET-based insect repellents. Give a self-inflater plenty of time to puff up. Open the valve and unroll your pad as soon as you get to camp. By bedtime it should be nice and cushy, requiring only a few puffs to cap it off. Try to minimize the amount of air you blow into a pad. Your breath carries spit and water vapor, and moisture ultimately breaks down even the sturdiest foam. After each outing, a quick sponge bath will remove encrusted dirt. Allow ample time to dry, and store the pad unrolled with the valve open. Closing the valve may trap moisture inside and cause mildew. Because self-inflaters occasionally succumb to sticks and sparks, always pack a good repair kit. Small holes patch nicely in the field, but a quarter-size puncture or a large tear requires factory attention or a replacement. Slap on duct tape only as a last resort in the field because it leaves a gooey residue that inhibits permanent repair. To fix a punctured pad, the following "hot pot" method works best: Set a quart of water to boil in a flat-bottomed pot. Wipe the pad clean and saturate the area around the puncture with water. Let the pad air dry. Open the valve. This is very important because you can ruin a pad if you try this repair with the valve closed! Squeeze a liberal amount of Seam Grip (or any generic contact cement) into the exposed foam, work it into the material, then spread a thinner coat around the hole. Once the water boils, peel the backing from the patch and smooth it over the puncture. Place the hot pot over the patch and leave it for at least 30 minutes. The heat-sealed bond should hold permanently. http://www.backpacker.com/march_1998_skills_gear_fix_sleeping_pad/gear/2379?page=1
How to Resole Hiking Boots Replacing the soles on hiking or work boots is a challenging and money-saving home project. Here's what you'll need for this project. Tools: small screwdriver or nail puller, sharp knife, sewing awl, work gloves, hammer, scrap wood boards, sturdy cord or clamps, small wood blocks. Materials: rags, acetone, replacement rubber insoles, heavy-duty waxed thread, coarse sandpaper, replacement Vibram soles; flexible, waterproof shoe-repair adhesive; replacement heel fasteners. Buy Vibram soles of the correct size from a recreational outfitter; buy flexible shoe-repair adhesive and heel fasteners at a shoe repair shop. Time: about 1 to 2 hours. Before you can replace the old soles, you must remove them. Normally, boot-soles are either sewn or glued. If they're sewn, there will be threads visible around the upper edge of the sole. Examine the soles for attaching screws or nails in the heel; remove any fasteners with a screwdriver or a nail puller, and save them to attach the new soles. After removing the heel fasteners, separate the old soles from the rest of the boot. If the boots are sewn, you'll find three layers of material: the old sole, a middle rubber layer, and a permanently attached leather layer. To separate the old soles from your boots, insert the blade of a sharp knife between the sole and the middle rubber layer; carefully work it around the boot until the sole is free. If the boots are glued, there will be only two layers, the old sole and a permanent layer. Separate these in the same manner. Once you've removed the old soles, clean the middle rubber layer with acetone until all excess glue and debris are gone. On sewn shoes, check the sewing for breaks, and check the rubber layer for tears. If this rubber layer is torn, it must be replaced too. Remove the damaged rubber layer the same way you removed the sole, inserting the blade of a sharp knife between the rubber layer and the permanently attached leather layer. Mend breaks in the stitching or attach a new middle layer with a sewing awl and heavy-duty waxed thread, making stitches all around the new insole. After you're satisfied with the soundness and cleanliness of this surface, use coarse sandpaper to roughen both the inside surface and the bonding surface of the new Vibram soles. Wear work gloves, and wipe off any sanding debris thoroughly. Be careful not to touch either the insole or the sole -- body oils repel most adhesives. Apply flexible shoe-repair adhesive evenly to both surfaces; be especially liberal around the edges. Follow the manufacturer's instructions exactly; join the soles immediately or let the adhesive get tacky before bonding as specified. Align the new sole over the prepared boot surface and press it into place, starting at the toe and working down toward the heel; curl the new sole into place and stretch it toward the heel as you go. Finally, set the boot on a flat surface, sole up, and pound the entire sole vigorously with a hammer. To assure a good bond, tie or clamp each boot between two flat boards for 24 hours; place a small wedge under the sole just forward of the heel. When the new soles are dry, trim off excess sole material with a sharp knife, working slowly and deliberately around each boot to assure a professional finish. Finally, if the new Vibram soles have predrilled holes for heel fasteners, set new heel fasteners into the holes and pound them firmly in. http://adventure.howstuffworks.com/how-to-make-and-repair-camping-equipment3.htm Once you've removed the old soles, clean the middle rubber layer with acetone until all excess glue and debris are gone. On sewn shoes, check the sewing for breaks, and check the rubber layer for tears. If this rubber layer is torn, it must be replaced too. Remove the damaged rubber layer the same way you removed the sole, inserting the blade of a sharp knife between the rubber layer and the permanently attached leather layer. Mend breaks in the stitching or attach a new middle layer with a sewing awl and heavy-duty waxed thread, making stitches all around the new insole. After you're satisfied with the soundness and cleanliness of this surface, use coarse sandpaper to roughen both the inside surface and the bonding surface of the new Vibram soles. Wear work gloves, and wipe off any sanding debris thoroughly. Be careful not to touch either the insole or the sole -- body oils repel most adhesives. Apply flexible shoe-repair adhesive evenly to both surfaces; be especially liberal around the edges. Follow the manufacturer's instructions exactly; join the soles immediately or let the adhesive get tacky before bonding as specified. Align the new sole over the prepared boot surface and press it into place, starting at the toe and working down toward the heel; curl the new sole into place and stretch it toward the heel as you go. Finally, set the boot on a flat surface, sole up, and pound the entire sole vigorously with a hammer. To assure a good bond, tie or clamp each boot between two flat boards for 24 hours; place a small wedge under the sole just forward of the heel. When the new soles are dry, trim off excess sole material with a sharp knife, working slowly and deliberately around each boot to assure a professional finish. Finally, if the new Vibram soles have predrilled holes for heel fasteners, set new heel fasteners into the holes and pound them firmly in.
http://www.hikemore.com/hiking/hiking-tips/hiking-boot-tips.htmhttp://www.hikemore.com/hiking/hiking-tips/hiking-boot-tips.htm Waterproofing There are 5 basic kinds of waterproofing methods for hiking boots. Oil Based: Oil Based compounds soften the leather of the shoe, and can cause it to break down after time, so that the boot is less supportive. Wax Based: Wax-based products are quite functional in waterproofing hiking boots, provided the wax is reapplied regularly. Be sure to buff the boots after applying to get rid of the excess - it can attract dirt and grime. The main drawback is that wax based waterproofers cut down on the breathablity of the boot. Your feet don't get as much air when perspiring, and once the boots are wet, they take longer to dry. Silicone Based: Stitching and glue can break down under the high petroleum content of silicone products. Your boots will also give off fumes while drying. Silicone products stiffen the boots when exposed to low temperatures, and they do not aid in conditioning the leather. Silicone is recommended as opposed to wax based products for boots with a Gore-Tex liner, because it is more breathable. Water Based: Fluoropolymer: This type of waterproofing comes in a spray can, and has been rated the best by leading authorities on the subject. It can be used on hiking boots that have been previously treated by a different method. It dries quickly, repels stains, and does not change the appearance of most leather (always try on a discreet spot first if you are concerned.) There are also some basic "waterproof rules" to follow when buying hiking boots. Look for shoes with as few seams as possible. Stitched seams become weak spots as the materials degrade, inviting leaks. If you are shopping for a hiking boot with a Gore-Tex waterproof liner, look for one that is relatively thin. Thicker liners will take longer to dry when they (like ALL boots, inevitably) get wet. Be sure the hiking boots that you buy have a leather piece between the tongue and body of the boot, called a gusset. This helps to keep the water out.
http://www.tutorials.com/04/0462/04624.asp Zippers are great until they break. There's always the chance that even the best quality zipper could separate, and develop a gap behind the slider. But before you throw away the item, or rip the whole zipper out and replace it, try this simple repair method. If you have a zipper that's not separated, but is merely balky or stuck, try these measures first: Look underneath the zipper to see if any threads are caught in it. If there are, take a scissors or razor blade and cut them where they enter the slider. Pull them through to free the slider. Rub a bar of soap, or a candle on the teeth of the zipper. Now run the slider back and forth a few times. This will smooth things out. Remove the old stop The thick horizontal piece at the bottom of the teeth is called a stop. Take this item in one hand and the pliers in the other. Grasp the metal stop at the bottom of the teeth, and work it off. Then turn the zipper over if need be, in order to access the other side of the stop. Realign the slider When the stop is removed, you'll be able to get rid of the gap. Next: Once the stop is off, move the slider down the zipper, and carefully run the teeth back through the slider. Zip the zipper completely up, so that the fabric is aligned on either side. Create a new stop Since it's just about impossible to reattach the old stop, you'll create a new one. Thread the needle with the heavy thread. Starting from the back side, create a new stop by placing several stitches across the bottom of the zipper. You need enough stitches to hold, but not so many that it becomes bulky. On your last stitch, tie off the thread in a double knot or two under the zipper and cut the thread. -end- Tools Needle nose pliers A needle heavy enough to pierce the zipper's surrounding fabric Some heavy thread
http://www.essortment.com/all/sewingseambasi_reqt.htm Seams for repair or sewing of gear Sewing seams is a cinch when you know the basics. You’ll find that all of these practical applications can also be used as decorative techniques. There are five basic seams that are essential to sewing. Each has its own purpose and level of difficulty. We’ll start with the easiest and finish with the most difficult. That way, you can print this off and use it as a tutorial while you’re in front of your machine practicing. When you practice sewing, be sure to keep an even pressure on the fabric. You don’t need to push or pull it through the machine. It should glide effortlessly and with minimal urging. Your hands are gently holding the edges of the fabric together while maintaining an even seam allowance. Let the fabric and sewing machine do the work and you can act as the guide or overseer. Also remember to practice your back-tack. This is a technique that knots off the end of them seam to prevent unraveling. You can achieve this by sewing forward a few stitches, backward, then forward again. For optimum insurance, be sure to do this at the beginning and end of each seam you sew . The Plain Seam It doesn’t get much simpler than this. The fabric is bound by one continuous seam, generally sewn in a straight line. Two pieces of fabric are joined and the seam allowance—that can be as narrow as 1/8” to as wide as 2” or more—and either pressed to the open or to one side. Perfect for beginner projects from pillows to pants, this seam is probably the most used and if you can master this one, you will have the skill to conquer the more advanced seams. The French Seam This seam is great to use for a clean, finished look. It’s created by sewing one plain seam, then encasing the seam allowance by pressing the all the fabric to one side and sewing another plain seam. The technique is a practical way to prevent woven fabrics like voile, organza or burlap from unraveling. This pretty seam is easy enough if you remember a couple tips. First off, remember that you’re flipping the fabric once more than you normally would. That means under normal circumstances you would put the topsides of the fabric together when you start to sew. In this case, you must put backsides together first—unless you want the finished seam allowance on the outside of the garment or project. Secondly, the first seam’s allowance should always be narrower than the finished allowance. By doing this you will ensure that all of the first seam allowance is encased in the second seam. The Welt Seam This is a great variation on the plain seam. It’s used to add an extra ounce of strength to seams that might need it. It’s achieved by sewing a plain seam and pressing the seam allowance in one direction, then a second topstitch is sewn from the fabric’s topside to secure the seam allowance. This seam works well as a decorative accent and can provide just the right touch to a yoke or style line. The Flat-Felled Seam A twist on the French and welt, this one will be more difficult the heavier the fabric. Start with the backsides of the together and sew the first seam. Press the seam allowance to one side, tuck its edge under and run one more stitch right along the fold to anchor it in place. This seam can be used for heavy-duty jobs. Most often you see this seam when denim is used—check out the side seam of any pair of jeans. The Curved Seam The most difficult of seams is this one. Seen wherever a bustline, hipline or shoulder seam come together, its also one of the most used. This will be the toughest task to tackle and you’ll have to fight your urge to fight the fabric. It’s best to learn this seam with pins to hold the fabric. You’ll know you’ve mastered it when you don’t need them anymore. Start with the piece of fabric that is concave (it goes in like a cave) and clip the seam allowance every 1/2” to inch. Be careful not to clip beyond the seam allowance—clipping it a little more than three-quarters of the way is usually enough. Now, as you sew the pieces together, there is ease to pivot the pieces together.
http://www.thru-hiker.com/articles/washing_down.php Washing a Down Sleeping Bag Down bags can, and definitely should, be cleaned when they start to accumulate oils. Body oils, hair oils, and sweat are all acidic and will slowly decompose down. Moreover, washing your bag restores lots of loft! Do not dry-clean your sleeping bag. Dry-cleaning fluids remain in the bag for weeks. You do not want to be zipped up inside a bag giving off carbon tetrachloride or perchlorethelene. These solvents also strip the down of oils that are important to its function. For this reason, whenever you wash your bag use a down specific detergent. Down bags that are baffled can be safely washed in a front-loading washing machine, but hand washing is safest of all. In fact it is nearly impossible to damage a bag in hand washing. Use a down cleaning product or a mild shampoo. Use a bathtub, or sometimes you can get away with washing your bag in the laundromat sink. It can be hard to soak your bag, especially if you have a DWR finish on the fabric. I recommend filling the sink and putting the bag into the soapy water in its stuff sack. Slowly work the water and soap into the bag as you pull it out of the stuff sack. Leaving it to soak for up to an hour helps to remove more thru-hiker grime. Rinse the bag several times until no more soap comes out. Be very gentle when you lift out the bag. Don't wring it out! Your bag will be really heavy, and it can tear the delicate baffles under its own weight. If your Laundromat has an "extractor", use it to remove most of the water left in the bag. Alternatively you can carefully arrange the bag in an upright washer for a spin cycle. If you skip this step it will take forever to dry out your bag. Use a medium heat. Be skeptical of public Laundromats. I nearly cooked a bag because the dryer was stuck on High no matter what the knob said. Some tennis balls thrown in with the bag will help to break up the down clumps. When I'm on the trail I use rocks stuffed into sock rolls. Take the bag out every dry cycle to feel the bag over. Gently breaking up the clumps a little helps to speed up the drying process. Dry it over and over again until it is bone dry. Now revel in the sweet smell and high loft of your clean sleeping bag!
http://www.thru-hiker.com/articles/repairing_gear_on_trail.phphttp://www.thru-hiker.com/articles/repairing_gear_on_trail.php Repairing Your Gear on the Trail Materials: Machine sewing needle and thread. Thread the needle so that both ends are equal in length.Step 1: One of the sides of the needle is flat. Hold the thread against the flat part with your thumb. Notice also that there is a groove on one side of the needle.Step 2: To get started, push the needle through and then pull it back a little to form a loop as seen in the picture.Step 3: Grab the loop and pull one side of the thread through while holding the other side against the flat part of the needle with your thumb.Step 4: Now there should be an equal length of thread on both sides of your repair. Pull the needle back through the material. It helps to hold the thread between your fingers as shown.Step 5: Push the needle through to form the first stitch. Make sure the groove in the needle faces in the direction you're sewing.Step 6: Pull back the needle to form a loop. Important: this loop must be on the side of the needle without the groove. Pass the thread through the loop.Step 7: Pull back the needle and thread as you hold onto the other end that was passed through the loop. Pull both ends to tighten up the stitch.Step 8: You should have the needle and half of the thread on one side....Step 9: ... and the other half of the thread on the other side. Notice that you can see the stitch on both sides of the repair.Step 10: Repeat steps 5-9 until you have enough stitches to complete the repair. Now finish by pushing the needle through close to the last stitch.Step 11: Pull back to make the loop, and then pull the thread through like you did at the beginning during step 3. Step 12: Now both sides of the thread should be on the same side. You can then remove and set aside the needle.Step 13: Tie off the ends with a couple of overhand knots. Trim off the ends.Step 14: You should see a line of lock stitches on one side and ...Step 15: ...and a line of lock stitches on the other. Congratulations! You now know how to make long lasting repairs to packs and other heavy duty equipment right on the trail!
*Storage of Camping Gear* By Myndtryp 02 February 2004 If you are like me, you spent a lot of time selecting your camping gear and spent hard earned dollars to purchase, good quality gear. With proper care this gear will give you many years of good usage. One important part of properly caring for your gear is the way it is stored when not in use. One of the major problems when it comes to storing gear, is you get home from a trip, you are tired from the drive home and so the gear gets thrown in the garage or closet and you tell yourself, " I will take care of it tomorrow ! " Unfortunately you forget about it and the next time you need it, find that it is now mildewed and moldy , which if it has been left that way over a long period is pretty much impossible to clean and also voids the lifetime warranty on the gear. So how do you store your gear properly? After using it, make sure you take care of it when you get back home. Take all the gear: tents and sleeping bags especially out of your pack or vehicle and spend them out to let them dry out. This is also a good time to check to see how dirty they are, clean if needed and also check to see that they are still in good shape. Sleeping bags and tents: These you will want to store clean, dry, and loose. After making sure they are clean and dry, store them loosely in large laundry bags, Rubbermaid tubs or something similar to them. You do not want to store them stuffed or rolled up tightly. Sleeping bags need to be loose so the insulation will not be compressed over a long period. This will eventually destroy the insulation. Tents can be stuffed loosely into the storage bags also, if you fold it up when storing it, this will eventually cause the tent to start leaking in the folds. Another suggestion if you are storing the tent long term is if you have shock-corded poles, put them together like you would if you were using them and store them along a wall. This takes pressure off the shock-cord and will make it last a lot longer. They should also be stored in a cool dry place, attics are normally not a good place to store them because they tend to get hot in the summer and that is not good for the gear Self-inflating sleeping pads: After cleaning them, store them unrolled with the inflating valve open, under a bed is a good place to store these. If stored rolled up, it will collapse the foam inside of them and they will not inflate fully. Stoves and lanterns: These should be stored clean and dry to prevent rusting and also with no fuel in the tanks so they did not get clogged up. Check to make sure the mantles on the lanterns are still in good shape so they will be ready for the next trip Myndtryp http://www.alpharubicon.com/prepinfo/campgearstorage.htm
My dad gave me an old Marmot sleeping bag, and it has two small holes in it and some down feathers are coming out. The sleeping bag works just fine, but how do I stop the feathers from coming out? —Cold Coleman, Reno, Nev. A: Thanks for the question, Cold. First off, good for you for reusing your dad’s old sleeping bag. A good bag can last for decades if you take care of it. As for your escaping feathers problem, I called my buddy George Farkas over at McNett, a company known for its gear-care and -maintenance products. Here’s what he had to say: Seam Grip ($7; www.rei.com ) makes an excellent ‘no-sew’ patch on small holes and tears. For pinholes just use a toothpick to apply a very small dab to cover the hole and about 2 mm beyond. For larger holes, cut a small piece of fabric (such as some nylon from the lining of an old retired jacket). Next, shape the patch with scissors to be about 3 mm bigger than the hole in all directions. Then apply Seam Grip all along the outer edge of the patch (at least 3 mm in from the edges). Apply the patch to cover the hole and leave it laying flat overnight. Once it’s good and dry, the patch will be permanent and should survive laundering when you wash the bag. For the sewn seams, apply a very minimal amount of Seam Grip in a thin line along the stitching and that’ll provide an easy and permanent fix. http://boyslife.org/outdoors/askgearguy/4539/repairing-a-sleeping-bag/
Backpacking Stove Safety and Maintenance When you use your backpacking stove, remember that you are using fire and you should follow the same safety precautions as when burning a camp fire. Additionally, following these simple steps for backpacking stove safety and maintenance will ensure your safety and that of the people and the environment around you.Never use a stove in a tent. Tents, and the gear inside them, may be flame retardant, but they are not fireproof. Even if your stove seems stable, it will still tip over easily if bumped into. The fire on a stove will not go out if it is tipped over and will easily ignite any flammable surfaces that the burner comes in contact with. You should always use your stove outdoors, on a flat surface, and on a fireproof base such as stone or dirt. Clear the area of any twigs, leaves or debris, and use a stabilizer, such as the MSR Trillium Stove Base, to level your stove if needed. Refuel your stove in an area where any fuel spilled will be far away from where you will use your stove. If any fuel leaks, wipe it up immediately and keep fuel soaked rags in a sealed bag, away from any fire sources, until you can wash them.If using a stove with an integrated fuel tank, like the Coleman Exponent Feather 442, where the fuel source can not be disconnected from the stove and sealed, you need to ensure that you pack the stove upright in you backpack. Even with the fuel turned off, these stoves can still leak if they are turned on their side or upside-down. This can result in all of your gear becoming highly flammable and you not having any fuel left in your stove for cooking.Most backpacking stoves do not have an electric ignition meaning that you must light them with a match or lighter. It can be dangerous to stick your hand near the gas emitting from the burner to light your stove so you should either use a long-stem lighter like the Coleman Wind Resistant Lighter, or light the end of a small twig that can then be inserted into the gas. Always follow your stove manufacturer's lighting and safety precautions to avoid injury.Be sure to check you stove for leaks or damage before and after every trip. Stoves take a lot of abuse in the field and it is not uncommon for small parts to get bent or seal leaks to occur. Most problems can be fixed with a maintenance kit from the stove manufacturer. If you encounter any fuel leaks that can not be easily repaired, have a professional repair your stove for you. Backpacking stoves can be very dangerous if not properly maintained and can lead to personal injury, forest fires or worse. Test yours regularly and never use a stove that you think may have a leak or damage.Performing maintenance on a stove generally requires a maintenance kit from the stove's manufacturer. These typically include replacement o-rings and other small parts that wear out regularly. Most stove manufacturers recommend that you use a maintenance kit annually, but if you are not using your stove regularly or in harsh climate conditions, you may only need one every few years. If your maintenance kit does not come with lubricant, make sure to wipe the o-rings down with petroleum jelly before installing them as this will significantly increase their lifespan and keep them from drying out and cracking. By examining your stove for fuel leaks or damage before every backpacking trip (see above), you should be able to tell if you are in need of a maintenance kit. If you will be on a long trip, always bring a maintenance kit with you, just in case. Most maintenance kits can be applied in the field with simple tools like a Leatherman Multi-Tool. You may also want to consider buying a replacement fuel pump if available. This is the most utilized part on a stove and, if it fails, will leave your stove inoperable. http://www.backpacking-guide.com/backpacking-stove-safety.html
Gear First Aid Kit An emergency repair kit for camping equipment should include: o 1 roll of duct tape o A few hose clamps o Shoe Goo o Spare lantern mantles and a spare globe o Stove maintenance kit for your model of stove o Tear-Aid patches o Tent repair kit to match your tent material o Seam Seal or paraffin wax to seal seams or needle holes after stitching o Tent screen patch kit o Tent pole repair kit o Substantial needle, spool of strong nylon thread, and a thimble o Shock cord o Some 1-inch-wide nylon straps and a few spare buckles My Philmont repair kit Duct tape Tie wraps Twist ties Needle and strong thread Crazy glue Tent patch Pins and rings for external backpacks Dental floss Sure grip glue Eyeglass repair kit Self inflating matress repair kit Stove repair kit ( with stove) Water filter repair kit (with filter) http://www.campinglife.com/output.cfm?id=1409131
Materials A lot of places sell repair materials: Materials: Eyelets Tent patch material Silnet (Silicon coated materials need silicone based adhesives) Seam Grip J&B Weld Super Glue Seam seal for poly urethanes Various grades of nylons Buckles (Eureka has bins) Straps (Eureka in their repair department)
Difficulty: Moderate • Things You’ll Need: • Seam-sealing Glue • Dishwashing Liquid • Heavy-duty Nylon Cloth • Sewing Machine With Heavy-duty Nylon Thread • Scissors • Step1 • Clean the torn area with dishwashing liquid and water, then thoroughly dry the tent. • Step2 http://www.ehow.com/how_118020_fix-torn-tent.html Cut two patches of heavy-duty nylon cloth about 2 inches (5 cm) larger than the tear (see A). Step3 Coat one side of each patch with seam-sealing glue. Let them dry until the glue becomes tacky. Step4 Apply one patch to each side of the torn area. Be careful to keep the tent material under the patch as flat as possible. This will ensure watertightness. Step5 Using a sewing machine, zigzag-stitch completely around the edge of the patches. Continue stitching over the patches in a dense zigzag pattern (see B). Step6 Apply additional seam-sealing glue to the stitching, both inside and out.
Repair Tools Speedy Stitcher Awl Hole Punch Sewing machine with variety of needles/ thread (polyester not cotton or coated) Seam Ripper Needle nose pliers Needle and thread Riveter Eyelet crimper Propane torch with “aluminum braze”
Darning a hole in a sock Instructions Difficulty: Moderate Things You’ll Need: Darning Needle Thread Scissors Scissors Lightbulb (or other smooth, round object) Step1 Carefully insert a lightbulb (or another round, smooth object) into the sock where the hole is. This will give you a smooth surface to work on. Step2 Thread a darning needle with thread that's similar in color and weight to the fabric of the sock. Don't knot the thread. Step3 Trim the ragged threads around the edges of the sock hole, being careful not to make the hole any bigger. Step4 Imagine a circle (or oval) drawn around the hole in the sock, about 1/4 inch (6 mm) larger than the hole on every side. With your needle and thread, stitch around this circle using a simple running stitch, your needle piercing the fabric down, then up, about every 1/8 inch (3 mm). Complete the circle and add five more stitches (see A). Clip off the remaining thread. Step5 Rethread the darning needle with another length of thread (again, don't knot it). Starting at the top of the hole, just outside the circle you've stitched, make a series of vertical lines all the way across the hole. Where there is fabric, weave your needle through the fabric in a running stitch. Where there is no fabric, your thread will simply lie flat across the hole. Continue stitching parallel vertical lines all the way across the hole (see B). Step6 When you've covered the hole with vertical lines, make horizontal stitches, weaving your needle under and over the vertical lines you just made (see C). Step7 Once the entire area has been filled up, make another six or seven running stitches (simple up-and-down stitches) in the sock outside the darning area. This will hold the stitches in place. Step8 Clip off the remaining thread. http://www.ehow.com/how_113438_fix-hole-sock.html