Disassembly and Study of a Single Use Camera
90 likes | 260 Vues
Disassembly and Study of a Single Use Camera. Team 2 Tyler Brun Ashlea Krupa Seung Ho Park Gage Hermanson. Functional Components. Plastic Housing : The plastic covers and inner housing protects the camera’s inner parts and hold them in place.

Disassembly and Study of a Single Use Camera
E N D
Presentation Transcript
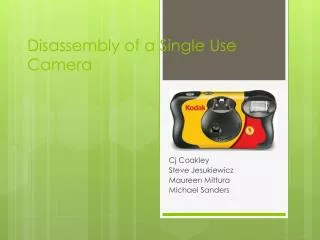
Disassembly and Study of a Single Use Camera Team 2 Tyler Brun AshleaKrupa Seung Ho Park Gage Hermanson
Functional Components Plastic Housing: The plastic covers and inner housing protects the camera’s inner parts and hold them in place Electrical Parts: These parts allow for the charge and discharge of the flash Film Cartridge: This component is a material that keeps an image after light hits it. Film is then developed into pictures.
Functional Components (cont.) Viewfinder: Allows the user to see the picture being taken before the shutter button is pressed Film Advancement: Moves to the next frame on the film Lens: Lets light through for a short time to hit the film, burning the image on the film
Materials Used How It Works • Two metal plates are in contact with • one another when the charge button • is pressed, which means the circuit is • complete. • When you wind up the grey • spool, it causes another smaller spool • to spin, which is what moves the film • to the next frame. • When the camera button is pressed, the • button pushes • down on a small black piece, which • releases the shutter, which then strikes • a larger red strip connected to the • circuit board, activating the flash. • The shutter allows light to pass through for • a short time to hit the film, as it passes • the lens. • This image is then rolled back • into the cartridge by the grey spool. • Most of the materials used for parts are plastic. • As for the electrical parts, most of them are made out of metal, for conductivity. • The circuit board is made out of silicon.
Disassembly Procedure 1. Using the blade of a small knife cut the adhesive paper that covers the slits/planes where the front and the back cover meet all the way around the camera. 2. Using a small slotted screw driver depress the locking mechanism that are present around the back cover.(located on the sides and the bottom of the camera) 3. Firmly hold the respected front of the camera down and slightly pull upward on the back casing. It should detach with a little bit of wiggling. 4. Clearly mark the cover Part 1 and set it off to the side. 5. Place the camera on the table flat on the front cover as to leave the newly revealed parts upward. 6. Using your thumb and index finger remove the spool for unexposed film that is located on the opposite side from the film cartridge, it is removed by pulling it upward. 7. Clearly mark the spool Part 2 and set it off to the side. 8. Using your thumb and index finger grasp and remove the film cartridge by pulling it upward. 9. Clearly mark the cartridge Part 3 and set it off to the side. 10. Next using you thumb and index finger grasp and remove the batter from holders. This is accomplished by firmly pulling upward. 11. Clearly mark the battery Part 4 and set it off to the side. 12. Now grasp the camera in both hands and rotate the camera 180 degrees as to present the front cover upward. 13. Using your thumb and index finger remove the front cover. (it should be free from the rest of the parts) 14. Clearly mark the front cover Part 5 and set it aside. 15. Using a very small set of needle nose pliers release the tension on the copper spring that is attached to the Lens base. ( this should be accomplished by slowly removing it from the hook it is attached to and slowly allowing it to recoil) 16. Clearly mark the spring Part 6 and set it aside. 17. Grasp the top and bottom of the circuit board with your thumb and index finger and pull laterally away from the camera wiggling and the circuit board will detach. 18. Clearly mark the circuit board/flash Part 7 and set it off to the side. 19. Rotate the camera 90 degrees so the viewing lens is on the top( the respective top is upward) 20. Firmly grasp the viewing lens with your thumb and index finger and firmly pull up ward and it will detach. 21. Clearly mark it Part 8 and set it off to the side. 22. Lay the camera on its respective back with the lens facing upward. 23. Rotate the lens fastener with your thumb and index finger and pull it upward. 24. Clearly mark the lens fastener Part 9 and set it aside. 25. Remove the lens by picking it up with your thumb and index finger. 26. Clearly mark the lens Part 10 and set it off with the rest of the parts. 27. Now return the camera to the respective upright position with the picture button in the upright corner. 28. Using your thumb and index finger grasp and pull upward on the gear protector/picture capture button.( being careful not to remove any other parts in this process) 29. Clearly mark the gear protector/ picture capture button Part 11 and set it aside. 30. Using your thumb and index finger remove the unexposed film counter by pulling it upward. 31. Clearly mark the counter Part 12 and set it aside. 32. Next remove the Film advancer that is located in the top right corner it is removed by pulling it upward with your thumb and index finger. 33. Clearly mark the Advancer Part 13 and set it off with the rest of the parts. 34. Using the needle nose pliers remove the film advance locking mechanism by grasping it and pulling it upward off the shaft it resides on. 35. Clearly mark the locking mechanism Part 14 and set it aside. 36. Using the pliers still remove the revolving shaft that the other peaces were located upon. This is accomplishes by simply pulling upward. 37. Clearly mark the shaft Part 15 and set it off to the side. 38. Remove the film advancer gear that pushes the film along from the back of the frame by using the pliers and pulling laterally straight back. 39. Clearly mark the gear Part 16 and set it aside.
Disassembly Procedure (cont.) Procedure for the disassembly was taken from: http://gicl.cs.drexel.edu/wiki/Group_32_-_Kodak_Funsaver_Camera • 40. Next remove the Locking Mechanism Release Lever by picking it upward with your thumb and forefinger. • 41. Clearly label the Release Lever PART 17 and set it aside with the rest of the peaces. • 42. Remove the resistance spring from the top corner section by grasping it with the pliers and pilling it upward. • 43. Clearly mark the spring Part 18 and set it aside. • 44. Return the camera to its respective back having the front face upward. • 45. Remove the lens base by depressing the locking mechanisms that are located around it with the small slotted screw driver. • 46. After the locking mechanisms are depressed pull upward with your thumb and index finger. • 47. Clearly mark the base Part 19 and set it off to the side. • 48. Remove the metal spacer that is present by grasping it with your index finger and thumb and pulling it upward. • 49. Clearly mark the metal spacer Part 20 and set it aside. • 50. Acknowledge the fact that there is a peace of metal jutting upward out of the top of the frame. ( for putting back together purposes) the recoil shaft • 51. Mark this recoil shaft part Part 21. • 52. Count the internal frame as a part as well. • 53. Mark the internal frame as part 22 and set it aside. • 54. The camera is completely taken apart.
Parts Grouped By Function Plastic Housing