Palestine Public Library Computer Classes
Join us for our Spring 2010 Computer Classes at the Palestine Public Library and master the art of résumé writing using ResumeMaker. This session will guide you through logging onto the library’s website, creating an account, and utilizing the step-by-step résumé wizard. You'll learn how to format and edit your résumé, choose job titles, and select styles and fonts. Gain valuable tips and advice, and get ready to impress potential employers with a polished résumé. Don’t miss this opportunity to enhance your job-seeking skills!
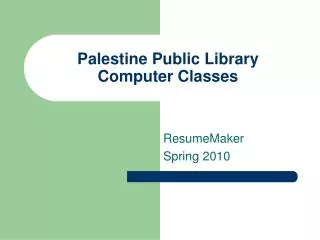

Palestine Public Library Computer Classes
E N D
Presentation Transcript
Palestine Public LibraryComputer Classes ResumeMaker Spring 2010
Goals • To learn how to write, format, and print a résumé • To learn how to use ResumeMaker
Logging on to the Internet • Log on to Internet Explorer • Click on the blue E
Go to the library’s website Go to the library’s website http://www.palestine.lib.tx.us.
Go to Job Seekers Tab Click on the Job Seekers tab
ResumeMaker • Scroll down • Click on ResumeMaker logo
ResumeMaker Click on “Click here to continue”
Creating an Account on ResumeMaker Click on Create Account
Creating an Account on ResumeMaker Fill in blank boxes
Creating an Account on ResumeMaker Click Continue after filling in the blank boxes
Creating an Account on ResumeMaker • Verify your email address • If correct, click Continue
Creating an Account on ResumeMaker • You will receive an email from Resumemaker • The email will have your password information
Tips and Advice Tips and Advice
Tips and Advice Click on Insider Advice for Resume Writing
New Resume Click on Start New Resume
Resume Wizard Choose New, Step-by-Step Resume Wizard
Resume Wizard Click Continue
Resume Wizard • Fill in the text boxes
Resume Wizard Click Continue
Resume Type Select Resume Type
Resume Type Click Continue
ResumeMaker Click Continue
Job Title Enter title of job or click on Title to get suggestions
Job Title Job Title suggestions
Job Title • Enter Title • Click on Continue
Examples & Advice Click on Examples & Advice
Words Click on Words
Phrases Click on Phrases
Phrases • Choose a phrase • Click on the phrase
Phrases • The phrase has been added • Edit the sentence
ResumeMaker • Save/Finish saves your Resume • Back returns you to the previous screen • Click Continue
Resume Summary Click on Phrases
Resume Summary Click on a Phrase
Resume Summary Fill in blanks and edit
Resume Summary Click OK
Style Click on Style
Style, Font • Choose a Style • Choose a Font
Resume View Click on View
Resume View View of Resume
Custom Settings Custom Settings changes font size and spacing
ResumeMaker Click OK
Work Experience Click on Experience
Work Experience Edit text boxes
Work Experience Click on Phrases
Work Experience Choose a phrase
Work Experience Click Add Another
Work Experience Edit text boxes
Work Experience Click OK or Add Another if you have more jobs to add