Moving XY Data (Waypoints) to a Map
790 likes | 949 Vues
Moving XY Data (Waypoints) to a Map. Frank Wideman Extension Engineer Univ. of Missouri Extension Perryville, MO. To get points from a GPS to a Map software. GPS unit Computer Cable USAPhotoMaps XML file Excel CSV file (XY data file) Import XY data file into to a map

Moving XY Data (Waypoints) to a Map
E N D
Presentation Transcript
Moving XY Data (Waypoints)to a Map Frank Wideman Extension Engineer Univ. of Missouri Extension Perryville, MO
To get points from a GPS to a Map software • GPS unit • Computer Cable • USAPhotoMaps • XML file • Excel • CSV file (XY data file) • Import XY data file into to a map • Called importing an Event Theme in AEJEE
Hooking up the GPS unit • Check your connections • Not many opportunities to mix up ports • Just check and match up
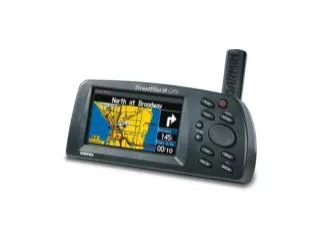
Garmin eTrex GPS • Check the notches and grooves • Pretty durable connection • Do not force the connection • Match up the connection • Other GPS units • Just pay attention to • pins, • notches • grooves
Check computer connection • Serial – older style Garmin use this • USB • Other
Check computer connection • Check the shape • Check the alignment • Guide it into place
Connections are ready • Now you can start your GPS Applications • Now start USAPhotoMaps • First start will bring up the help menu • Read or close “Help” as is your need
Setting up new project • Click “File” menu • Select “New Map Location” • Use “Map Locations” to identify projects since several projects may be located in the same territory. • Select “Open Map Locations” to work on an existing one.
New Map Project/Location • Default location is Washington, DC • Name your new project. Replace the name that is there. • Use one of your Waypoints for Lat & Lon • Click “OK” button
Fill in the blank map tiles • First screen will be empty • You must be on-line to download maps. • Only the downloading of map data requires you to be on line. • Maps are from Terraserver. • Aerial photos and topo maps. • Future projects for the same area will not require the map download.
Fill in the blank map tiles • Click on “File” menu and select “Download Map Data” and “Fill Screen.” • Map tiles will fill the screen • Separate downloads will be needed to get 1-meter and 8-meter aerial photos; also 4-meter and 64-meter topo maps. • Download only what you need.
Setting up for the GPS • The GPS menu allows you to set “Comm Port”, “Baud” rate and “Protocol.” • Comm 1 is usually the 9 pin serial port that most GPS units have used until very recently. • Newer GPS units are usually USB. • For USB connection use “No serial GPS.”
Setting up for the GPS • Baud rate seldom needs to change. • The amount of data we are moving is so small that even slow baud rates are OK. • Standard for serial port is 9600
Setting up for the GPS • Protocol • Most of the GPS units that we use in our 4-H programming are eTrex units that use the serial connection. • Use the Standard Garmin Protocol • Garmin units with USB connection uses “Garmin USB” • All GPS units can be set to use the “NMEA” communication protocol
Sending & receiving data • In the “GPS” menu you can send or receive “waypoints”, “routes”, “tracks” and “position”. The Unit must be on for this. • Waypoints are the points/locations of interest. • Tracks are paths recorded while traveling. • Routes are a series of waypoints in a desired order • Position allows for a live connection with the GPS unit.
Sending & receiving data • A message will show if the transfer is successful. • A message will also show on the GPS screen that indicates the transfer is complete.
Reviewing Waypoints • The “Waypoint” menu allows you to show the list of current waypoints for this project. • Another option will import a new list from other programs that might create an XML or GPX file.
Reviewing Waypoints • The list of waypoints will have the name the GPS unit gave each point, usually a number. This program calls it “Name.” • I usually add the real world name as the “Comment.” • You can select one from the list and click the “Go To” button. The program will move that point to the center of the view.
New map view • The map will show the points in the current view and corresponding labels that you select, GPS name or Comment. • You may need to download more map tiles. • You can click and drag any point to correct any GPS error or inaccuracy. • You can create new points in the program.
Editing a point • The “Edit” button will let you change the text information for that point, like GPS Name, Comment and add other descriptive information. • The “To GPS” button will send the selected waypoint to a GPS unit. Use this if you do not want to upload the whole list. • The GPS menu will upload the whole list to the GPS.
Edit Screen • You can very easily change the GPS name here, much easier than in the GPS unit. • We will use it for “Data Base ID” • Lots of room for more information. Maybe too much!!
Zoom Menu • “Zoom” menu will let you get a different view of your world. • Different map types use different zoom levels.
Map types • The “View” Menu will let you select the “Map Type” • All maps are downloaded from TerraServer. • Types depends on what is public • Aerial Photos of USA • High res color photos of urban areas • Topo Maps
XML files found in C:\Program Files\USAPhotoMaps Open with Excel (version 2002 or 2003)
Files created • USAPhotoMaps creates an XML file for each location or project. • XML files found in C:\Program Files\USAPhotoMaps • Open with Excel (version 2002 or 2003)
Use Excel to edit project file • Open Excel and browse for the desired file in C:\Program Files\USAPhotoMaps • Only newer Excel (version 2002 or 2003) will work