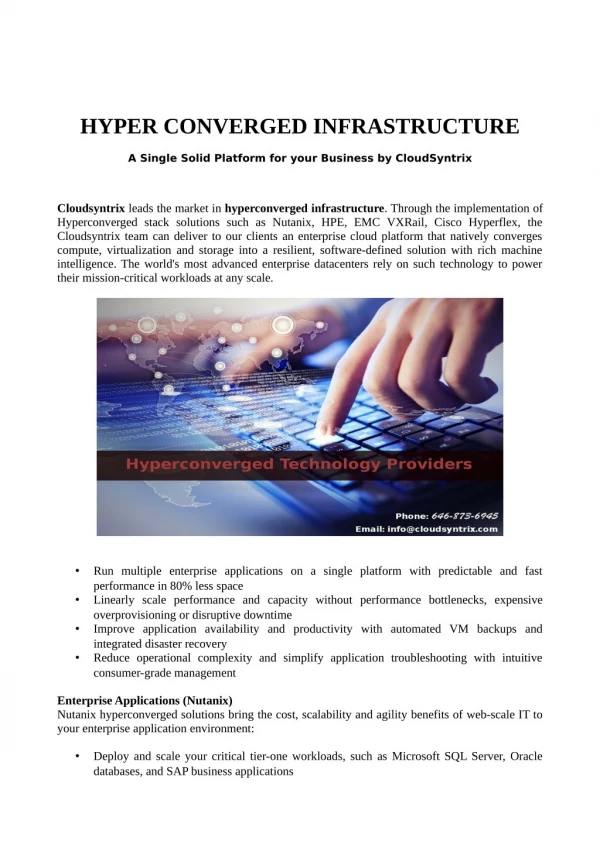
Cisco ASA 5505
Cisco ASA 5505. Joseph Cicero Northeast Wisconsin Technical College. Some Terminology. Cisco states in Chapter 3 of the Getting Started Guide:


Cisco ASA 5505
E N D
Presentation Transcript
Cisco ASA 5505 Joseph Cicero Northeast Wisconsin Technical College
Some Terminology • Cisco states in Chapter 3 of the Getting Started Guide: • Grouping ports into logical VLANs on the ASA 5505 enables you to segment large private networks and provide additional protection to critical network segments that may host resources such as servers, corporate computers, and IP phones. • This chapter describes the options of deploying the ASA 5505 in a VLAN configuration and how to determine how many VLANs you need. It also describes allocating ports for each of the VLANS.
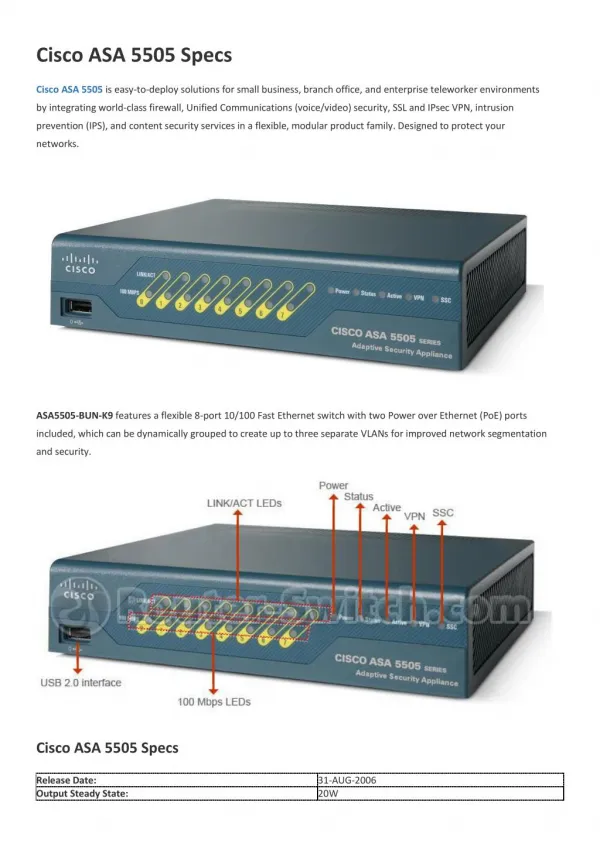
Maximum Number and Types of VLANs • The Cisco ASA 5505 comes pre-configured with 2 VLANS. • Cisco is basically saying that Port 0 (external interface) is one VLAN, and the remaining ports (internal interfaces) are the second VLAN. • You can configure as many as 3 VLANs (internal, external and DMZ) • The license determines how many active VLANs you have. We don’t have the Security Plus license so you can not configure full DMZ configuration.
Hardware Setup • Basically the ASA 5505 by default is a firewall with built in switch. You connect Port 0 (external interface) to the “Internet” and all other ports are considered (internal interfaces). • To begin configuration simply plug Port 0 into the uplink to the Internet and plug your system into any of the remaining Ports 1-7. • You many need to ipconfig /release and /renew before you get the correct ip address.
Software Setup - ASDM • ASDM – Adaptive Security Device Manager • GUI configuration utility for the ASA • The ASA 5505’s internal interface is 192.168.1.1 and it is setup by default to assign 192.168.1.2-254 dynamically. This can be problematic if you’re using static IP’s on servers/printers etc. • Configure the device BEFORE you plug it into the network!
Software Setup - ASDM • You’ll need to know the following BEFORE you setup your system. • Hostname • Domain Name • IP Address of External Interface, Internal Interface and DMZ if it will be setup • IP Address of the host that will have administrative access to the ASA 5505. • Privaleged Mode password • IP addresses for NAT or PAT • IP address range for DHCP server • IP address for the WINS server • Static routes that may need to be configured • 3rd VLAN assigned Ports • Whether or not interfaces should have access to each other & VPN issues
Launching the ASDM • The ASDM can be installed onto the workstation • The ASDM can be run through a browser that allows Java and JavaScript. • Using your browser visit: https://192.168.1.1/admin • You will then receive “invalid certificate” errors, click through them.
ASDM • You will need to open and run the previous clicked on utilities. • The default Username and Password fields should be left blank.
ASDM - Wizard • By default your internal systems should be able to access external resources now.
Restoring Original Config… • Restoring to factory defaults via the ASDM does not work. • There is a button on the back of the device that says ‘Reset’. This button appears to be entirely for looks.
Using the Console Port • Use hyperterminal, click Start, Programs, Accessories, Communications, Hyperterminal, create a connection on Com1 using the terminal settings: • Bits per second: 9600 • Data bits: 8 • Parity: None • Stop bits: 1 • Flow control: None • After you open your connection, press enter a couple times, and you should get a prompt like: ‘ciscoasa>’, or ‘nameofyourdevice>’ • type ‘ena’ to go to enable mode. Enter the password, or just press enter if there is no password set. • type ‘config t’ • type ‘config factory-default’ • hit spacebar when the ‘more’ thing happens. You want to get back to the prompt that looks like: ‘ciscoasa(config)#’ • type ‘reload save-config noconfirm’ • make sure that the outside line is plugged into port zero, and your pc is plugged into any of the ports 1-7. • The Cisco ASA has been reset to factory settings. DHCP is enabled on the cisco device, and it’s internal IP address is now 192.168.1.1!
ASDM Pitfalls • The following lists some issues you may run into should the ASDM web interface fail to work and how you can work around them: • Disable the Windows Firewall. • Clear the Java cache from Windows Control Panel – Java • Upgrade/Downgrade your Java version to JRE6u7.
ASDM Pitfalls • Reloading the appliance may fix the "1 year uptime" ASDM java bug • Verify that http server is running on the device • cli command: http server enableor issue "http server enable XXX" • where XXX is a custom port number • Verify that you can access the device via https • cli command: http 192.168.1.0 255.255.255.0 inside • where 192.168.1.0 is your LAN network
ASDM Pitfalls • Reissue the local keys (SSL Certificate) • asa cli : crypto key zeroize • asa cli : crypto key generate rsa general-keys • Verify the ASDM startup-config pointer • cli command: dirfind the line listing the asdm image filename "asdm-xxx.bin“ • cli command: show runfind and compare the filename with the asdm load command "asdm image disk0:/asdm-xxx.bin"
ASDM Pitfalls • Try downloading a new ASDM copy from Cisco. • Upload the new file to the ASA flash memory • Remove the old pointer issuing the commandcli command: no asdm image disk0:/asdm-xxx.bin • Add the new filename to the configurationcli command: asdm image disk0:/asdm-yyy.bin
Caveats • The last time checked there was over 50 open caveats and hundreds of resolved caveats with the ASDM. Don’t expect it to work perfectly.