Pig Dissection
Pig Dissection. Andrew Zegarski Joe Randazzo. Set up dissection table with paper towels, a tray to dissect the pig in, gloves, the fetal pig, and your tools to dissect with. Place fetal pig on its back with its 4 legs up in the air

Pig Dissection
E N D
Presentation Transcript
Pig Dissection Andrew Zegarski Joe Randazzo
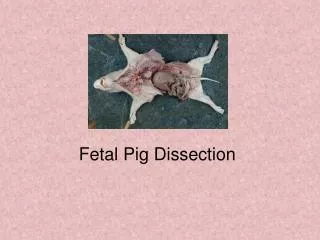
Set up dissection table with paper towels, a tray to dissect the pig in, gloves, the fetal pig, and your tools to dissect with
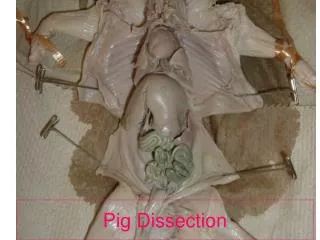
Place fetal pig on its back with its 4 legs up in the air • Tie string around the second joint on one of the legs, wrap it underneath the tray and tie it to the adjacent leg • Do the same for the other set of legs
Using scalplel of scissors, start incision from the top of the umbilical cord to right underneath the mandible (scalpel is recommended for initital incision)
Cut a horseshoe shape from the right inner thigh to the left inner thigh, peaking at the center of the pig where first incision was made • If necessary, bring tray and pig over to a sink and drain all excess fluids
Make 2 horizontal incisions across the top of the diaphragm, right underneath the arms, leaving the diaphragm intact • Pull back the two flaps of skin that were just made from the last incisions and pin them to the bottom of the tray so they stay open and don’t get in the way
Cut film over the heart to reveal it, making sure you don’t cut the heart or lungs
Peel back intestines to uncover the kidneys • Cut out the intestines to get a better view of the kidneys
Slice horizontally under the kidneys between the legs and peel back to reveal the testes (there will be no testes if it’s female)
Male or Female? Male Female
Flip the pig over to get to the brain • Make vertical incision from the front of the head, to the back of the head, cut a circle around it and peel the skin off
Make a groove with the scalpel around the skull then use the scissors to cut along that groove to make a hole to get to the brain
Cut skin from the scalp to the middle of the spine and peel skin back so you can pull the brain out
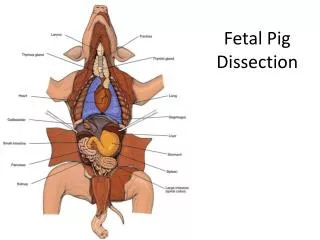
Overview/ Conclusion • In conclusion, there were a lot of similarities between the anatomy of the pig, and the human body. There were very similar organ placements, especially the heart and the brain. Also the small intestine was capable of being stretched out just like a human’s can. The major differences were mostly in the areas like the olfactory bulbs for sense of smell, and the direction of the spinal chord as to laterally rather than the human vertical. The fetal pig dissection was an extremely good learning experience to tie all the knowledge we had about anatomy together.
Use of Camera Phone • Throughout this dissection, pictures were taken to document each step of the dissecting procedure. However, they were not taken from a digital camera, but from a mobile device. Having the phone to take pictures with was very effective because it was always on me. Since most phones nowadays can instantly connect to most computers, it was simple when it came to uploading the picture files onto the computer when it was time to make the PowerPoint. I definitely recommend using a good quality phone camera if you have one instead of using a digital camera, and I also encourage teachers to allow certain devices to be used on such occasions. It was a very useful tool and it would have been a lot more difficult for us to complete the assignment had we not used it.