DTIAtlasBuilder
E N D
Presentation Transcript
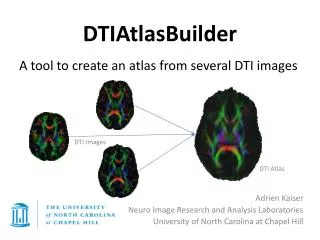
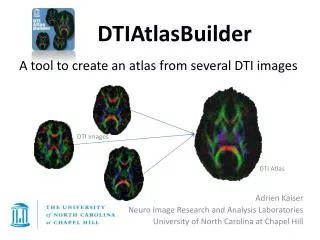
A tool to create an atlas from several DTI images DTIAtlasBuilder DTI Images Adrien Kaiser Neuro Image Research and Analysis Laboratories University of North Carolina at Chapel Hill DTI Atlas
Framework • Download • Online • Slicer Extension • GUI • Basic Use • Add DTI images • Remove DTI images • Give an output folder • Optional: give a FA template • Compute the Atlas • Running Completed • Options • Overwriting • Affine Atlas • DiffeomorphicAtlas • Final Resampling • Load and Save • Keyboard Shortcuts • QualityControl • Software Configuration • Manual Configuration • Automatic Configuration • Load and Save • Command Line • Command Line options • No GUI mode • GridProcessing • ExternalRequirements • Data Organization • Troubleshooting
Framework • This program willallowyou to create an Atlas image as an average of severalregistered DTI images. The registration willbedone in twosteps : • Affine Registration withBRAINSFit • Non-Linear Registration withGreedyAtlas • A final stepwillcompute the final Atlas by resampling and averaging the registered images. Affine Registration Non Linear Registration Final Resampling DTI Images DTI Atlas DTI Images DTI Images DTI Images
Framework • Affine Registration Pipeline • The Affine Registrationcanbedone in severalloops. Ateachloop, the normalization and the registration willbedonewith a new reference, to improve the quality. The referenceis the first case or a templateyou gave for the first loop, and then an averagecomputedat the end of the loop.
Framework • AtlasBuilding Pipeline : Non Linear Registration
Framework • Final Resampling Pipeline
Download Online • Source Code: GitHub: http://github.com/NIRALUser/DTIAtlasBuilder • To get the source code from a linux shell: $ git clone http://github.com/NIRALUser/DTIAtlasBuilder.git $ git checkoutv1.3 • Binary package: NITRC: http://www.nitrc.org/projects/dtiatlasbuilder -> Downloads: Release v1.3
Download Slicer Extension • Slicer: http://www.slicer.org/
Download Slicer Extension • Open the Extension Manager in View -> Extension Manager
Download Slicer Extension • Click the blue INSTALL buttonunderDTIAtlasBuilder • The extension willbedownloaded and youwillneed to restart Slicer. • Whenrestarted, youwillfind the installed extension in the module list.
Download Slicer Extension • You willnowfind the DTIAtlasBuilderjustinstalled in the list of all modules. Running the DTIAtlasBuilder extension will open GUI thatyouwill use as if itwasused by itself.
Basic Use Add DTI Images • Clicking the '+' button will allow you to select several DTI images, and add it to the central Cases box
Basic Use Remove DTI Images • After having selected some images, you can remove them from the central Cases box by clicking the '-' button
Basic Use Give an output folder • You need to give an output folder: A folder named "DTIAtlas" will be created in your output folder, and all the files generated by the program will be put in it (Data organization on slide 33)
Basic Use Optional : Give a FA Template • As an option, you can give a scalar image (FA) as a template that will be used as reference for the affine registration with BRAINSFit in the first loop. • The values in this template image will be rescaled between 0 and 10 000 to avoid compatibility issues • If you do not give a template, the reference for the registration willbe the first case, and then the FA average if there are loops.
Basic Use Optional : Give a FA Template
Basic Use Compute the Atlas • When you added cases and gave an output folder, you can compute the Atlas by clicking the "Compute" button. It will test the existence and type of the files and the folders and tell you if some files are not images or DTIs.
Basic Use Running Completed • This popup window will appear when the processing is done.
Options Overwriting • The "Overwrite" option will allow you write the images anyway, over existing images if they were computed already.
Options Affine Atlas • SafetyMargin : Add 2 slices ateachside of the volume • Initial Affine Transform : If you put a transformation file named <case>_InitLinearTrans.txt or <case>_InitLinearTrans.mat (<case> being the name of the corresponding original DTI image without path and extension) in the folder [OutputFolder]/DTIAtlas/1_Affine_Registration/ as an affine transform already computed, it will be used as an input to initialize the affine registration with BRAINSFit
Options Affine Atlas
Options Diffeomorphic Atlas • The DiffeomorphicAtlas is the Atlas computed from the affine registered images to get the deformation fields from the affine space to the final atlas space. • These deformation fields will be applied to the original DTIs which will be used to compute the first DTI average. • You can choose the Scale Levels that you want for GreedyAtlas and also the options for the resampling and for the average computation.
Options Diffeomorphic Atlas
Options Final Resampling • The Final Resampling will be done with DTI-Reg, it will create the global deformation fields from the original space to the final atlas space. You can use either BRAINS or ANTS, and you can also choose your options.
Options Final Resampling
Load and Save • Save yourparameters: In the « File » Menu, youcan Save or Load a parameter file generated by the program. Do not change the parameter file manually, because it could be recognized by the program as a corrupt file and not be read. • When you save the parameters, a .csv file with the dataset will automatically be created in the same directory than the parameter file. • Auto save: Whenyou push the « Compute » button, the program willautomaticallysave a parameter file (DTIAtlasBuilderParameters.txt) and a .csv dataset file(DTIAtlasBuilderDataset.csv) in [OutputFolder]/DTIAtlas. It will also save a .csv file with the paths to all the interesting files generated, in this same folder(DTIAtlasBuilderResults.csv). • You can save your Dataset into a CSV file so you can load it and use it again later. • You can also load a CSV file containing paths to a Dataset you saved before or you wrote yourself with this format:
Keyboard Shortcuts • RETURN or ENTER: Compute • PLUS: Add cases • MINUS or DELETE: Remove cases • It isalso possible to drag and drop any file (DTI image, dataset CSV file, software configuration file or parameter file) into the window to beloaded.
Quality Control • By pushing one of the QC buttons, you will run MriWatcher to see the images at different steps of the compute, and check if the results are good.
Quality Control • Affine QC: Affine registeredFAs and last affine averagecomputed • Deformable QC: DeformablyregisteredFAs and Diffeomorphic Atlas • Final QC: Final DTI-Reg resampledFAs and final Atlas
Software Configuration Manual Configuration • If you have your own version of the programs or if you need to use a particular version of it, you can write the path manually or click the button to search it.
Software Configuration Automatic Configuration • By clicking the "Default" button, the program will automatically search all the programs in the PATH, and tell you if some of them are missing.
Software Configuration Automatic Configuration • If you want to reset the path for one or more programs, just push the "R" button and it will search the corresponding program in the PATH.
Software Configuration Load and Save • Save your configuration: In the « File » Menu, youcan Save or Load a configuration file generated by the program. • You can set an environment variable manually with the name “DTIAtlasBuilderSoftPath” and contaning the path to a configuration file. It will be read at the beginning of the program to configure the softwares. • When opening the program, it will automatically search and load any file called “DTIAtlasBuilderSoftConfig.txt” in the directory where the executable is and in the current work directory. So you can put this file in any of these folders and you will not have to set an environment variable to have to software automatically configured.
Command Line Command Line Options « DTIAtlasBuilder --help » : • Load : • -d <std::string>, --dataset_file <std::string> : CSV file containing the dataset • -p <std::string>, --parameter_file <std::string> : Parameter file fromthis program • -c <std::string>, --configuration_file <std::string> : Software configuration file • Options: • --overwrite: If you want to overwrite on compute (default: 0) • --nogui : If you do not need the GUI (default: 0)
Command Line No GUI mode • In « No GUI » mode, youneed to set the parameters by giving a parameter file in command line : DTIAtlasBuilder --nogui -p /home/DTIParameters.txt • The program will not display the GUI and willrunautomaticallywith the givenparameters, as if youhadpushed the « Compute » button.
GridProcessing • If you have the possibility of using a grid processing, you can run DTI Atlas Builder on this grid by checking the corresponding box and providing the submit command for your grid. For each step of the pipeline, the commands for all the cases will be submitted at the same time, and the program will wait until all cases have been processed.
ExternalRequirements • As DTIAtlasBuilder uses someexternaltoolsthatyoumay not have installed on your machine, you have the possibility to compile all toolsyoudon’t have in the same time thanDTIAtlasBuilder • The CMake cache contains an option « COMPILE_PACKAGE » thatwillallowyou to choosewhichtoolyouwant to recompile. • The external programsneeded are: • ImageMath • ResampleDTIlogEuclidean • CropDTI • dtiprocess • BRAINSFit • GreedyAtlas • dtiaverage • DTI-Reg • MriWatcher • unu • You canalsodownload the wholeexecutable package, to have DTIAtlasBuilder and the othertoolsalreadycompiled, ready to use: • http://www.nitrc.org/projects/dtiatlasbuilder
Data Organization … DTIAtlas 2_NonLinear_ Registration 3_Diffeomorphic _Atlas 4_Final_ Resampling Dataset .csv Parameters .txt Results .csv 1_Affine_ Registration Script Final Deformation Fields First Resampling Second Resampling Final Tensors LoopN Loop0
Data Organization • « 3_Diffeomorphic_Atlas » contains: • <case>_DiffeomorphicDTI.nrrd + float & FA • DiffeomorphicAtlasDTI.nrrd • + float, FA, Color FA, MD, RD, AD • « 4_Final_Resampling » contains: • Fisrt & Second_Resamplingtempfolders • FinalTensors: • <case>_FinalDeformedDTI.nrrd + float & FA • FinalDeformationFields: • <case>_GlobalDisplacementField.nrrd • FinalAtlasDTI.nrrd • + float, FA, Color FA, MD, RD, AD • « Script » contains: • DTIAtlasBuilder_MainScript.script • DTIAtlasBuilder_Preprocess.script • DTIAtlasBuilder_AtlasBuilding.script • « 1_Affine_Registration » contains: • LoopN: • <case>_LoopN_FA.nrrd • <case>_LoopN_LinearTrans.txt • <case>_LoopN_LinearTrans_DTI.nrrd • <case>_LoopN_LinearTrans_FA.nrrd • <case>_LoopN_NormFA.nrrd • LoopN_FAAverage.nrrd • <case>_filteredDTI.nrrd • <case>_FA.nrrd • (<case>_croppedDTI.nrrd) • « 2_NonLinear_Registration » contains: • GreedyAtlasParameters.xml • MeanImage.mhd • <case>_HField.mhd • <case>_InverseHField.mhd • <case>_NonLinearTrans_FA.mhd
Troubleshooting • Final Atlas is bad • If you see in the QC windows that the Affine and Diffeomorphic Atlases and registered images look OK, and that the Final Atlas and images look bad for all or most cases, that means that something went wrong during the FINAL registration.If this final registration was done using BRAINS, try to recompute it using ANTS (in the Final Resampling tab > Registration Method), which gives a better registration. • Loading parameter file fail • If a parameter file fails to open in DTIAtlasBuilder (Parameter file is corrupted), you need to recreate it by loading only the corresponding dataset file and setting your options again. • QC does not show up • If the QC windows do not appear when pushing the QC buttons, it might mean that you need to install the GLUT library to get MriWatcher to work.You can find the GLUT library here: http://www.opengl.org/resources/libraries/glut/glut_downloads.php
Contact For anyremark or question, please email: akaiser@unc.edu