Engaging Electromagnetism: Vanderbilt Student Presentation
Dive into the world of electromagnetism with Vanderbilt Student Volunteers for Science in this interactive training session from Spring 2016. Participants explore the fundamentals of magnets, the construction of electromagnets, and hands-on activities comparing properties of magnets and electromagnets. The session also delves into making electricity with magnets and building a motor using an electromagnet. Discover the fascinating science behind these concepts and enjoy practical demonstrations to deepen understanding. Students will engage in various experiments, from constructing circuits to visualizing magnetic fields, providing a comprehensive learning experience in electromagnetism.

Engaging Electromagnetism: Vanderbilt Student Presentation
E N D
Presentation Transcript
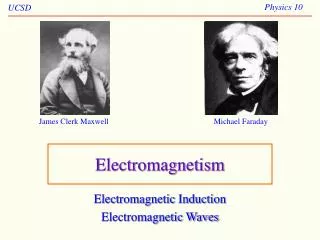
Vanderbilt Student Volunteers for Science Training Presentation Spring 2016 Electromagnetism
I. Introduction • Ask students what they know about magnets. • All magnets have two poles. • Same poles repel each other, but opposite poles attract • Magnets all have a 3-D magnetic field surrounding. • Ask students what they know about electromagnets • Electromagnets are made by wrapping wire around a core and passing current through that coil • The more coils there are, the stronger the magnetic force • They differ from permanent magnets in that they are temporary
II. Making an Electromagnet Using Batteries, a Nail and Copper Wire • Students will make the circuit as shown • Students should observe that the nails, when not connected to the circuit, will not attract paperclips • Students should press the switch and hold the nail so that the point of the nail is in the middle of a pile of paper clips. • They will see that when the circuit is completed, the nail with fewer (10) coils is not even able to pick up one or two paperclips • Students will remake the circuit using the nail with 50 coils, and they should see that it is able to pick up many more paperclips
III. Comparing Properties of Magnets and Electromagnets • Students will test the strength of the magnet by using 2 paperclips looped onto another and hanging them next to the magnet to observe attraction and field • Compare this to what occurs when the same paperclip loop is held next to the electromagnet • An electromagnet is made by passing current through a coiled wire. • Students should construct the circuit shown in the middle picture. Be aware there’s a #1 connector under the switch.
III. Comparing Properties of Magnets and Electromagnets (cont.) • Students use iron filings to visualize the magnetic field by placing a container of iron filings on top of a bar magnet and gently shaking the container • The denser the lines, the stronger the field at that point in space. • They then test the field of the electromagnet. • The shape of the field is the same as the bar magnet.
IV. Making Electricity with Magnets • Students will construct the electrical circuit as shown – leave the iron core out of the coil at the beginning. • The meter should be set to the middle mA setting. • The board should be flat on a table so that small movements will be visible. • Students should observe the meter needle as they move the magnet both with and without the core. Needle movement indicates current moving in the circuit.
Move the magnet both horizontally and vertically past the copper coil, as shown. The movement of the magnet induces current in the copper coil. IV. Making Electricity with Magnets (cont.)
V. Applications of Electromagnets – Using Electricity and an Electromagnet to make a Motor. • Tell students to look at the motor and identify the following parts: a permanent magnet, an electromagnet. copper wire, and a battery. • Point out the copper supports that connect the battery to the coil. • Point out that the copper wire is covered with an enamel coating for insulation. Tell students to look closely at the 2 straight ends of the copper coil. Both ends have had the enamel coating stripped from one side of the wire (it does not have the same shiny copper color as the other side). The coated side will not conduct electricity, whereas the stripped side will allow a current to flow through the coil.
V. Applications of Electromagnets contd. Tell students to: • Place the straightened wires from the coil into the U of the copper supports. The shiny (insulated) side must be facing UP. • Give the coil a gentle tap. If it spins continuously, the student has succeeded in making a motor. • If the coil does not spin, have the student tap it in the other direction. Optional: • Flip the magnet over (so that a different pole will now be facing up). Repeat steps 1-3. What happens?
V. Applications of Electromagnets contd. Explanation: We know that an electromagnet has a magnetic field when an electrical current flows through it. Magnets also have permanent magnetic fields. The 2 magnetic fields can attract or repel each other. • The motor works because electricity flows through the coil and a magnetic field is formed. The magnetic fields from the magnet and electromagnet repel each other. • The coil pushes away from the magnet with enough force to turn it around. As the coil rotates around, the coated side makes contact with the copper supports and breaks the electrical circuit. • Momentum carries the coil around to its starting position, when the stripped wire now comes back into contact with the copper supports. • The circuit is again completed, so the magnetic field in the electromagnet is created again, and the coil continues to spin. Motors are commonly used to convert electricity to mechanical energy.
Clean Up • Have the students reassemble the circuit components the way they received them. • Make sure all circuit components are collected and packaged properly. • Return all supplies to the VSVS lab.