Download
1 / 19
190 likes | 521 Vues
Digital Crime Scene Investigative Process. Acknowledgments. Dr. David Dampier and the Center for Computer Security Research (CCSR). System Preservation Phase. Evidence Searching Phase. Event Reconstruction Phase. Digital Crime Scene Investigation Process. No one right way to do it!.

E N D
Acknowledgments Dr. David Dampier and the Center for Computer Security Research (CCSR)
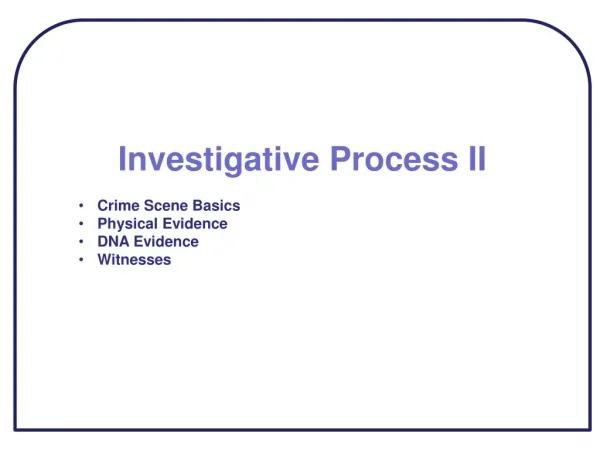
System Preservation Phase Evidence Searching Phase Event Reconstruction Phase Digital Crime Scene Investigation Process • No one right way to do it! Carrier, B., Page. 5, Figure 1.1
System Preservation Stage • Crime Scene Preservation • Depending on the situation, this will vary. • Take pictures of everything. • Room setup • Connections • Open windows on computers • Label all wires and connections. • Bag and Tag all evidence.
System Preservation (cont.) • Evidence Preservation • Seize all hardware that is necessary to reconstruct evidence • Jam or disable all wireless connections if possible • Make 2 (3) copies of all media • Authenticate all copies of media with MD-5 and SHA-1 hash algorithms
Evidence Preservation The data has to be protected physically and logically. Physically, make sure when transporting hard drives that it is stabilized and is not damaged by excessive vibrations. Another thing to look out for is static electricity. Logically preserving evidence means that that the information contained on the drive down to the last bit never changes during seizing, analysis and storage.
Evidence Preservation – Write Blockers Write blockers are devices that allow acquisition of information on a drive without creating the possibility of accidentally damaging the drive contents. They do this by allowing read commands to pass but by blocking write commands. These can be in the form or hardware or software blockers. It is very important that some type of write blocker is tested and used when working with data.
Evidence Preservation – Write Blockers (contd.) On our systems, we would use software write blockers to preserve the integrity of the data. We have included a tool that would do that (disable_usb_write.reg). BEFORE attaching the usb drive, the write-blocker needs to be invoked. Now, the usb drive can be attached, and this would ensure that nothing would be written on the usb drive. In a real scenario, a hardware write blocker would provide much stronger protection.
Evidence Preservation – Making Copies With the write blocker in place, you can now make several copies of the image. It is important that an image is made of the hard drive and not a copy or a backup. The reason for this is that an image will make sure to preserve important information such as slack space, time stamps, unallocated space and file system structures, which would not necessarily be there in a copy or a backup.
Evidence Preservation – Making Copies (contd.) It is a good idea to make at least 2 working images – one to be used as a backup and one to work on. In our tools folder, there is a Image command that actually uses the dd command to create an image of a hard drive. Most texts also suggest making a third image for discovery.
Evidence Preservation – Authenticating and Hash Functions It is now necessary to prove that all of these images are exactly the same, down to the very last bit! A hashfunction is any well-defined procedure or mathematical function for turning some kind of data into a relatively small integer. The values returned by a hash function are called hash values, hash codes, hash sums, or simply hashes.
Evidence Preservation – Hashing (contd.) In authentication, hashing is used to create a set of numbers that represent a drive or set of files. This is similar to fingerprinting someone. With hashing, a finger print is created from the evidence. No details about the evidence can be determined from the hash value, but if the evidence is altered in any way, the hash value will also change.
Evidence Preservation – Hashing (contd.) Two examples of hash functions are MD5 and SHA-1. MD5 was developed by Professor Ronald L. Rivest of MIT. The MD5 algorithm takes as input a message of arbitrary length and produces as output a 128-bit fingerprint of the input.
Evidence Preservation – Hashing (contd.) SHA stands for Secure Hash Algorithm. The SHA hash functions are a set of cryptographic hash functions designed by the National Security Agency (NSA). The five algorithms are denoted SHA-1, SHA-224, SHA-256, SHA-384, and SHA-512. SHA-1 produces a message digest that is 160 bits long; the number in the other four algorithms' names denote the bit length of the digest they produce.
Evidence Preservation – Hashing (contd.) Hashing tools can be found in the tools directory. The md5sum tool produces an md5 message digest (hash value). The hashcalc application can also create hash values using different hashing methods. The hashing is done on the data itself, and not on the names of files. There are existing databases of hash values for images, that can be used to find child pornography.
Evidence Searching Stage • Once everything is preserved, analysis must begin. • Forensics is a science, so there should be a hypothesis from which to work. • Direct searching activities to support this hypothesis.
Evidence Searching (cont.) • If you are looking for a specific file, i.e., child porn, compare hash values. • If you are looking for keywords, most software gives you a search capability. • Be specific to what you are looking for: • If you are looking for web activity, look in web files; history, cache, cookies, etc.
Event Reconstruction Stage • Last phase of investigation. • Trying to answer the question of what happened and how. • Evidence discovered during searching phase is reconciled with non-digital evidence to create a sequence of events to support the hypothesis.
General Guidelines • Use a write-blocking device to prevent accidentally writing to the suspect media. • Always work from a copy, not from the original. • Authenticate the copy so that you can prove that evidence discovered was on the original media. • Minimize file creation on working media to prevent over-writing of free space. • Be especially careful of opening files, especially without a write-blocker, because CMA times will change.