Importing AVI and TIF Files into PowerPoint Using Zeiss Image Browser
This tutorial guides you through the process of importing AVI and TIF files into PowerPoint using the Zeiss Image Browser. You will learn how to download the required software, open databases, and utilize various viewing modes. The tutorial covers individual file importation and provides tips on modifying images, adjusting colors, and removing unwanted overlays. With step-by-step instructions, you can enhance your presentations with high-quality imaging. Additional resources for further assistance are also provided.

Importing AVI and TIF Files into PowerPoint Using Zeiss Image Browser
E N D
Presentation Transcript
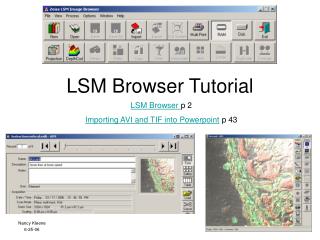
LSM Browser Tutorial LSM Browser p 2 Importing AVI and TIF into Powerpoint p 43 Nancy Kleene 6-25-06
Download the software • If you would like to view your images on your own computer, you must download the Zeiss image browser from this website: http://microscopy.uc.edu/downloads. The downloads are at the bottom of the page. • The Zeiss software does not have a Macintosh version. Macintosh users can view images (but not databases) using ImageJ with an additional plugin for viewing LSM images.
Get the latest version (3.5.0.376) • Check your version by selecting ‘Help’ and then ‘About’ from the menu bar • This version was available in Jan, 2006. • If you have not downloaded the browser since Jan 06, you’ll want to download the install program and install the software. • You do not need to uninstall the old version. • This new version has several abilities (e.g., multiple angle projections) that are absent from earlier versions.
Start the software • You can not open a database by doubleclicking on an ‘mdb’ file. • If you double click on an ‘mdb’ file, it will open in Microsoft Access. • Several years ago, if you did anything to the database in Access, it would be corrupted. • Click on the LSM Image Browser Icon to start the software.
Open a database • To open a database, select the ‘Open’ button from the upper row of buttons. • Highlight the appropriate database. (This protocol uses a database called instructionconfocal.mdb. You can download the folder that has this database (.mdb file) and the lsm files from the same website that had this protocol. http://microscopy.uc.edu/protocols/) • Click the ‘Open’ button on the Open Database dialog box.
The three modes of the browser are Form, Gallery, and Table. • They can be obtained by selecting one of the top three buttons in column of icons on the right. • The Form mode shows info for a single image. • To see info from a different lsm file, move the slider at the top of the dialog box. • To open a file, double click on the thumbnail image or select the ‘Load’ icon. Form Mode
Gallery Mode • The Gallery mode allows you to view many images at once. • To open an image, double click on the desired thumbnail.
Table mode • The Table mode lets you compare the acquisition parameters of several images. • Double click on the desired row to open the image.
Import the LSM image if you do not have a database file • Sometimes the database is corrupt or you failed to copy it. • You can import an individual LSM file by selecting the ‘Import’ button on the top row of buttons. • Select the desired LSM file and click on the ‘Open’ button.
Where to get more help • The rest of the buttons on the Database dialog box are either self explanatory or seldom used. • If you would like further information, download the manual for the LSM browser from http://microscopy.uc.edu/downloads.
Image Buttons – xy vs. Split xy • When the XY button is depressed, all the channels are overlaid on a single image. • Depress the ‘Split XY’ button, to add an image for each channel used.
Image Buttons – Chan • When the ‘Chan’ button is depressed, buttons for each channel appear on the right of the image. • Click on the desired channel to see a list series color options. • Click one of the buttons to change or remove a color (here we have removed red).
Removing DIC from the overlay The DIC images makes it hard to see colocalization in the overlay. You can remove the DIC component from the overlay by clicking on the channel button. Then, Click on the ChD button and select the OFF button in the resulting dialog box. Dialog box for channel colors
Image Buttons - Zoom • The ‘in’ button will make the image a good size for viewing on the confocal monitor. • ‘Resize’ with take the image back to default. • The slider at the bottom lets you zoom in increments. • Pushing the ‘All’ button before zooming zooms to the same place within all windows.
Image Button – Overlay- Scale Bar • The Overlay button is the location of the scale bar, ruler, crop, and other functions. • To make an scale bar, select the scale bar button. • Then, select a color and a thickness. • Then draw the bar on your image. • The software knows how to define the scale bar because it knows what objective and zoom you used during acquisition.
Image Button – Overlay - Crop • To crop an image, select the rectangle button and draw a box around the desired area. • Then select “Extract Region” to open a new image box with only the cropped image
Image Buttons – Overlay - Measure • To measure a distance or area, select the ruler and then the appropriate tool. • Draw the line or region on the image. • Use multiple mouse clicks to draw a curved region. • The values are shown on the image.
Image buttons – Contr • The ‘Contr’ button lets you alter contrast and brightness but I think these are easier to alter in Photoshop where you can see the histogram and control the black level more directly. • If you used the More button before saving the image on the confocal, it will not be grayed out as shown here. • The ‘More’ button lets you change gamma, which is also controllable in photoshop (see the tutorial for Photoshop).
Image buttons – Palette • If you would like to change how the image is Pseudocolored, select the ‘Palette’ button. • If one saved the image using the ‘Range Indicator’ palette, one can get back to the colors as defined in the ‘Chan’ button by selecting ‘No Palette’.
Image buttons – Copy • The ‘Copy’ button helps make a low resolution montage. • Select the ‘Multiprint’ button from the top row of the main menu bar. • Use ‘Copy’ on the image and ‘Paste’ on the multiprint window to transfer images to the multiprint. • You can change of the size of the pasted images by dragging corners after clicking on the image. • You may need to ‘Setup’ your printer before pasting or be prepared to resize some of the pasted images. • Zeiss doesn’t provide you with a way to save the montage as a file.
Image buttons – Save • The ‘Save’ and ‘SaveAs” buttons DO NOT let you save images as tifs or jpgs. • They only let you save the image in a LSM database. • If you wish to save to the same LSM database, you will get a warning about the fact that the browser format is newer than the format on the confocal. • I know of no problems associated with converting your database to the newer format but I haven’t tried to open the converted database on the confocal, as one might do to ‘Reuse’ as setting. • I always say ‘no’ and then create a new database for any files that I alter in the browser.
Image buttons – Info The Info button reveals acquisition parameters.
Image Buttons – Info • If you don’t see all the acquisition parameters, you need to change your options as follows. • Select ‘Options’ on the main browser bar. • Select ‘Options’ again. • Select the‘Image Status Display’ tab. • Click the acquisition info that you wish to see. • Select ‘OK’.
Z Stack – Slice Button • The slice button will allow you to view different xy images in the z stack. • The fraction at the bottom of the slide describe which of the total number of slices you are currently viewing.
Z Stack – Gallery Button • The Gallery button will show a montage of the slices. • The data button is optional; it labels each slice with its depth.
Z Stack – Gallery Button • The ‘Subset’ button will allow you to make a new stack with only some of the slices, here every other slice between the 8th and the 32nd slice. • If you selected OK, you would make a new, shorter stack that you could then save.
Z Stack – Ortho Button XZ image • The ortho button is a way of showing all 3 dimensions on a 2D piece of paper. It is great for publications. • The XY image is in the center • The XZ image is on top and the YZ image is on the right side. XY image YZ image
Z Stack – Ortho Button • You may want to crop the image before using the Ortho view so that the XZ and YZ images are closer to the same size as the XY image. • The green line on the XY image shows where the stack is cut to form the XZ image. • The red line on the XY image shows where the stack is cut to form the YZ image. • The blue line on the XZ and YZ images show the location of the XY slice. XZ image YZ image XY image
Z Stack – Ortho Button • You can pick a different place in the stack by moving the sliders on the right. • Alternatively, you can click on the ‘Mouse’ button and then click at the desired location in the image. • There is a way to measure distance in 3D with the ‘Dist’ button, but it is a little tricky. Let us know if you would like some help with that function. Mouse button
Z Stack – Cut Button • The ‘Cut’ button allows one to make cuts at angles in additional to orthogonal angles. • The black lines of the cube outline the stack while the red orange rectangle indicate the orientation of the currently shown slice.
Z Stack – Cut Button This is one way to get a side view without having to get the other views.
Z Stack – Projection • The latest version of the browser will let you make multi-angle maximum and transparent projections. • Maximum Projections are more common than transparent projections. • Surface renderings can not be done in the browser. You need ‘3D for LSM’ on the confocal. • Select the ‘Projection’ button on the main menu bar. • For a Maximum projection, select ‘maximum’ on the ‘transparency’ tab.
Z Stack – Projection • Select the desired stack in ‘source’ and select the ‘Projection’ tab. • A common way to get the impression of a 360o projection is to use 32 projections with a difference angle of 6o and a first angle of 0. • Click ‘Apply’ to make the projections. • One usually rotates around the Y or X axis. • You can click on the edges of the diagram that shows the planned projections and pull on it to change the plan.
Z Stack – Projection • This shows one of the slices from the maximum projection that was made using the settings from the last screen. • One can use the Slice or Gallery buttons to view the maximum projection at other angles. • Now, that projections can be made with the browser in a matter of seconds, there is much less need to save an entire stack of projections.
Z Stack – Projection- Animation The ‘Anim’ button allows you to play the rotating series of projections at various speeds.
Converting LSM to TIF: Export • There are a couple ways to export to a tif. The following instructions will work for nearly all situations. • Use the Chan button select which channels you want in the final image. • Select the ‘xy’ button. • Select the ‘Export’ button on the main menu bar.
Converting LSM to TIF • Select “Full resolution image window – single plane” as the ‘Image Type’. • This image type will save anything you may have added to the image such as scale bars. • Save as a TIF image. Do not select 12 or 16 bit versions. • Type a filename and select ‘Save’
Converting an LSM stack to a series of TIFs • To export a stack of slices or projections, use ‘Full resolution image window-series’ • This will save a tif image for each slice or projection. • A number will be added after the base file name to indicate the slice or projection.
Exporting a gallery as a TIF • You can export the gallery view as a tif. • Use the Image type option that starts with ‘Gallery’. • You may have a choice of resolution for the gallery.
Exporting an Ortho or Cut view as a TIF • The only way to export an Ortho or Cut view is by using the Image Type option “Contents of image window- single.” • This will be at a resolution that depends on the size of the image box. The number of microns per pixel will probably be different from what the original LSM file is.
Export a Cut view as high resolution TIF • Often one wants a linescan image from a Z-stack. This is better generated with the cut function than with the ortho function. • Increase the zoom and adjust the WIDTH of the window so that the scan is as large as possible so that the image will have as many pixels as possible. • Decrease the height of the window to be just larger than the cut view. • Export as ‘Content of image window – single plane’. This will yield an image with as many pixels the image covered on your screen. • You should make scale bars based on your knowledge of the width and height of the image because the LSM file’s microns/pixel measurements do not apply to this repixeled image. • If you find this unsatisfying, Metamorph can do this with more precision or you can acquire a Z line scan instead of a Z stack.
Export to AVI with the Browser • Select ‘Export’. • Select ‘Full resolution image window series’ as the image type. • Select the Frame rate. • Select ‘AVI’ for ‘Save as type:’ • Enter a file name and select a location. • Select ‘Save’.
Importing AVI into Powerpoint • If the file is larger than 50 megs, you may have trouble playing it. • You can crop the image or select every other frame before saving as AVI to decrease the file size. • If you need all the frames, Metamorph has some compression methods. Contact the CBM for more details. • To import into PowerPoint, select ‘Insert:Picture:from file’ • Select the AVI file and click ‘OK’.
Importing AVI into Powerpoint • Answer the question about whether or not you want the movie to play automatically. • You will need to click on the movie and move it. • Use the corners to resize in order to maintain the one to one pixel ratio. • Right click on the image and select ‘Edit Movie Object’. • I usually click the boxes about looping and rewinding. • Then, select ‘OK’
Importing AVI into Powerpoint • Movies are only LINKED to the PPT file; they are NOT saved in the PPT file. • We learned the hard way that you must keep the AVI file in the same folder at the PPT file when you play the PPT file. • Actually, the PPT file will want the AVI file to be in the same folder it was in when you linked it. • It is easy to move the AVI file to the folder with the PPT file is and then import the AVI file. • This not necessary for TIF images. TIF (and JPEG) images become a part of the PPT file. • What should you do before presenting a PPT file with movies on a new projector or cpu? Get there in time to make sure the movies play. I like to test the day before.
Inserting a TIF (or JPG) image into PowerPoint • To import into PowerPoint, select ‘Insert:Picture:from file’ • Resize the image by clicking on and moving the corners, NOT the sides. • Clicking on the image will activate a picture tool box that will allow you to crop or adjust contrast & brightness.