SAFARI ODBC INSTALLATION
300 likes | 413 Vues
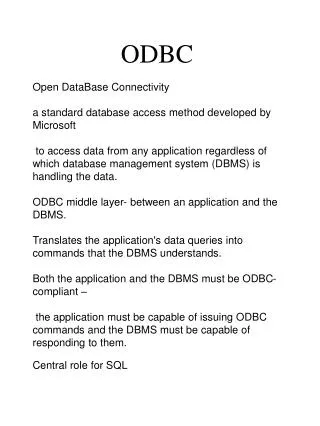
This guide provides step-by-step instructions for downloading and installing the SAFARI ODBC driver. Start by visiting the TRECA home web page and navigating to the Fiscal Services section. After locating your username and password, download the SAFODBC.EXE file. Follow the unzipping process to create the necessary folder, and proceed with the installation. Enter your license key and configure the server settings for the packages you want to access, including USAS, USPS, SIS, EIS, and EMIS. Ensure you have Microsoft Query installed for database access.

SAFARI ODBC INSTALLATION
E N D
Presentation Transcript
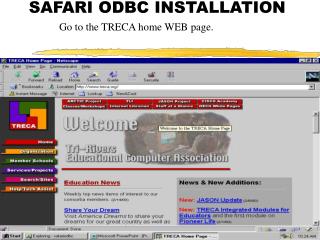
SAFARI ODBC INSTALLATION Go to the TRECA home WEB page.
SAFARI ODBC INSTALLATION Click on Services/Projects to the left of screen
SAFARI ODBC INSTALLATION Go to Fiscal Services and click on get more info on Fiscal Services.
SAFARI ODBC INSTALLATION Scroll down to SAFARI and Click on here to get information on how to download and install.
SAFARI ODBC INSTALLATION Scroll down to the download SAFARI download section.
SAFARI ODBC INSTALLATION Click on the SAFARI Download Page section that is highlighted.
SAFARI ODBC INSTALLATION Locate username and password . You will need a username and password to down load the SAFODBC.EXE file. To locate the username and password go to the TRECA main menu. Select the local option then find the SAFPASS option and select it. It may be located on the 2nd page of the menu options.
SAFARI ODBC INSTALLATION Enter username = safari and password = oasis17
SAFARI ODBC INSTALLATION Scroll down to the file you want to down load.
SAFARI ODBC INSTALLATION To download the SAFODBC.EXE click on “Click her to Download the SAFODBC.EXE file”.
SAFARI ODBC INSTALLATION To Unzip the SAFODBC.EXE file go to DESKTOP, If that is were you saved the SAFODBC.EXE and double click on it.
SAFARI ODBC INSTALLATION To build the SAFARIODBC folder to unzip the the SAFODBC.EXE program in do the falling: A. Right click on START. B. Left click on EXPLORER. C. Scroll down and find C folder then highlight it. D. Create new folder SAFARIODBC by clicking on the File option at the top of the screen, then highlight the New option, then click on the Folder option. A new folder will be created call New Folder. Rename it to SAFARIODBC and hit the return key. E. Close Explorer and return to the SAFARI ODBC INSTALLATION and unzip the SAFODBC.EXE in the new SAFARIODBC folder.
You need to create a special directory to unzip the files in. In this case I used SAFARIODBC directory. The unzip may default to Windows \Temp directory. Select correct folder and click on Unzip. SAFARI ODBC INSTALLATION
SAFARI ODBC INSTALLATION Files will be unzipped. Click on OK.
SAFARI ODBC INSTALLATION Double click on Setup.exe file.
SAFARI ODBC INSTALLATION Safari ODBC installation will begin. Click Next
SAFARI ODBC INSTALLATION Enter the License Key: SB-43714-1066
SAFARI ODBC INSTALLATION English is the default, keep it and click Next
SAFARI ODBC INSTALLATION The default is Perform Full Instillation. Keep the default and click Next
SAFARI ODBC INSTALLATION Click Yes to accept the license
SAFARI ODBC INSTALLATION Click Add to add the packages you want to access. Available packages are USAS, USPS, SIS, EIS, EMIS.
SAFARI ODBC INSTALLATION Connection Name will be server you are setting up, USAS, USPS, SIS, EIS, OR EMIS. Put treca0.treca.org as Server Name, enter your username. Do N O T enter password information. Click on Advanced Setup.
SAFARI ODBC INSTALLATION Enter the Path Name as oecn$:safari name Replace name with the system you are setting up to access, will be same as connection name above. In this case it is eis so path name would be oecn$:safari eis
SAFARI ODBC INSTALLATION Continue to use the Server Connect box to add all of the packages that you are authorized to access. You will have to repeat the add and complete the advanced settings for each package you want to access. The settings will be the same for each package accept for replacing the package name USAS, USPS, SIS, EIS, AND EMIS for each add that you do. After all packages have been added click Next to continue the setup process.
SAFARI ODBC INSTALLATION The Program Folders name will default to Safari Info Tools Leave the default and click on Next to continue.
SAFARI ODBC INSTALLATION Leave the default settings, “C:\SafarilT\Safodbc” and click Next to continue.
SAFARI ODBC INSTALLATION Copying installation files… screen will appear show the instillation progress.
SAFARI ODBC INSTALLATION Once all files have been copied the following screen will be displayed. Click Finish to complete the instillation.
SAFARI ODBC INSTALLATION You have completed the instillation for Safari ODBC. In order to access from your PC you must have Micro Soft Query install. A normal installation of Micro Soft Office will not install the Query. You may have to reinstall Micro Soft Office and tell it to install everything. This is normally done through the custom install procedures.