Edline Teacher Web Pages
500 likes | 639 Vues
Edline Teacher Web Pages. January 5, 2009 Presentation. Please log on to www.edline.net under your user name and password. This presentation will be posted on the Teachers Shared folder for further reference. Teachers can begin using the Edline teacher pages as soon as today.

Edline Teacher Web Pages
E N D
Presentation Transcript
Edline Teacher Web Pages January 5, 2009 Presentation Please log on to www.edline.net under your user name and password. This presentation will be posted on the Teachers Shared folder for further reference. Teachers can begin using the Edline teacher pages as soon as today.
Edline Web Solution Layout & Implementation Current website and home page for CES will remain at www.ces-richmond.org indefinitely. Teacher pages, sports pages, etc. will be automatically directed to the Edline pages once the pages are in use or by the full implementation date, whichever is sooner. Parents will have to sign in to Edline to see calendar, etc. Some pages will remain public. Full implementation to launch at the start of the next school year.
Teacher’s Home Pages Organization The home page contains a picture and a description of the group as well as boxes and folders where you can post important information about the group. Folders Include: News Items Calendar Events Links Assignments
Teacher’s Home Pages Organization Shortcut boxes allow you to quickly view your own classes, activities, and personal documents. They also allow you to view this same information for any student you are linked to. • There are three types of shortcut boxes: • People (teachers with children who are students) • Documents (like gradebooks and upcoming tests) • Classes and other groups.
Teacher’s Home Pages Organization The My Contents box lists shortcuts and other personal documents and scheduled events. The "My Gradebooks" link shows you all the gradebooks you currently have stored in Edline.
Teacher’s Home Pages Organization The "Old Class Materials " link takes you to a folder containing documents you posted on class home pages in previous terms. When one of your classes is deleted, Edline saves a copy of all the items you posted to that class, excluding gradebook reports, into your "Old Class Materials" folder. You can copy any document or folder from here into your current classes. This feature allows you to re-use class materials from your previous classes.
Teacher’s Home Pages Organization The "Combined Calendar" link displays all the events that have been posted to the school calendar, and to all the other groups you are specifically a member. It allows you to see the events that are important to you with just one click. The calendar viewed by the parent will automatically list every assignment, activity, or upcoming event assigned to that student. This calendar is for viewing only, it cannot be modified. For example, on February 15th, two different students’ calendars may read: Word Within A Word Test Math Quiz, Chpt. 15 Basketball Game, 4:00 CES Free Dress Day Science Projects Due Library Books Due Social Studies Test- Alamo Math Facts Test Free Dress Day Basketball Game, 4:00 CES
Teacher’s Home Pages Organization The Command Center Allows You Access To Your Gradebooks & Class Web Pages From Command Center, you click on the individual web pages for each class. From these individual web pages, you can begin setting up your page and adding content.
Setting Up Your Home Page Change The Name Of Your Page • The name of the group (class) is displayed at the top of the group's home page. • To change the name... • Go to the home page of the class whose name you want to change, then click the "Manage Class" link in your Command Center. • The Name field is in the Information section (the title of the section changes to match the type of group you are managing). Enter the new name in the name field. • Click the ""Save & Return" button at the bottom of the page.
Setting Up Your Home Page Class ID – Only For Classes The Class ID is used to upload the reports from Gradequick to Edline & to identify sections of the same class. Please do NOT change your Class ID
Setting Up Your Home Page Change The Class Picture • You can display a single picture, drawing, or image in the center of the group's home page just below the group name. • To change the picture... • From the Manage Class screen, scroll to the "Image" section at the bottom of the page • Click the "Browse..." button. A file selection dialog box will appear. • Find the file that contains the picture or image you want and click the "Open" button in the dialog box. The full path to the file you chose is now displayed in the field next to the "Browse..." button. • Click the "Save & Return" button at the bottom of the page. The next time someone visits the group, this picture will be displayed on the home page. Click “Remove” to remove this picture and choose another one.
Setting Up Your Home Page Change The Class Picture Helpful Hint…………… IMPORTANT: To avoid distortion when your picture is displayed on the group home page, we recommend you use an image file that is * a .jpg, .png, or .gif; * approximately 314 pixels wide (the height does not matter); * smaller than 75 Kilobytes
Setting Up Your Home Page Change The Class Description • The description is displayed in the center section of the group's home page below the group picture. • To change the description... • From the manage class screen, type a short description into the Description field. • Then click the "Save & Return" button at the bottom of the page. Helpful Hint…………… IMPORTANT: The Description Should Be Short, Generally A Quick Welcome.
Setting Up Your Home Page Adding & Deleting Members Adding and Deleting Group Members and Changing Web Address Is Done By The Super Users. You Can Make Add or Delete A Member If They Are A Member Of Your Group Or Class. Information Is Available In The Teachers Shared Folder On The Server If You Need To Add Someone.
Setting Up Your Home Page Setting Group Policies & Permissions Group policies and permissions allow you to control which types of users can create documents directly in the Contents box on the group home page. The documents they create will need to be approved before anyone other than you and the author can see them. When this group was created, EDLINE automatically set default policy values. In most cases, these are just fine. Helpful Hint…………… IMPORTANT: The Group Policies Should Only Change In Rare Circumstances. Information On How To Make Those Changes Is In The Teachers’ Shared Folder On The Server.
Setting Up Your Home Page Change The Class Visibility The visibility of the group is simply the set of people who are allowed to visit it. Most of the time, you will want everyone to be able to visit. If there are certain documents within the group that you do not want everyone to see, then you can set the visibility of those documents (or the folder that contains them) to be more restrictive. The current setting for the visibility of this group is displayed in the Visibility section near the top of the page. Helpful Hint…………… IMPORTANT: Visibility of individual sections of your page can change. Detailed instructions are available in the Teachers’ Shared folder on the server.
Adding Information To Your Home Page Creating Folders Folders in Edline are a place to put things to keep them organized. When you create a folder, it goes into the Contents box on the class home page. Edline creates some folders for you such as Assignments. There are three kinds of items you can put inside a folder: Documents Groups Other Folders
Adding Information To Your Home Page Creating Folders • From the class home page, click the "Edit" button at the top of the Contents box. • Select "Folder" from the pull down menu and click the "Add" button. • Enter the name of the new folder in the "Title" field. • Under the "Folder Management" heading, set the member permissions and policies for the new folder, if necessary. • Click "Save & Return" to save this folder and return to the original contents page. However, if you wish to add another folder, you can quickly do so by clicking "Save & Add Another". Your folder will be saved, and your cursor will be appear in the Folder Name field, allowing you to begin the folder entry process immediately.
Adding Information To Your Home Page Combined Calendar!!!!!!!!! • Edline Creates A Combined Calendar For Every Student. This Calendar Is Personalized For Each Individual Student. • As you add assignments or activities, the combined calendar will be amended to reflect those changes. • The changes only will be added if you add a date to the document.
Adding Information To Your Home Page Creating Documents When you want to post information to Edline, you do it by creating a "document". A document can be a quick note you type directly into a text box on Edline, an assignment you created with word processing software (for example, a Microsoft Word file), or a web document. You can put documents in the News section, the Calendar section, and the Contents section on your group's home page. Links that are posted in the Links section are special kinds of documents. Helpful Hint…………… IMPORTANT: Giving A Document A Date Automatically Adds It To The Combined Calendar.
Adding Information To Your Home Page Creating Documents Documents Are Created In Folders Any time you create a document with a date, it will be created with a "category" in the Calendar. The category that is assigned to the document is based upon the folder in which it was created. Assignments should be created in the assignment folder, tests in the test folder, activities in the activities folder, etc. Default folders have been created, but you can add folders as needed.
Adding Information To Your Home Page Creating Documents Select A Section Of The Home Page You Want Your Document To Appear • News section • Calendar section • Links section Contents section (not in a folder) • A folder in the Contents section (homework, projects, tests)
Adding Information To Your Home Page Creating Documents Adding a Document to a Folder • Open the folder where you want to put the document. • Click the name of the folder in the Contents section. This will open the folder.
Adding Information To Your Home Page Creating Documents Adding a Document to a Folder Select "Document" from the pull down menu and click the "Add" button. This button is at the top of the page. Clicking this will take you to the Create Document Page.
Adding Information To Your Home Page Creating Documents Adding a Document to a Folder Enter Summary Information for your document, add a Calendar Date, and click “Add”. You will be sent to the Create Document Page, where you enter a title for the document in the "Title" field. If you would like the document to show up on the calendar, enter a date in the "Calendar Date:" field.
Adding Information To Your Home Page Creating Documents Adding Content To Document You Create In A Folder When entering content to a document, you are given the three options (below the title and description):
Adding Information To Your Home Page Creating Documents Adding Content To Document You Create In A Folder Option 1: Text By Hand • To make a text box appear to type your content, click on the link that reads "Enter text by hand (with optional link and image)". • Type text into the box provided, using the Rich Text Formatting options to customize the text (to change font, color, style, etc).
Adding Information To Your Home Page Creating Documents Adding Content To Document – Option 1: Enter By Hand • You can add a photo to go with the information you typed. • Browse and select an image that you wish to display with your text (if applicable). • Choose any additional groups/classes that you wish to multi-post the document to, and add them to the 'Additional Posted Groups' box. • Click the 'Save & Add Another'. Or, click the "Save & Return" button if you are finished adding events.
Adding Information To Your Home Page Creating Documents Helpful Hint…………… To quickly create multiple events at one time, click the "Save & Add Another" button. This will allow you to return you back to a new, blank calendar event create page quickly to add another event. This will assist you in quickly creating many calendar items at one time. If you choose to, you can add a link to a related web site. That link will appear at the bottom of the document when your users view it. Note that this link will only appear for documents that are entered into the content field and will not appear for imported documents.
Adding Information To Your Home Page Creating Documents Adding Content To Document Option 2: Upload Existing File • When you import a document you have already created, the formatting (like bolding, centering, tables, etc.) will be maintained. • The only thing that won't be imported are pictures in the file (if you use the "Import File" option). You can, however, add a picture.
Adding Information To Your Home Page Creating Documents Adding Content To Document Option 2: Upload Existing File To make the 'Import a file' field appear, click on the link that reads "Import an existing file (e.g. MS Word, PDF, Excel)". HTML: Once you have imported an html file into Edline, you have the option to convert the html code to Rich Text Format for editing purposes. However, once you convert the html document to Rich Text Format, you cannot change it back to html format. You can also edit the html by hand and not convert it to Rich Text Format, if you wish.
Adding Information To Your Home Page Creating Documents Adding Content To Document Option 2: Upload Existing File • Click the "Browse..." button next to the "Import File" field. You will see a file selection dialog box. • Find the file that you want to import and click the "Open" button in the dialog box. The full path to the file you chose is now displayed in the "Import File" field. • Click the "Import" button to bring the file into Edline. Then click the "Save & Add Another" button at the bottom of the page. If you are finished entering events, click the "Save & Return" button to return.
Adding Information To Your Home Page Creating Documents Adding Content To Document Option 3: Upload Web Documents It is now possible to upload a Web Documents to your school's Edline site. For example, you can now post an HTML page showing multiple pictures from a class field trip. Web Documents will enable you to enhance pages of your Edline site with multiple pictures, flash, and just about anything else you can create using HTML. To upload a Web Document to Edline, you must upload a Zip file containing all of the HTML related files that comprise the web page or group of web pages. Web Documents can appear as News items, Calendar Items, as Assignments-just like any other type of document that appears on Edline.
Adding Information To Your Home Page Creating Documents Adding Content To Document Option 3: Upload Web Documents • Place the cursor in the box and select the appropriate Zip file by using the 'browse' button. • Enter the Default starting Page of the group of web pages that you have uploaded. Typically the default starting page of a group of web pages is titled 'Index.html'. If this is not the case, or you do not know the default starting page name, leave the field blank. • Choose any additional groups/classes that you wish to multi-post the document to, and add them to the Additional Posted Groups box. • Click the "Save & Add Another" button to save your changes and add another event. Or, click the "Save & Return" button if you are finished creating events.
Adding Information To Your Home Page Creating Documents Helpful Hint………. If there are copies of this event on other group calendar , Edline defaults to automatically applying changes to all copies of the event. If you do not wish to apply the changes to all copies, uncheck the box at the bottom/top of the page that reads "Apply changes (update or delete) in all locations". This applies to all documents, either uploaded, linked, or typed directly in to Edline.
Adding Information To Your Home Page Creating Documents The News Section The News box contains documents like special announcements and important reminders that you want people to see right away. The most recently created or modified items are always listed at the top of the box. News items can have a short summary displayed below the title for users to read. Click on the title of a item to read the full story.
Adding Information To Your Home Page Creating Documents Creating A Document In The News Section Click the "Edit" button at the top of the News section.This will open the News section. Select "News" from the pull down menu and click the "Add" button.This button is at the top of the page. Clicking it will take you to the Create Document Page.
Adding Information To Your Home Page Creating Documents Creating A Document In The News Section Enter Summary Information for your item.Once you click the "Add" button, you will be sent to the Create Document Page. Enter a title and document summary for the item in the appropriate field.
Adding Information To Your Home Page Creating Documents Creating A Document In The News Section • Enter Summary Information for your item.Once you click the "Add" button, you will be sent to the Create Document Page. Enter a title and document summary for the item in the appropriate field. • Add Content to your news event.Information is entered the same way as it is entered for an assignment or existing folder. You can add by hand, upload an existing file, or upload a web document. • Specify any additional groups that you want the event to appear in.Select any additional groups from the "Available Groups:" menu. The menu is located in the "Multiple Posting"section of the page. • Click the "Save & Return" button at the bottom of the page when you are finished.
Adding Information To Your Home Page Creating Documents Creating A Document In The Calendar Section • Click the "Edit" button at the top of the Calendar section. This will open the Calendar. • Select "Event" from the pull down menu and click the "Add" button. • Enter Summary Information for your event and select a category/folder. You will add a title and choose a category (or choose uncategorized). • To add a calendar event that will appear in the all individualized calendar, you have to have Super User privileges. You need to have Malcolm, Colleen, Brooke, or Rachelle enter this information for you.
Adding Information To Your Home Page Creating Documents Creating A Document In The Calendar Section • Add Content to your calendar event. Information can be entered the same way it is entered in the assignments folder. • Specify any additional groups that you want the event to appear in.Select any additional groups from the "Available Groups:" menu. • Click the "Save & Return" button at the bottom of the page when you are finished.
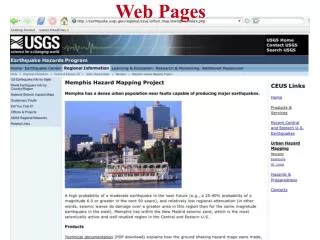
Adding Information To Your Home Page Creating Links To Other Websites Creating A Link In The Links Section The Links section contains links to other web sites that may be useful to members of the group. For example, an art class might have a link to the local museum.
Adding Information To Your Home Page Creating Links To Other Websites Creating A Link In The Links Section • Click the "Edit" button at the top of the Links section. This will open the Links section. • Select "Link" from the pull down menu and click the "Add" button. • Add a title and enter summary information for the link. Enter a name for the link in the "Title" field. If you wish for this link to appear on the calendar, you can enter the calendar date in the "Calendar Date" field. • Enter the address of the web page you want to link to. Edline has created and saved an empty link with the name you chose in the previous step. Now just enter the address for the web page you want to link to.
Adding Information To Your Home Page Creating Documents Adding A Document To The Contents Section When you add a document directly to the Contents section, it does not go inside a folder. It is just listed in the Contents section along with all the folders. Documents in the contents folder should be limited to only a few items. Examples of suggested documents could be: Reading List Merit/Demerit Description Class Rules
Adding Information To Your Home Page Creating Documents Adding A Document To The Contents Section • Click the "Edit" button at the top of the Contents section. • Select "Document" from the pull down menu and click the Add button. • Enter Summary Information for your document and add a Calendar Date.Click the “Add” button. Enter a title for the document in the "Title" field. If you would like the document to show up on the calendar, enter a date in the "Calendar Date:" field. • Add Content to your document the same way you enter content for assignments. • Specify any additional groups that you want the document to appear in.Select any additional groups from the "Available Groups" menu. Click the "Save & Return" button at the bottom of the page when you are finished.
Adding Information To Your Home Page My File Locker To Save Documents The My File Locker folder is a place for you to store documents that you may want to use later (or next year) in your classes, clubs, sports, or other groups you manage. Use this locker to store new documents that you are not ready to use yet, to store old documents you have used before and may want to re-use again, or anything else you want. You can upload documents directly into your locker, copy documents into your locker from other locations in Edline, and copy documents out of your locker to other locations.
Adding Information To Your Home Page My File Locker To Save Documents • Go to the group or folder that contains the item(s) you want to move- open the folder that contains the item(s) you want to move. • Click on the name of the folder in the 'Contents' box to open it. • Select the item(s) you want to move. Click the checkbox next to each item you want to move. If you select a folder, the folder and all its contents will be moved. Helpful Hint………. If the item you want to copy is in the News, Calendar, or Links boxes, or is directly in the Contents box (rather than in a folder), click the "Edit" button at the top of the appropriate box to open it.
Adding Information To Your Home Page My File Locker To Save Documents • Click the "Move To..." button at the bottom of the page. Choose 'My File Locker' as the destination. • You will be sent to a page that displays the 'Current Location' of your document(s), folder(s), or group(s), along with a 'tree view' that will allow you to choose the new location of the folder, group, or class where you wish to move the selected item. • Left click on the name (until it is highlighted), and then click the button that reads 'Move Selected Item(s)'.
You’re Finished!!!! Directing Your Home Page Once Your Home Page Is Created, We Can Re-Direct Your Parents From The Current Site To Your New Page. It Will Be A Straight Click Through This Presentation Plus Tons Of Additional Information Is Available On The Teachers’ Shared Folder On The Server.