Download
1 / 20
0 likes | 19 Vues
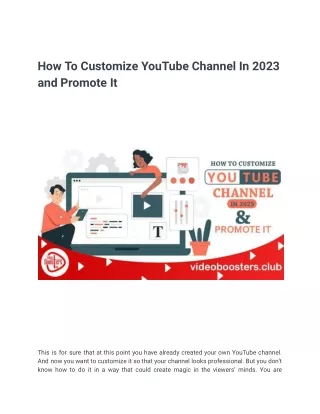
This is for sure that at this point you have already created your own YouTube channel.<br>And now you want to customize it so that your channel looks professional. But you donu2019t<br>know how to do it in a way that could create magic in the viewersu2019 minds. You are<br>looking for a perfect tutorial so that you can customize YouTube channel on your own.<br>Isnu2019t that right? Of course! Otherwise, why are you even here.

E N D
How To Customize YouTube Channel In 2023 and Promote It This is for sure that at this point you have already created your own YouTube channel. And now you want to customize it so that your channel looks professional. But you don’t know how to do it in a way that could create magic in the viewers’ minds. You are
looking for a perfect tutorial so that you can customize YouTube channel on your own. Isn’t that right? Of course! Otherwise, why are you even here? Therefore, we are here to help you with that. In this article, or I can say tutorial, you are going to learn how to customize YouTube channel properly. And we believe, after reading this, you will do that without any problem. Keep reading… How To Customize YouTube Channel Properly Finally, we are going to see what these steps are to customize your YouTube channel. But it is advisable to use this tutorial as a guide and just follow these steps at the same time while reading. Ready? Start… Step 1
First, go to your Chrome browser on your desktop. Then log in to your Gmail ID on which you have created your YouTube channel. So that later you don’t have to do anything related to logging into Google. And if you do this now, it will be pretty easy too. Step 2
Then, after completing the login step, you will find a search box on the screen. This is where you can ask and search for anything to get information from the web. Here, type this link, “studio.youtube.com.” Then press the enter button on your keyboard. Step 3
The YouTube studio is now open in front of you. In the right corner, you will find two blue buttons. ● Customize Channel ● Manage Videos Click on the “Customize Channel” button. Step 4
Now the Channel customization screen is opened. If things go according to this tutorial, then there will be three sections written in grey color. Sections are – ● Layout ● Branding ● Basic info First, we are going to see the Layout section. By default, the layout tab is already open. In the next step, we are going to see this section in detail. Step 5
In this tab first, a heading is there right in front of our eyes. And that is, “Video spotlight”. Here you can upload a channel trailer for new visitors who haven’t subscribed yet. This is the video that will introduce you and your content to new visitors. It will automatically play when a viewer will arrive on your channel. It is a really a good feature to use when you customize YouTube channel. So, to upload a trailer click on Add button. One important thing, before you upload your trailer you have to upload that video on your channel. Otherwise, you can’t add your trailer to your YouTube channel’s home section.
Step 6 Lastly, in the layout section, you can add some featured sections for the viewers who have already subscribed to your channel. This feature lets you totally organize your channels’ videos into sections. This will increase your viewers’ good experience on your channel. By default here, we can see two sections already added, and those are: Short videos Uploads ● ●
You can add other sections here. For this, just click on + Add Section and after clicking on that, a list of sections will now pop up. From this list, uploads and short videos are already added. If you want, then you can even add other sections as well. Like – ● Popular uploads ● Live now ● Past live streams ● Upcoming live streams ● Single playlists ● Created playlists ● Multiple playlists ● Subscriptions ● Featured channels Step 7
So, as you completed your job in the Layout tab, let’s move to the next tab. Which is Branding. Here you can see some features which basically let you design your own channel’s branding. From here you can add, change, or remove your channel’s logo, banner, and even add your own watermark to your video. First thing first, click on the upload button under the Picture option. Then choose a picture or logo from your file manager’s popup window and click on the open button at the bottom of the pop-up window. Then set or crop your image to fit in the circle. So, don’t keep any important information in the corner of the image. Also, keep things simple here. Don’t use cluttered, blurry, or copied images. Here, the recommendation comes from YouTube itself: You have to upload a picture that is at least 98*98 pixels and 4 MB or less than 4 MB. Also, you have to follow YouTube’s community guidelines.
This feature lets you add your logo or if you are just starting a channel with your own name, in that case, your picture. Step 8 The process is the same as when uploading a logo. When you are uploading your YouTube channel’s banner, just click on upload. A popup window will open and then, in that window, choose an image and click on the open button. Your channel banner will be uploaded.
But keep in mind that this image’s file size should be either 6 MB or less than that. Don’t forget to design this image in a way that shows perfectly on any device, whether it is a desktop, or laptop, or tablet, or TV. Step 9 In the same way, you can upload your own watermark. Which will appear on all of your videos. It’s your choice whether you want this watermark to appear at the end of your
video or at the start or throughout the video. This watermark could be your logo or a call to action like a subscribe write-up. Step 10 Let’s move on to the last tab, Basic Info. Here we can change our channel’s name, write a description of our channel, add languages, add links, and add contact info.
Let’s see about these features and how to utilize them properly. The first thing on this tab is the channel name and description. But because you already put your channel’s name when creating the channel, you can skip this. Or, if you want to change your channel’s name, then you can change it from here. We would suggest not changing it. If something comes up, only then you can change the name, but try not to change it often. Why are we saying this to you? Because if you continually change your channel’s name, then your channel will not be able to establish itself as a brand and people will also not recognize it as one. Your channel also won’t be seen as a professional one; seriously, it is weird. You will look like an amateur YouTuber. Step 11
On this basic info tab, the next option is the channel description. Here you can write or update your channel’s description. This is very important for your channel’s growth. You have to optimize your channel description properly. Otherwise, you will miss a chance to attract new viewers. But remember that you shouldn’t get carried away while writing your channel’s description. Here, the character limit is only 1000. Convey what you have to say about your channel in between these character limits. If you want to customize YouTube channel properly then, this is one the most important features. Step 12
Our next option to customize YouTube channel is channel URL, or you can say channel link. Every YouTube channel has its own web address, or link, or URL. This is your channel’s unique and standard URL, which you can copy and share with your friends and family, and also in various Facebook groups or any other place you want to. But you don’t have to do anything here. So just skip this option and let’s move on to the next important option. And that is Link. Don’t get confused! First was the URL of your own channel. And here, “link” means, you can add your social media, website, and other types of links related to your channel. So here, you can add your – ● Facebook, ● Instagram, ● Twitter,
● LinkedIn, ● Website link To add a link, just click on the blue colored +Add links text and some boxes will open. You just have to fill in those boxes and you are done. Those boxes are – ● Link title ● URL In the link title box, type your desired platform’s name, like Facebook, Instagram, etc., and if you want to add your website’s link, then in the link name box type “Website”. And to fill the next box, you have to go to your website’s homepage, copy your website’s link, and simply paste that URL or link. And if you want to add more links, then just click on the blue-colored “+Add link text”. Repeat the same process. Here my suggestion is that your vital links should be present in the first 5. Why? You will get the answer in the next step. But this is very important to keep in mind. That’s it. You have successfully completed this step. Step 13
Next, you have a section where you can add links to your YouTube channel’s banner. Here you can add links from the upper section where you added links on your channel. For this reason, I have told you to keep your important links in the first 5. So, for adding links to the banner click on the “Links on banner” box. After clicking, now you can see that you have some options, like : ● None ● First link ● First 2 links ● First 3 links ● First 4 links ● First 5 links You can choose whatever you like. If you want to show the first link on the banner, you can choose the second option and if you want to show the first 4 links then you can choose the fifth option or if you don’t want to show any links then choose none (But it
will be the smartest choice if you add some. It will help viewers to find valuable links faster, without any extra finger movement). Like this, you can choose how many links from the first one you want to show on the banner. But there is a limit to that. You are not able to add over 5 links. Step 14
This is the last step to customize YouTube channel. And this option is for adding an email address. So that if anyone wants to contact you with business inquiries, they can do that through this email ID. It will be shown in the about section of your channel and it will be public. So, anyone can see this mail address. Conclusion These are the processes, or steps, to customize YouTube channel. I hope that by following these steps, you can easily customize your YouTube channel. But don’t ever skip this customization feature. Use this feature properly to get the most out of your YouTube channel. Whether you are starting a YouTube channel as an individual creator or a business, it doesn’t matter! This is important for anyone who wants to start a YouTube channel and grow on this platform to achieve his/her goal. With proper customization, you can attract new viewers, gain new clients, etc. It will help you to promote your channel and videos for free! Do you want to miss this grand opportunity? You are a smart one. Your answer must be “YES.” That’s why we have written these steps to help you. Best of luck for your wonderful Youtube journey.