Download
1 / 22
230 likes | 1.43k Vues
AT91SAM9261-EK WinCE 6.0 DEMO. ATMEL AT91 Application & Support Group Version 1.O February 2007. AT91SAM9261-EK Boot Solutions. Jumper J4 (Boot Mode Select) allows to select the Boot Mode of the AT91SAM9261-EK J4 Opened, the AT91SAM9261 boots from the on-chip Boot ROM

E N D
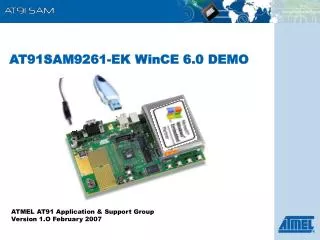
AT91SAM9261-EK WinCE 6.0 DEMO ATMEL AT91 Application & Support Group Version 1.O February 2007
AT91SAM9261-EK Boot Solutions • Jumper J4 (Boot Mode Select) allows to select the Boot Mode of the AT91SAM9261-EK • J4 Opened, the AT91SAM9261 boots from the on-chip Boot ROM • The Boot ROM Memory integrates different programs permitting download and/or upload into the different memories of the product • First, it initializes the DBGU and the USB Device Port. • Then the DataFlash Boot program is executed. It looks for a sequence of eight valid ARM exception vectors in a DataFlash connected to the SPI. If a valid sequence is found, code is downloaded into the internal SRAM. This is followed by a remap and a jump to the first address of the SRAM. • If no valid ARM vector sequence is found, SAMBA™ Boot is then executed. It waits for transactions either on the USB device, or on the DBGU serial port. Then, user can use SAM-BA GUI to download binary file into the different memories of the product. • J4 Closed, the AT91SAM9261 boots from the off-chip memory connected to NCS0 (No memory is connected on the EK by default)
AT91SAM9261-EK J19: USB Device Interface J15: DBGU 5V Power Supply J4: Boot Mode Select (BMS) Reset Button J21: Position 1-2 For DataFlash Access
AT91SAM9261-EK WinCE Demo • Software requirements • Demo WinCE.zip file including: • Binary Files: BootRam.nb0, EBOOT.nb0 & NK.nb0 • AT91 ISP 1.8 Application installed on your PC • Microsoft ActiveSync • The Core Pocket Media Player (TCPMP) • Hardware requirements • 5V Power supply • AT91SAM9261-EK Evaluation Kit • Serial Cross Cable (Female-Female) • USB Cable
AT91SAM9261-EK SAM-BA Boot • Remove DataFlash Jumper (J21) • Power up the board • Connect the USB Device Interface (J19) to your PC using the USB Cable • If it is the first time an AT91 chip is connected to the PC: • New Hardware detected
AT91SAM9261 USB Device Detection(Only the 1st time an AT91 chip is connected to the PC !) • Hardware Wizard tool launched (1) • Select “Yes, this time only” • Software installation (2) • Select “Install the software automatically (Recommended)” 1 2
AT91SAM9261 USB Device Installation(Only the 1st time an AT91 chip is connected to the PC !) • Searching for driver (1) • Windows logo testing (2) • Select “Continue Anyway” • Installation finished (3) 1 3 2
AT91SAM9261-EK SAM-BA Boot • Start SAM-BA GUI Application • Choose USB Connection (1) and select the AT91SAM9261-EK (2) • Click on “Connect” (3) • Plug DataFlash Jumper (J21) back in position 1-2 1 2 3
Download DataFlashBootin DataFlash with SAM-BA • Select DataFlash AT45DB/DCB tab (1) • Choose Enable Dataflash on CS0 (2) in scripts rolling menu and press Execute(3) 1 2 3
Download BootRam.nb0in DataFlash with SAM-BA • Choose Send BOOT File (1) in scripts rolling menu and press Execute (2) • Select file namedBootRam.nb0and press Open. 1 2
Download EBoot.nb0 in DataFlash with SAM-BA • Enter “0x5000” inInternal Addresstext field (1) • Press onSend File Name Browsebutton (2) • Choose EBOOT.nb0and pressOpen • PressSend Filebutton (3) 2 3 1
Download WinCE Demo (NK.nb0) in NandFlash with SAM-BA • Select NandFlash tab (1) • Choose NandFlash Init (2) in scripts rolling menu and press Execute (3) 1 2 3
Download WinCE Demo (NK.nb0) in NandFlash with SAM-BA • Press onSend File Name Browsebutton (1) • Choose file named NK.nb0and press Open. Take few seconds. • PressSend File (2) button (this will take a few moment): WinCE has been stored in NandFlash • Close SAMBA, remove USB cable 1 2
Configure WinCE Boot: EBOOT • Connect the Serial Debug Port (J15) to your PC using the Serial Cross Cable • Start an hyperterminal session on your PC with settings: • 115200 8-N-1-N • Reset the board • Press “Space” key when the message“Initiating image launch in x seconds”is displayed to stop booting, the following Menu is then displayed • Ethernet Boot Loader Configuration:0) MAC address: 02:02:03:04:05:061) IP address: 192.168.100.1282) Subnet mask: 255.255.255.03) Boot delay: 5 seconds4) DHCP: (Enabled)5) Reset to factory default configuration6) Download new image at startup7) Download image to SDRAM8) Frequency settings (core at 200, bus divider 2)A) test RTC:D) Download image nowL) Launch existing flash resident image nowN) Nand Flash menu
Configure WinCE Boot: EBOOT • Select option “6” • The following menu is then displayed: • Ethernet Boot Loader Configuration:0) MAC address: 02:02:03:04:05:061) IP address: 192.168.100.1282) Subnet mask: 255.255.255.03) Boot delay: 5 seconds4) DHCP: (Enabled)5) Reset to factory default configuration6) Launch existing flash resident image at startup7) Download image to SDRAM8) Frequency settings (core at 200, bus divider 2) A) test RTC:D) Download image nowL) Launch existing flash resident image nowN) Nand Flash menu
Configure WinCE Boot: EBOOT • In hyperterminal menu • Select option “8” to setup ARM and bus frequency according to audio frequency • Enter new Core Frequency (old frequency is 200 MHz) 181 • Enter new Bus divider (old divider is 2) 2 • The audio frequency is 44100KHz • F = 44100KHz * 256*2^X or F = 44100Khz *384*2^X (refer to audio codec dataheet) • The values allowed are 181 MHz, 135 MHz, 90 MHz, 67MHz, 45 MHz,… • Select option N, “Nand Flash menu”: • The following menu is then displayed: • Nand Flash Menu :1) Erase all sectors2) Enter manually the image parameters3) Quit... • Select option “2” and set the following settings: • Physical Start Address : (0x80059000) : 0x (Press Return)Starting ip : (0x8005a000) : 0x (Press Return)Total ROM size : (0x75144c) : 0x01707b7c
Start WinCE • Reset the board to start WinCE. • After the first reset, the WinCE kernel formats the NandFlash. This operation can take several minutes. Do not reset the board until the end of the format process (the calibration screen is displayed). • WinCE is running: makes calibration if needed and after, click on the touch screen to enter Windows CE • To save the touch screen parameters, enter the suspend mode and restart the board.
Install Microsoft ActiveSync • Microsoft ActiveSync is a synchronization software for Windows Mobile powered Pocket PCs and Smartphones • http://www.microsoft.com/windowsmobile/downloads/activesync41.mspx • Download and install ActiveSync on your PC • Start WinCE and Connect the on-board USB device to the PC
Install Microsoft ActiveSync • Once the connection is established, a “mobile device” directory should appear on your desktop PC • Don’t create any partnerships
Install Microsoft ActiveSync • Now you can browse, copy files from/to your PC to/from the board : do it with the “Demo Files directory” • For more information, please refer to ActiveSync documentation • Windows Media Player allows you to play audio or video files stored in NandFlash via ActiveSync.
How to install TCPMP on Windows CE • The Core Pocket Media Player is an open-source media player for Windows CE based devices. • Install the last TCPMP for PocketPC from the PC • Connect your AT91SAM9261-EK to your PC via USB • Just follow the instructions provided by the installer on your PC and on the target • The installer allows to install TCPMP on the Main memory or NandFlash. • TCPMP is ready to use.
Mounting a SD/MMC Card • SD/MMC Card insertion is not automatically detected • Plug the SD/MMC Card in the DataFlash Card Interface (J22) • Start windows explorer by clickingMy deviceicon on desktop • In the directoryWindows/Programsstart the FlashLoader Application • Select PluggedSD/MMC Card • Close the FlashLoader Application • The SD/MMC Card has been mounted and is now available • You can store jpeg files on the SD/MMC Card and display the pictures with “Image viewer” Application