Princess & Dragon – Version 2
300 likes | 536 Vues
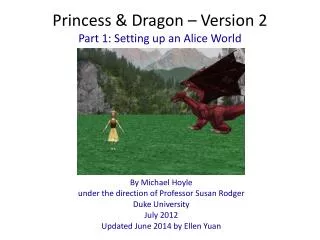
Part 1: Setting up an Alice World. Princess & Dragon – Version 2. By Michael Hoyle under the direction of Professor Susan Rodger Duke University July 2012 Updated June 2014 by Ellen Yuan. Introduction.

Princess & Dragon – Version 2
E N D
Presentation Transcript
Part 1: Setting up an Alice World Princess & Dragon – Version 2 By Michael Hoyle under the direction of Professor Susan Rodger Duke University July 2012 Updated June 2014 by Ellen Yuan
Introduction • Welcome to Alice! Alice is an innovative 3D programming environment that makes it easy to create an animation. These animations can be used to: • tell a story • make an interactive game • create a video that you can share online • and much more! • Alice uses 3D graphics and a drag-and-drop interface so its fun and easy to learn. • In this three part tutorial, you’ll be learning some of the basics of Alice so that you can program your own stories and games. Download & InstallAlice 2.2 You may need to download Alice from the Alice.org website. See the site for more details
Overview • In this tutorial, we’ll be creating a short animated story about a princess who is captured by a dragon and rescued by a knight that comes riding in. The tutorial is broken up into three parts. • Part 1: Positioning Objects • Part 2: Methods & Properties • Part 3: Events, Billboards, Sound, & 3D-Text • In Part 1 we’ll set up our world, add objects, position them, and set up the camera. • NOTE: This is version 2 of the Princess Dragon tutorial, designed to be shorter and easier to complete while covering the same content
Create a new Alice world Start Alice and after it loads (it may take awhile) you will see the “Welcome to Alice!” screen. From this screen you can start a new world with a template or open a saved Alice world from earlier. Click on the Templates tab to start a new Alice world and you will see 6 basic templates. Select grass and then click open.
Main Screen The main Alice screen is broken up into sections. Toolbar World Preview Object Tree Events Editor Method Editor Details Pane
Saving an Alice world Click on File in menu at the top of the screen, select Save World and give a name to your world. Click Save when you are done. Alice worlds are saved as .a2w files. Remember where you save the world so that you can find it later!
Add Objects Screen Click on the Add Objects button in the World Preview Pane and You will see the screen change into the Adding Objects screen. Toolbar World Preview Positioning Tools Object Tree Gallery Details Pane
Dummy Objects A Dummy Object allows us to save the position of the camera and return to it. Before you add or position any objects, it’s a good idea to save the original camera position. Click on the more controls button under the positioning tools, select drop dummy at camera.
Renaming Objects You will notice in the object tree that a new folder called Dummy Objects has appeared. Right click it and rename it cameraViews. Open the folder by clicking on the + next to it. Right click on the dummy object inside and rename it originalView.
The Gallery: Adding our first object The Gallery contains different types of objects that you can add to a world in Alice. It is organized into folders which are listed in alphabetical order. Scroll to the right until you find the People folder. Click on it. Scroll to the right until you find Cinderella. She will be our princess. Click on her and you will see a screen pop up. Click on Add instance to world and you will see Cinderella appear in the world! Congratulations you’ve added your first Alice object! NOTE: Cinderella is now called Sally.
Adding more objects Click either the folder icon next to People or click Local Gallery to exit the people folder. Now add a dragon. Find the Medieval folder and add a Dragon. NOTE: There are two dragons in Alice. Make sure you add the darker maroon dragon, not the one with a yellow belly.
Positioning tools The panel to the right contain a variety of positioning tools that will help you move the objects on the screen to set up the scene. To use the tools, you click on the tool that you want and then click & hold on the object you want to position. Move the mouse to watch the tool work! DO NOT use the last tool on the right, it does not work. If you mess up, use the Undo button in the toolbar! X
Positioning tools Use the Move Freely tool to move objects left, right, forward, and backwards. Use the Up and Down tool to move objects towards and away from the ground Use the Turn tool to turn objects left and right. Use the Tumble tool to twist objects in many directions around their center. Caution: this tool is hard to use. Use the Resize tool to make objects bigger and smaller. Moving objects in Alice can be hard! Never be afraid to use the Undo button as often as you want if you make a mistake.
Positioning your objects Use the positioning tools (mostly the move freely tool) to position your objects like in the picture. Cinderella should be on the left near the camera, and the dragon should be on the right, further from the camera. Use the up/down tool to make sure your objects are both resting on the ground.
Camera controls Under your world preview you should see these blue arrows, which control the camera. This tool MOVES the camera left, right, up and down. This tool TURNS the camera left and right, and MOVES the camera forward and backward. This tool TILTS the camera forward and backward.
Moving the Camera Use the right arrow on the center positioning tool to turn the camera to the right. Turn until your preview looks like the image above. Cinderella should be off-screen, and the dragon should be on the very left. DO NOT use any of the other camera positioning tools at this time. If your camera is not going where you want it, use the UNDO button as many times as you need to get back to your original view, and try again.
Creating another Dummy Object Following the same steps as before, click drop dummy at camera to save this view as well. In your object-tree, rename your new dummy to “knight view”. These dummy objects act like tri-pods to save the camera position. We will use them later to switch between views.
Adding our Knight and his noble steed Your gallery should still be in the Medieval folder from adding the dragon. Now, from this folder, you should add the Knight object, and the Horse object. Drag-and-drop the objects into your world to put them where you want them. They should be near each other on the right side of the screen, like in the picture.
Positioning our Knight and his noble steed Use your positioning tools to make the knight stand on the horse, and have both of them facing the dragon, like the picture above. This can be difficult, use the next slide to show you how to make sure it’s right. Ignore the red, blue, and green blocks on the screen. They represent the dummy objects you dropped, and will not show up when you play your animation. It is a common mistake to accidentally click the ground and move it instead of the object you intended to move. If this happens, Press UNDO to return the ground to its proper position.
Positioning our Knight using quad view Click quad view to get a view of our world from four different angles.
Positioning our Knight using quad view Use the Scroll and Zoom tools on the “from the top” view to get a good view of the knight from the top. Use this view to make sure he is properly positioned on his horse.
Centers Click single view to get back to a single screen. If you click on an object, either in the viewing pane or in the object tree, you will notice that lines appear around and through the object. Click on the dragon. The center of the object is where the green, blue, and red lines meet. When you tumble the dragon for example, he moves around his center. The dragon’s center is located in the middle of his body, but each object has it’s own center, defined differently.
Centers Click on the Horse. You will notice that its centeris at its feet You will also notice the yellow bounding box of the object. This can be useful when you’re trying to line up the object. There are three orientation lines to help you. The green line indicates the object’s sense of up, the red line indicates the object’s sense of right, and the blue line indicates the object’s sense of forward. In Alice, everything happens relative to the object so even if it is your left, keep it mind that it may be the object’s right.
Switching between Camera Views Now let’s get our camera back to the original position dummy object we created earlier. To do this, right-click on the Camera in the object-tree, and hover over methods. You will see a large menu of all the methods the camera object can do. Choose camera set point of view to, then choose your camera views folder, and finally your original view. If your camera did not go where you expect, press UNDO and try again. Make sure you use “set point of view to” and not “point at” or any of the other methods.
Using subparts Now that you changed your camera view, Cinderella should be back in your preview window, and your knight should be out of view, like the picture to the right. You’ve probably already noticed how Cinderella is unnaturally holding her arms out to her sides. As our last action in part 1 of this tutorial, lets make her arms fall by her sides by calling a method on some of her subparts, her left and right arms. A method tells an object what to do, you’ll learn more about them in part 2.
Using subparts In the object tree, click the next to Cinderella to view her subparts. Click on her hips, then torso, then upperBody until you finally see leftUpperArm and rightUpperArm. Click one of them and you will see a bounding box around one of Cinderella’s arms, showing which part you’ve selected. Even though it says “UpperArm” it really means the entire arm. This is because Alice objects are built hierarchically, meaning all the subparts are connected to a bigger subparts. So the other parts of the arm are all connected to the upper arm.
Using subparts Right click on leftUpperArm and select methods, roll, left, and then click “other…”. A calculator should pop up. Type in .2 and click okay. Cinderella’s left arm should then rotate down comfortably by her side. If it doesn’t, press UNDO and try again. Did those drop-down menus seem familiar? This is the same idea as when we changed the point of view of the camera. Both times we used methods, which both told an object what to do. In one case the object was the camera, which we told to change its point of view. Now the object is Cinderella’s arm, which we’re telling to roll.
Using subparts Cinderella should now look like this. We need to change her right arm to match her left one. To do this, just do the exact same thing you did with the left arm, except this time, roll right .2 revolutions. The exact selections you should make are shown in the image below. Notice how this time around, 0.2 revolutions is already an option in the dropdown menu, you don’t have to type it in again. That‘s because Alice saves recent entries for you in case you need to re-use them, like now.
Exiting Library View We are now done adding and setting up all of the objects we will be using for this world. In order to exit the library view, press “Done”. The library of objects will go away revealing a blank yellow space. This is where you will write the code for your animation in parts 2 & 3.
Congratulations, You Finished Part 1! In part 2 you’ll learn about writing methods and animating your world.
