Graphing Quiz CCSS : 3.MD.3
300 likes | 553 Vues
Graphing Quiz CCSS : 3.MD.3 Objective : We will demonstrate our knowledge of graphs by completing an assessment. . Unit 4.3.1 – Triangles CCSS: 3.G.1 Objectives: We will identify the attributes of triangles. We will recognize right angles. EQ:

Graphing Quiz CCSS : 3.MD.3
E N D
Presentation Transcript
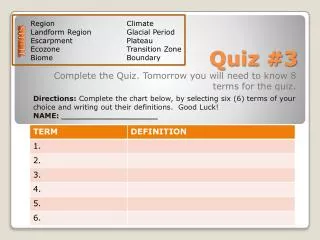
Graphing Quiz CCSS: 3.MD.3 Objective: We will demonstrate our knowledge of graphs by completing an assessment.
Unit 4.3.1 – Triangles CCSS: 3.G.1 Objectives: We will identify the attributes of triangles. We will recognize right angles. EQ: What attributes help you to identify triangles? Why can’t you create a triangle with any three straight lines? Teacher Input: 1. Introduce the Straw Building Kit and explain that the straws come in different lengths that allow the building of a variety of shapes. 2. Explain that they will build triangles with the straws. 3. Go over vocabulary (ppt). Have students tell how many sides a triangle has and explain that the corners are called vertices (vertex singular). 4. Demonstrate how to build a triangle using the straw kit. Independent: 1. Have students tear out Unit 4 pages 37 and 38 from the student book. 2. Have students build the triangles that are prompted by the worksheet. 3. Higher-level thinking questions to pose during work: What do you notice about the shape of the triangle using straws of the same length? Different length? 4. For problem #4, have the students cut the shortest straw in half and try to make a triangle with those two pieces plus the longest straw. 5. Have them draw three different types of triangles that they created on the left side of their interactive notebook. Closing Discussion: 1. Have students discuss some things they noticed about the triangles they made. 2. Have two students show their triangles for Problem #2 and explain that the two triangles are congruent (use PPT Slide). 3. Highlight the fact that the triangles have a right angle, and so they are called right triangles. 4. Go over the concepts of obtuse and acute triangles. Assessment: Worksheet Homework: Teacher Generated Sheet.
Unit 4.3.1Triangles Objectives: We will identify the attributes of triangles. We will recognize right, obtuse, and acute angles.
Vocabulary Side (arm) – One of the lines that is used to make the shape. Vertex – The corner where two sides meet. (plural: vertices) Congruent – shapes that are the same shape and size. Angle – The amount of “turn” between two sides that create a vertex.
Vocabulary Continued Right Angle – An angle that is created by two sides that are perpendicular (demonstrate). Obtuse Angle – An angle that is larger than a right angle. Acute Angle – An angle that is smaller than a right angle.
Independent Unit 4 Pages 37 and 38. What do you notice about the shape of the triangle using straws of the same length? What do you notice about the shape of the triangle using straws of different lengths?
Triangles This is what I noticed… What did you notice about the triangles you made? …have three sides. …have three vertices. …have three angles. Let’s look at two students’ triangles for problem #2. These triangle are congruent. What kind of angle do they share?
Homework Triangle Worksheet
Unit 4.3.3 - Quadrilaterals CCSS: 3.G.1 Objectives: We will identify the attributes of quadrilaterals. We will compare the properties of squares and rectangles. We will identify a right angle as having a measure of 90 degrees. EQ: What attributes help you to identify quadrilaterals? Teacher Input: 1. Explain that the students will build quadrilaterals with the straw kit. 2. Have students guess how many sides a quadrilateral has. Have them name a few quadrilaterals. 3. Display a quadrilateral and have the students identify the sides and the vertices, and tell how many vertices there are in a quadrilateral. Have them point out anything else they notice. 4. Go over vocabulary (ppt). 5. Show that there are many quadrilaterals other than a square or rectangle (ppt). Independent: 1. Have students tear out Unit 4 pages 45 and 46 from the student book. 2. Have students build the quadrilaterals that are prompted by the worksheet. 3. Higher-level thinking questions to pose during work: Given the straw lengths provided, how many different sized squares can you make? How many rectangles? 4. Have them draw three different types of quadrilaterals that they created on the left side of their interactive notebook. Closing Discussion: 1. Select a few student-created squares and rectangles. 2. Have the students explain the similarities and differences between squares and triangles (have 4 sides, have 4 corners, opposite sides match, have all right angles, sides differ). 3. Highlight the angles of the squares and rectangles and have the students determine the angle (right angle). 4. Explain that angles are measured by degrees and that right angles are 90 degrees. Assessment: Worksheet
Unit 4.3.3Quadrilaterals Objectives: We will identify the attributes of quadrilaterals. We will compare the properties of squares and rectangles. Essential Question: What attributes help you to identify quadrilaterals?
Quadrilaterals How many sides do you think quadrilaterals have? Name a few quadrilaterals! Identify the sides and vertices of these quadrilaterals!
Vocabulary Side (arm) – One of the lines that is used to make the shape. Vertex – The corner where two sides meet. (plural: vertices) Congruent – shapes that are the same shape and size. Angle – The amount of “turn” between two sides that create a vertex.
Vocabulary Continued Quadrilateral – Any shape with four sides. Some types of quadrilaterals – Square, Rectangle, Trapezoid, rhombus.
Independent Unit 4 Pages 45 and 46. Given the straw lengths provided, how many different sized squares can you make? What about rectangles? Pick three that you created and draw them in the left side of your interactive notebook.
Quadrilaterals What are some similarities and differences between the squares and rectangles?
Squares and Rectangles What did you notice about the angles of the squares and rectangles? Angles are measured by degrees, check the next slide to see what those are!
Degrees 45º 90º Degrees are like inches, but instead they measure the “turn” or angle between two sides that meet at a vertex. A right angle is always 90 degrees!
Day 3 CMS Wiki Unit: Unit 4.3.4 – Angles of Different Sizes CCSS: 3.G.A.1 Objective: · I can understand angle size as the degree of turn. · I can compare the sizes of angles. Teacher Input: · Review right, obtuse, and acute angles by playing Simon Says. As a class create arm movements for an acute, right, straight, and obtuse angle. Call out an angle and have the students show the movements with their arms. · Review what quadrilaterals and the types of quadrilaterals: trapezoid, rhombus, square, rectangle by showing study jams video. It is already linked in the Power point. You can also play the Quadrilaterals song by clicking sing karaoke. · Discuss other quadrilaterals (ones that are not rhombuses, squares, rectangles, or trapezoids). · Introduce parallelograms and brainstorm which quadrilaterals that we’ve learned so far are parallelograms. · Explain to students what an attribute is. Students will name attributes of a square, rectangle, and rhombus. · Discuss similarities and differences between a square and rectangle and also a square and rhombus by using Venn diagrams. · Have students sort shapes based on their angles (slide 8). · Discuss the relationships overall among quadrilaterals and introduce students to the tree map and the Venn diagram to show this. · For independent practice students will do a scavenger hunt around the room to try and locate as many angles as they can. Have students glue in their graphic organizer to complete. Students will also make a prediction as to how many degrees they think it would be. Assessment: Exit Ticket Homework: Teacher created homework
3.4 Angles of Different Sizes Objective(s): I can understand angle size as the degree of turn. I can compare the sizes angles within different shapes. I can identify attributes of different shapes and compare/contrast them.
Angles Review • Simon Says Quadrilaterals Review • Video
Other Quadrilaterals Quadrilaterals that are not rectangles, squares, rhombuses, or trapezoids. Is this a Quadrilateral? Why or why not? Can you create any more examples?
What is a parallelogram? • A shape where opposite sides are parallel. Parallel lines are lines that never touch. They look like the sides to a railroad track. Which of these quadrilaterals are parallelograms?
Name an attribute of these shapes Attribute: A characteristic that defines a shape such as sides, angles
Identifying Angles within Shapes Obtuse Acute Right Draw and drop the shapes with the following angles. If it has more than one kind of angle, drag it on the line in the middle of those two angles.
Shape Relationships Tree Drag and drop the correct word into the correct box of the tree. Polygons – a closed figure shape made of straight lines Word Bank Rhombus Parallelograms Rectangle Trapezoid Quadrilaterals Square
Another Way to see the Relationships Explain this picture!
Classroom Angle Scavenger Hunt • Directions: You will go around the room and try to find as many angles as you can. First create a 90 degree angle using 2 straws. This will help you determine whether objects are smaller or larger than 90 degrees. Also, keep another straw with you to measure the objects. You will write the object, write what kind of angle it has, and then make a prediction as to how many degrees you think that angle is.