DSLR Video Settings
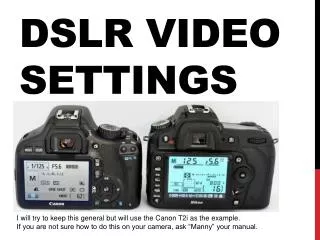
DSLR Video Settings. I will try to keep this general but will use the Canon T2i as the example. If you are not sure how to do this on your camera, ask “Manny” your manual. Resolution & Frame Rate. Resolution 1920 x 1080 = Full HD 1020 x 720 = Easier for older computer systems to handle

DSLR Video Settings
E N D
Presentation Transcript
DSLR Video Settings I will try to keep this general but will use the Canon T2i as the example. If you are not sure how to do this on your camera, ask “Manny” your manual.
Resolution & Frame Rate • Resolution • 1920 x 1080 = Full HD • 1020 x 720 = Easier for older computer systems to handle • Frame Rate (frames per second) • 30 = Video/News • 24 = Film look • 60 = Sports • *Make sure to match these settings in your video editor!
Movie Exposure • Switch this to Manual so we can have creative control!
Other Settings • Disable: • Highlight tone priority • Peripheral Illumination correct • Auto Lighting Optimizer • Picture Style: Neutral • Image Jump: 1 image • Auto Power Off: 4 - 8 min. • Color Space: Adobe RGB
Manual Settings • Make sure to switch the lens to MF for manual focus
Focus Tips • Use the Image Magnification Buttonsto help you focus • Peaking • Some monitors offer a peaking function that highlights areas of the image that arein sharp focus with a colored outline.*Magic Lantern offers this feature. • External View Finder • My students use our Zacuto Z-Finderexternal view finder to help focus,especially when outdoors.
Shutter Speed • This depends on the frame rate you selected earlier • You want to double the frame rate: • If you selected 24fps then set use 1/50th (50) • If you selected 60fps then choose 1/130th (130) • To adjust shutter speed simply rotate • the “Wheel” by the shutter button
Aperture vsISo • This will be a balancing act based on the amount of light, the desired depth of field (aperture) and how graining you are willing to make your film (ISO).
Aperture • Aperture is the size of the iris or openingthat lets light into the camera. It is measured • in F-stops. • Rule of Thumb: Smaller the F-stop the narrower the depth of field and the more light • *This is how they blur the background so you focus on the subject in a film. Students that can demonstrate mastery of this skill will set themselves apart from the competition.
Aperture • Use the “Wheel” and the AV buttonto adjust aperture • Tips • The lens will determine how low this will go (low = $$$) • At f 1.8 your depth of field can be inches deep • If your subject is moving increase the F-stop to keep more of the image in focus
ISo • Higher the ISO the brighter your image but you also get more grain. Try to stay as low as possible, but you will really notice it at 1200 and over. • *Adjust the ISO by pressing the ISO button and moving the “Wheel”, then press the ISO button again set
White balance • This is the color temperature of light. • AWB – Automatic White Balance usually works great but occasionally you want greater control. • Options • Pre-set white balance: Indoor, outdoor, florecent, cloudy, shade • Custom white balance: Take a photo of something white or 18% gray under the lighting conditions • Magic Lantern – if you have installed this firmware you can dial in the white balance
What is Magic lantern? • “Magic Lantern is an enhancement atop of Canon's firmware that frees your Canon DSLR, allowing you to use many useful features. • Magic Lantern has written extensions and widgets that fix many of the annoyances in working with Canon DSLR cameras on a film or video set. Our first set of fixes are targeted at the audio limitations of the camera, but there are some video enhancements included, too:” • On-screen audio meters • Manual gain control with no AGC • Zebra stripes (video peaking) • White balance dial
Magic Lantern Basics • http://magiclantern.wikia.com/wiki/Magic_Lantern_Firmware_Wiki • Research and check with your district before installing! • Installing: They have a great video that walks you through the process. I had to upgrade my Canon firmware first. • Using: Click on the trash can to launch the menus.*The download comes with a nice pdf manual.
Audio w/Magic lantern • Audio Gain – this allows you to adjust the audio levels • AGC Off – this is turned on by default*Automatic Gain Control • Input Source – this allows you to control/mix between the internal mic and your external microphones • Monitoring-USB – connect headphones to the USB cable*Requires some adapters • Audio Meters – this is turned on by default
White balance w/Magic Lantern • Expo Menu • WhiteBalance then click “set” • *The best part is that your “wheel” lets you dial in just the color temperature you want with a live preview!