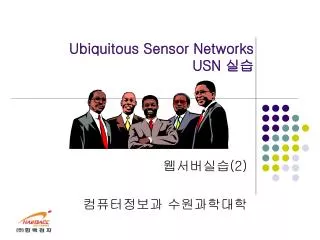
Ubiquitous Sensor Networks USN 실습
1.23k likes | 1.84k Vues
Ubiquitous Sensor Networks USN 실습. 웹서버실습 (2) 컴퓨터정보과 수원과학대학. 기상 보드 ( 온 , 습도 , 압력 , 가속도 , 광 ). Base 보드. GPS. 릴레이 보드. 홈 보드 ( 움직임검출 , 가스 , 자기 , 리드 ). 헬스케어 보드 (ECG, 체온 ). ZigbeX 소개. 9600. 하드웨어 구성. 전면

Ubiquitous Sensor Networks USN 실습
E N D
Presentation Transcript
Ubiquitous Sensor Networks USN 실습 웹서버실습(2) 컴퓨터정보과 수원과학대학
기상 보드 (온,습도, 압력, 가속도, 광) Base 보드 GPS 릴레이 보드 홈 보드 (움직임검출, 가스, 자기, 리드) 헬스케어 보드 (ECG, 체온) ZigbeX 소개 9600
하드웨어 구성 • 전면 • CPU, RF, 안테나, 클럭, ISP, 배터리전력, 외부 전력, 확장커넥터,조도센서,step-up, LED, 온 습도센서, 적외선센서,RTC, 확장안테나 단자, 전원스위치, 전원표시LED • 뒷면 • 플래시메모리, serial ID
ZigbeX 재원 • CPU ATmega128 • 128KB프로그램메모리,4KB램, 4KB EEPROM • SPI, serial 2, timer, ADC 10bit 8Ch,… • RF CC2420 • IEEE 802.15.4, DSSS, 2.4GH ISM • PCB패턴안테나(실외 130m, 실내 30m) • 외부 플래시 512KB • serialID DS2401 • RTC RTC4513
TinyOS Language • C • Make efficiency code for microcontroller • Provide base characteristic for hardware access • Familiar with programmer • Difficult to make component based applications • nesC(network embedded system C) • Extended C • No support dynamic memory allocation • Concurrency access to shared data • More flexible • Component Based • Configuration file : wiring components each other • Module file : Actual implementing Component
NesC Programming Language • Component • NesC를 구성하는 기본 블록, 컴포넌트를 정의하는 configuration과 module 부분으로 구분 • Component의 종류: • configuration: 컴포넌트의 연결을 나타냄 • module: 인터페이스의 동작을 기술, 이벤트 핸들러 작성
comp3 comp1: module comp4 comp2: configuration application: configuration NesC Programming Language • Components: • 구성 • module: C구현 부분 • configuration:component select and wire 부분 • Interfaces • provides interface • uses interface
Interface I • Interface • 컴포넌트를 연결하는 포트의 역할을 수행 • 제공자(provider)와 사용자(user) 형태로 컴포넌트에서 선언 • Command와 Event 타입의 함수로 정의 • Command:상위 컴포넌트에서 하위 컴포넌트에게 call 명령을 통해 호출하는 함수 (실제 함수 내용은 하위 컴포넌트에 구현). • Event:하위 컴포넌트에서 상위 컴포넌트로 signal 명령을 통해 호출하는 함수 (실제 함수 내용은 상위 컴포넌트에 구현). interface Timer { command result_t start (char type, uint32_t interval); command result_t stop (); event result_t fired (); }
Interface II Command : Call down –불려서 수행 Event : Call up – signal을 받아서 수행 • Interfaces used in Blink app. • Red: use interface • Blue: provide interface 내가만든것
컴포넌트간 연결 • 컴포넌트들 사이의 연결 (wiring) • Interface 1 = interface 2 • 두 개의 interface가 완전히 같음을 의미한다. • Interface1 ‐> interface2 • Interface의 구성 함수가 링크되어 있음을 의미한다. 즉 interface1에서 사용한 함수가 interface2에 구현되어 있음을 나타낸다. • Interface1 <‐ interface2 • Interface2 ‐> interface1과 동일한 표기방법이다.
C1 C2 C3 NesC Programming Language • Configurations의 연결: configuration apps { } implementation { components c1, c2, c3; c1. triangle1 -> c2. triangle1 ; c2. triangle2 -> c3 ; // c3의triangle2 생략 c3. rectangle1 <- c2. rectangle1; } apps component
C1 C2 C3 NesC Programming Language • modules: module C1 { uses interface triangle1; } implementation { ... } module C2 { provides interface triangle1; uses { interface triangle2; interface rectangle1; } } implementation { ... } module C3 { provides interface triangle2; provides interface rectangle1; } implementation { ... }
NesC Variable Type typedef signed char int8_t;typedef unsigned char uint8_t;typedef short int16_t;typedef unsigned short uint16_t;typedef int int32_t;typedef unsigned uint32_t;typedef long long int64_t;typedef unsigned long long uint64_t; typedef uint8_t result_t; enum { /* standard codes for result_t */ FAIL = 0, SUCCESS = 1} typedef unsigned char bool; enum { FALSE = 0, TRUE = 1}; Type 선언부 /opt/tinyos-1.x/tos/system/tos.h /usr/local/avr/include/inttypes.h
NesC 함수 표현 방법 • return_type function(argument); • void calc_SHT11(uint16_t p_humidity, uint16_t p_temperature) • command return_type function(argument); • command result_t StdControl.init() • event return_type function(argument); • event result_t DataMsg.sendDone(TOS_MsgPtr sent, result_t success) • task return_type function(No argument); • task void dataTask()
Blink.nc [task를 이용한 LED제어] • Blink configuration의 수행 내용을 implement하는 모듈 configuration Blink { } implementation { components Main, BlinkM,LedsC; Main.StdControl -> BlinkM.StdControl; BlinkM.leds->LedsC; } LED동작 구현 사용할 컴포넌트를 지정 BlinkM의 StdControl을 연결 LedsC의 interface를 BlinkM의 Leds에 연결. 정확한 표현은 BlinkM.Leds->LedsC.Leds. 생략될경우 서로 일치되는 interface를 자동으로 연결
BlinkM.nc [task를 이용한 LED제어] • Top Configuration으로 Component의 wiring을 함 module BlinkM { provides{ interface StdControl; } uses{ interface Leds; } } BlinM은 StdControl을 provide 즉 BlinkM을 사용 하려는 콤포넌트는 StdControl를 uses • BlinM은 Leds interface를 사용
BlinkM.nc [task를 이용한 LED제어] implementation { task void led_task(); command result_t StdControl.init() { call Leds.init(); return SUCCESS; } command result_t StdControl.start() { post led_task(); return SUCCESS; } command result_t StdControl.stop() { return SUCCESS; } task void led_task(){ int i; for(i=0; i<10; i++) { call Leds.yellowOn(); TOSH_uwait(30000); call Leds.yellowOff(); } } } • 실제구현부 LED동작 루틴 • Task 함수 원형 선언 • 프로그램 시작시 호출 • Function을 부를때 항상 call를 붙여줌 yellow LED 켜짐 30,000us 대기 • init()다음에 호출 • led_task() 를 호출
Blink의 구조 • 컴포넌트 : Main, LedsC, BlinkM • /opt/tinyos-1.x/tos/system/Main.nc configuration Main { uses interface StdControl; } implementation { components RealMain, PotC, HPLInit; StdControl = RealMain.StdControl; RealMain.hardwareInit -> HPLInit; RealMain.Pot -> PotC; } Real main과 동시에 동작
RealMain<->BlinkM module RealMain { uses { command result_t hardwareInit(); interface StdControl; interface Pot; } } implementation{ int main() __attribute__ ((C, spontaneous)) { call hardwareInit(); call Pot.init(10); TOSH_sched_init(); call StdControl.init(); call StdControl.start(); __nesc_enable_interrupt(); while(1) { TOSH_run_task(); } } } module BlinkM{ provides { interface StdControl; } uses { interface Leds; } }implementation { task void led_task(); command result_t StdControl.init() { call Leds.init(); return SUCCESS; } command result_t StdControl.start() { post led_task(); return SUCCESS } StdControl.stop() { return SUCCESS; } task void led_task() { … }
Blink File Index 컴파일시 docs 옵션을 사용하여 확인할수 있음 make docs zigbex
Component Graph RealMain이 아닌 Main에서 모든 일을 담당 HPLPotC 컴포넌트와의 연결을 의미 Blink Source Tree & Component Graph
Blink의 구조 • 컴포넌트 : Main, LedsC, BlinkM module LedsC { provides interface Leds; } implementation{ uint8_t ledsOn; enum { RED_BIT = 1, GREEN_BIT = 2, YELLOW_BIT = 4 }; async command result_t Leds.init() { … return SUCCESS; } async command result_t Leds.redOn() {…} async command result_t Leds.redOff() {…} async command result_t Leds.redToggle() {…} …. async command uint8_t Leds.get() {…} async command result_t Leds.set(uint8_t ledsNum) {…} }
Blink의 구조 • 컴포넌트 : Main, TimerC, LedsC, BlinkM implementation { task void led_task(); command result_t StdControl.init() { call Leds.init(); return SUCCESS; } command result_t StdControl.start() { post led_task(); return SUCCESS; } command result_t StdControl.stop() { return SUCCESS; } task void led_task(){ int i; for(i=0; i<10; i++) { call Leds.yellowOn(); TOSH_uwait(30000); call Leds.yellowOff(); } } }
BlinkM <->LedsC module BlinkM{ provides { interface StdControl; } uses { interface Leds; } }implementation { task void led_task(); command result_t StdControl.init() { call Leds.init(); return SUCCESS; } . . . task void led_task(){ int i; for(i=0;i<10;i++) { call Leds.yellowOn(); TOSH_uwait(30000); call Leds.yellowOff(); } module LedsC { provides interface Leds; } implementation{ uint8_t ledsOn; enum { RED_BIT = 1, GREEN_BIT = 2, YELLOW_BIT = 4 }; async command result_t Leds.init() { … return SUCCESS; } async command result_t Leds.yellowOn() {…} async command result_t Leds.yellowOff() {…} async command result_t Leds.yellowToggle() {…} …. async command uint8_t Leds.get() {…} async command result_t Leds.set(uint8_t ledsNum) {…} }
Blink 실습 과정 [Cygwin] 2 1 3 4
Blink 실습 과정 [PonyProg] <main.hax 파일의 경로> 1 c:\ProgramFiles\UCB\cygwin\opt\tinyos‐1.x\ contrib\zigbex\Blink\ build\ zigbex 2 3 열기 버튼을 누르면 main.hex파일 로드 Command메뉴에서 Write Program(FLASH)을 선택
BlinkTimer.nc configuration BlinkTimer { } implementation { components Main, BlinkTimerM, SingleTimer, LedsC; // 사용할 컴포넌트 지정 Main.StdControl ‐> BlinkTimerM.StdControl; Main.StdControl ‐> SingleTimer; // Main의 SdControl과 연결 BlinkTimerM.Timer ‐> SingleTimer; BlinkTimerM.Leds ‐> LedsC; //각 컴포넌트의 인터페이스를 연결 } <BlinkTimer의 구성도>
SingleTimer.nc configuration SingleTimer { provides interface Timer; // interface로 Timer를 provide provides interface StdControl; // inferface로 StdControl를 provide } implementation { components TimerC; //TimerC 콤포넌트를 사용 Timer = TimerC.Timer[unique("Timer")]; //Timer는 12개 까지 설정가능, unique라는 것은 같은 이름이 되더라도 다른 번호를 부여한다는 의미 StdControl = TimerC; //StdControl=TimerC.StdControl과 같음 } <SingleTimer 구상도>
<BlinkTimerM 구성도> BlinkTimerM.nc module BlinkTimerM { provides { interface StdControl; //BlinkM은 StdControl을 provide } uses { interface Timer; //BlinkM은 Timer interface를 사용 interface Leds; //BlinkM은 Leds interface를 사용 } }
BlinkTimerM.nc implementation { //실제 동작에 관련된 내용들을 기술 bool state; //LED상태를 나타내는 변수 command result_t StdControl.init() { //프로그램 시작시 호출 state = FALSE; call Leds.init(); // LedsC에서 제공하는 인터페이스 Leds의 init()를 호출, LED초기화 // function을 부를때는 항상 call이라고 붙여줌 return SUCCESS; } command result_t StdControl.start() { //StdControl.init() 다음에 호출 return call Timer.start(TIMER_REPEAT, 1000); // 1000ms마다 Timer.fired()가 호출되도록 설정 }
BlinkTimerM.nc command result_t StdControl.stop() { return call Timer.stop(); //종료할때 Timer를 멈춤 } task void processing() { if (state) call Leds.redOn(); else call Leds.redOff(); } // state변수값에 따른 LED on,off event result_t Timer.fired() { state = !state; post processing(); return SUCCESS; } } // state변수값을 부정하여 바꾸어 task로 정의된 processing 함수를 호출
BlinkTimer 예제실습 방법 • 먼저 cygwin을 시작한 후, 다음과 같이 입력하여 예제 폴더로 이동 • make zigbex를 입력하여 컴파일 cd /opt/tinyos-1.x/contrib/zigbex cd BlinkTimer
BlinkTimer 예제실습 방법 • 컴파일 후 bulid/zigbex라는 폴더가 만들어짐 • PonyProg 실행 후 만들어진 폴더안의 main.hex파일을 open • 열기버튼을 누름, main.hex가 로드되면서 박스에 hex가 표시 • Command 메뉴에서 write program을 선택 main.hex의 파일 경로 c:\Programfiles\UCB\cygwin\opt\tinyos‐1.x\contrib\zigbex\ BlinkTimer\ build\zigbex
Oscilloscope Component Graph 센서값 읽어오는것 내가 구현한 부분 시리얼 통신을 가능하게하는것
enum { BUFFER_SIZE = 10 }; struct OscopeMsg { uint16_t sourceMoteID; uint16_t lastSampleNumber; uint16_t channel; uint16_t data[BUFFER_SIZE]; }; struct OscopeResetMsg { /* Empty payload! */ }; enum { AM_OSCOPEMSG = 10, AM_OSCOPERESETMSG = 32, AM_ZIGBEXMSG = 0x27, AM_ZIGBEXRESETMSG = 0x28 }; 각 모트상의 고유 ID값 Message ID 실제 센싱되는 데이터값 OscopeMsg.h • OscilloscopeM 파일에서 사용한 Oscope 데이터 포맷을 정의하는 헤더파일 <Oscope 메시지의 형태>
Oscilloscope 예제 실습 방법 • 실습 준비물 • Host PC, 모트 1개, ISP프로그램 툴, 프린터 케이블, 시리얼 케이블 • 실습방법 • 먼저 cygwin을 시작한다. 다음과 같이 입력하여 예제 폴더로 이동 • 해당 경로로 이동한 다음 make zigbex cd /opt/tinyos-1.x/contrib/zigbex cd Oscilloscope make zigbex 결과
Oscilloscope 예제 실습 방법 • 컴파일 후 bulid/zigbex라는 폴더가 만들어짐 • PonyProg 실행 후 만들어진 폴더안의 main.hex파일을 open • 열기버튼을 누름, main.hex가 로드되면서 박스에 hex가 표시 • Command 메뉴에서 write program을 선택 main.hex의 파일 경로 c:\Programfiles\UCB\cygwin\opt\tinyos‐1.x\contrib\zigbex\ Oscilloscope\ build\zigbex
Oscilloscope 예제 실습 방법 • 모트에 연결된 프린트 케이블을 분리 시킨후, 다시 시리얼 케이블과 연결 • Cygwin에서 /opt/tinyos-1.x/tools/java로 이동 후 아래 명령 실행 • 자바 애플리케이션 결과를 확인한다. 혹시 그래프가 잘 보이지 않을 경우 Scrolling을 체크확인 export MOTECOM=serial@COM1:57600 cd /opt/tinyos-1.x/tools/java java net.tinyos.oscope.oscilloscope 조도 센서값을 Oscilloscope로 본 결과
OscilloscopeUltraredRF 여기서부터는 구릅아이디와 모터아이디 이용 원하는 노드에서만 주고받는다 그룹내 모트 넘버 지정 • OscilloscopeUltraredRF 예제의 특징 • 측정한 센서값을 RF 무선 통신으로 다른 ZigbeX 노드에게 전달 • TOSBase 프로그램을 설치함으로써 무선통신으로부터 받은 센서값을 시리얼 통신을 통해 PC로 전달 • PC상에서 Oscilloscope 자바 애플리케이션을 동작시켜 그 값을 확인 받아서 PC에 전달 <OsilloscopeUltraredRF 예제 구상도>
OscilloscopeUltraredRF 예제 실습 방법 • 실습 준비물 • Host PC, 모트 2개, ISP프로그램 툴, 프린터 케이블, 시리얼 케이블 • 실습방법 • 먼저 cygwin을 시작한다. 다음과 같이 입력하여 예제 폴더로 이동 • 컴파일 전 Makefile을 열어 수정, TOSBase와 그룹아이디와 동일 cd /opt/tinyos-1.x/contrib/zigbex cd OscilloscopeUltraredRF COMPONENT=Oscilloscope PFLAGS=-I../Oscilloscope DEFAULT_LOCAL_GROUP=0x7d Include ../../../apps/Makerules
OscilloscopeUltraredRF 예제 실습 방법 • 해당 경로에서 make zigbex을 입력 프로그램 컴파일 • PonyProg 실행 후 만들어진 폴더안의 main.hex파일을 open • 열기버튼을 누름, main.hex가 로드되면서 박스에 hex가 표시 • Command 메뉴에서 write program을 선택 make zigbex 결과 main.hex의 파일 경로 c:\Programfiles\UCB\cygwin\opt\tinyos‐1.x\contrib\zigbex\ OscilloscopeUltraredRF\ build\ zigbex
OscilloscopeUltraredRF 예제 실습 방법 • TOSBase 예제 실습 방법 • TOSBase 예제 폴더로 이동 • make zigbex로 컴파일 • PonyProg 프로그램을 실행하여 새로운 ZigbeX 노드에 다운로드 • 프로그램 입력후 시리얼 케이블과 연결 • Cygwin에서 /opt/tinyos-1.x/tools/java로 이동 후 아래 명령 실행 cd /opt/tinyos-1.x/contrib/zigbex cd TOSBase export MOTECOM=serial@COM1:57600 cd /opt/tinyos-1.x/tools/java java net.tinyos.oscope.oscilloscope