Download

1 / 6
60 likes | 80 Vues
Guide to Canon Pixma mg3500 Wireless Printer Setup. Contact 1-888-633-7151 for Canon mg3500 Setup, Setup Canon mg3500, Connect Canon mg3500 Printer to Wifi.

E N D
Canon Pixma mg3500 Wireless Printer Setup Call us : Toll-Free : USA/CA: +1-844-266-0040 UK: +44-808-164-5280
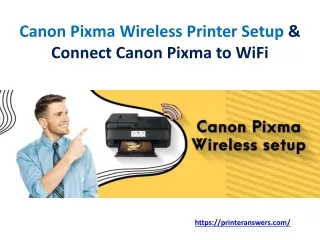
Connect Canon mg3500 Printer to WiFi Some access points (sometimes referred to as routers or hubs) feature an automatic Wi-Fi Protected Setup link button labeled “WPS.” This allows permitted devices such as your PIXMA printer to connect to your network without entering a password and allows you to connect your devices quickly and easily. This technique is by far the simplest manner to connect your PIXMA printer, so kindly pick’ WPS Connection Method’ for guidance on how to connect using this technique if your access point has a WPS button below. If your access point does not support WPS, we have provided alternative instructions for connecting your PIXMA printer, so please choose the’ Standard Connection Method’ below.
WPS Connection Method for Canon mg3500 Setup Before we start, some conditions must be met to use the WPS push button method: a physical WPS push button must be available to the access point.Please search for information with the user manual for your device.If there is no WPS push button accessible, kindly use the Standard Connection Method directions. The WPA (Wi-Fi Protected Access) or WPA2 safety protocol must be used by your network. This protocol is used by most access points enabled by WPS. Step 1: Check to turn on the printer. Press and hold the[ Wi-Fi] button at the top of the printer until the alarm lamp once flashes. Step 2: Make sure you start flashing red next to this button and then go to your access point and click the[ WPS] button within 2 minutes. Please refer to its user guide for information on beginning WPS on your access point. The (blue) printer Wi-Fi lamp will continue to flash while looking, and when connecting to the access point the energy and Wi-Fi lamp will flash. The power and Wi-Fi lamp will stop flashing and stay lit when the printer has successfully connected to your wireless network.
Network settings confirmation To confirm a successful connection of your printer to your wireless network, you can print out your printer’s network settings if you want: 1. Make sure you turn on your printer. 2. Load a simple paper sheet of A4 or letter size. 3. Press & hold the[ Resume / Cancel] button until 15 times the alarm lamp flashes and release it afterwards. The data page for the network will be printed. Check that the “Connection” indicates “Active” when referring to the printout and that the SSID-Service Set Identifier (the name of your wireless network) indicates the correct wireless network name. This concludes the procedure for setting up the WPS. Install the software to make the most of your PIXMA MG3550, please proceed now.
GET IN TOUCH WITH US Call us Toll-Free : USA/CA: +1-844-266-0040 UK: +44-808-164-5280 Mail us : support@canonprintersupport247.com