Download

1 / 81
2.07k likes | 6.09k Vues
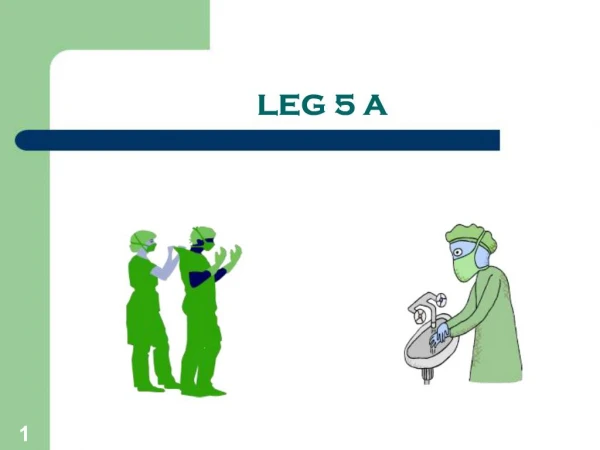
Entering the Sterile Field: Scrubbing, Gowning, and Gloving. ST220 Concorde Career College. Entering the Sterile Field. Objectives:

E N D
Entering the Sterile Field: Scrubbing, Gowning, and Gloving ST220 Concorde Career College
Entering the Sterile Field Objectives: • State the purpose of performing the surgical scrub, list the steps of the surgical scrub utilizing the counted brush stroke method, and explain the related sterile concepts. • Describe the technique utilized when drying and gowning oneself and explain the related sterile concepts. • Describe the technique utilized when closed gloving and explain the related sterile concepts.
Entering the Sterile Field Objectives: • Describe the technique utilized when assisting a team member with gowning and gloving and explain the related sterile concepts. • Describe the technique utilized when removing and replacing the gown and gloves intraoperatively and explain the rationale. • Describe the technique utilized when removing the gown and gloves postoperatively and explain the rationale.
Practices in Sterile Technique Surgical Scrub Asepsis and Sterile Technique is the third publication in the educational library of the Association of Surgical Technologists. Visit www.ast.org for more information about AST and their educational resources.
Method • Traditionally, both timed and counted brush stroke methods have been used • The method demonstrated is the counted brush stroke method
Please Note the Following Recent studies suggest that the use of alcohol solutions may be as or more effective than traditional scrub solutions. More studies are warranted.
Preparation for the Surgical Scrub • Attend to personal needs • Don all personal protective equipment • Tear open the packet containing the scrub brush • Adjust water temperature if necessary
Scrubbing: Step 1 • Hands and arms should be visually inspected for wounds or infections of any type
Scrubbing: Step 2 • Nails and cuticles, also, should be carefully inspected
Scrubbing: Step 3 Apply water to the arms for the pre-scrub hand-wash
Scrubbing: Step 4 Apply antimicrobial solution
Scrubbing: Step 5 • Perform a 30 second standard handwash • Rinse from finger tips to elbows
Scrubbing: Step 6 • Secure the previously opened scrub brush • Reapply antimicrobial solution • Remove the nail cleaner
Scrubbing: Step 7 • Clean each nail thoroughly under running water Note: You will need to hold the brush at the same time you are cleaning the nails
Scrubbing: Step 8 Rinse the end of the nail cleaner after each nail
Scrubbing: Step 9 • Discard the nail cleaner into the waste receptacle • Add an antimicrobial solution to the brush if necessary or wet and squeeze brush if it is soap impregnated
Scrubbing: Step 10 • Begin with scrubbing the nails • Use 30 strokes • 1 stroke is the combined movement in both directions
Scrubbing: Step 11 • Scrub all fingers • 10 strokes per plane per digit • (Planes = superior, medial, lateral, inferior) • Scrub web between fingers
Scrubbing: Step 12 • Continue to scrub the hand covering all planes • Continue proximally along the arm, scrubbing 1/3 the arm at a time • Keep arms away from scrub top and other objects
Note While several different practices are used, we recommend scrubbing one hand and arm completely, changing the brush to the other hand, and repeating the process with the second hand and arm.
Scrubbing: Step 13 • When scrub of both arms is completed, drop brush into waste receptacle • Keep arms away from the body • Rinse from finger tips toward elbow • Note blue path of water run-off
Scrubbing: Step 14 • Rinse arms thoroughly using a dipping maneuver • Note all the environmental dangers • Keep arms out • Note the blue path of water run-off
Practices in Sterile Technique Drying the Hands and Arms Asepsis and Sterile Technique is the third publication in the educational library of the Association of Surgical Technologists. Visit www.ast.org for more information about AST and their educational resources.
Step 1 • Watch the sterile field and verify that no water drops fall onto the sterile field from wet hands • Reach directly to the center of the towel and grasp it firmly
Step 2 • Lift the towel directly from the Mayo stand • Step back as the towel is lifted
Step 3 • Bend at the waist • Unfold the towel • Maintain distance from sterile fields • Use one end of the towel
Step 4 • Be aware of the lower ends of the towel • Begin to dry the hand at the fingers working toward the elbow
Step 5 • Rotate the hand and arm being dried to ensure that all surfaces are contacted • Use a squeezing and/or patting motion with the towel hand • Watch the lower end of the towel
Step 6 • Stop drying the first arm at the elbow • Place the dry hand on the sterile end of the towel (unused part)
Step 7 • Reverse the ends so that the contaminated / wet end is now the lower end
Step 8 • Repeat the process on the second hand • When finished drying, do not regrasp or refold the towel • Drop the towel into the linen hamper without changing hand positions on the towel
Practices in Sterile Technique Putting on a Gown Asepsis and Sterile Technique is the third publication in the educational library of the Association of Surgical Technologists. Visit www.ast.org for more information about AST and their educational resources.
Gowning: Step 1 • Observe the placement of various sterile fields • Approach the Mayo stand with gown and gloves opened upon it • Keep your body away from the sterile field • Reach from above down to the gown
Gowning: Step 2 • Reach directly onto the gown • Avoid touching the glove package or gown wrapping • “Pinch” the gown, controlling all layers
Gowning: Step 3 • Lift the gown vertically from the Mayo stand • Keep your body away from the Mayo stand
Gowning: Step 4 • Once the gown is lifted from the sterile field, step back from the Mayo stand • Beware other sterile fields and do not back into them
Gowning: Step 5 • Identify the collar of the gown • Confirm that the gown is oriented properly - inside of gown facing toward you • Grasping the gown at the collar and sleeves, release the lower portion
Gowning: Step 6 • Identify the arm openings • Place one hand inside each opening • Move hand into the sleeve • Remain conscious of all items around you
Gowning: Step 7 • Slip the first arm into the sleeve • Stop before the hand reaches the edge of the cuff • Flexing the arm slightly will help hold the gown in place • Repeat on other side
Gowning: Step 8 • Stop the second arm movement before the hand reaches the edge of the cuff • Flex both arms to hold the gown in place • Prepare to put on gloves
Donning a Surgical Gown Donning a surgical gown requires some “big” movements; therefore the surgical technologist must have a heightened awareness of the total environment around her/him.
Gloving Oneself Closed Glove Technique Asepsis and Sterile Technique is the third publication in the educational library of the Association of Surgical Technologists. Visit www.ast.org for more information about AST and their educational resources.
Step 1 • After gowning, approach the Mayo stand • Hands should be contained within the gown sleeve and distal to linen cuff • Keep distance between body and Mayo stand
Step 2 • Be aware of the gown front and do not allow it touch the gown wrapper • Open the glove package with covered hands • Stop as soon as one glove is exposed
Step 3 • Lift first glove from glove package by the cuff of the glove • Place it on the hand to be gloved so that the edge of the glove cuff is at the union of gown and cuff • Palm to palm; thumb to thumb
Close-up View • Cuff to cuff • Palm to palm • Thumb to thumb
Step 4 • Grasp lower edge of glove cuff with fingers on the hand being covered • Grasper upper edge of glove cuff with fingers of other hand • Stretch and extend the glove cuff • Roll wrist of hand being covered so glove cuff covers the linen cuff of the gown
Step 5 • Be sure glove covers all of the gown cuff • Do not touch gown cuff with other hand • Extend fingers into glove fingers • Pull glove onto hand
Step 6 • Repeat for the other hand
Step 7 • Note: always step back from the Mayo stand in order to perform gowning and gloving tasks • Complete gloving process