Download
1 / 173
1.74k likes | 1.78k Vues
FenSens comes with a set of security screws. FenSens owners are the only ones with the unique (included) screwdriver that can take it off the license plate. Also includes anti-theft software where device only works with your phone and tracks your car if it's lost or stolen, right on your app.

E N D
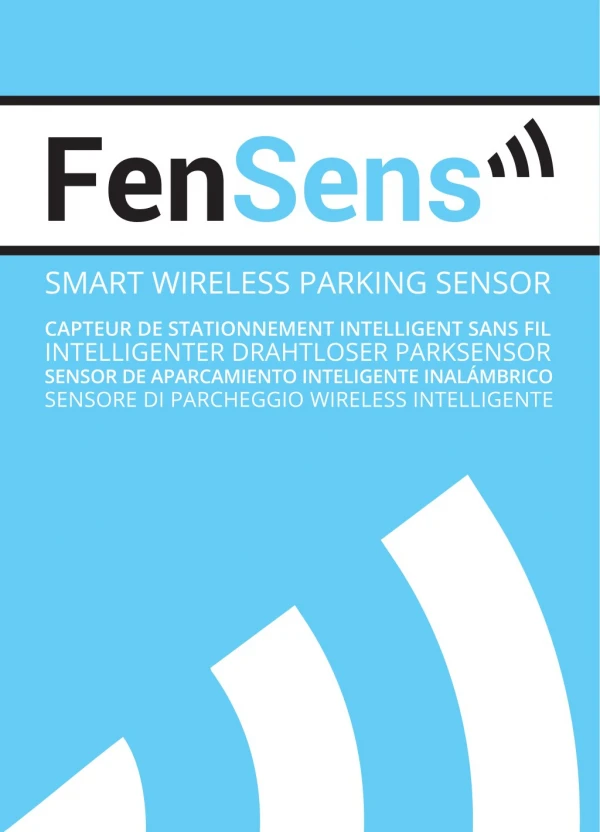
SMART WIRELESS PARKING SENSOR CAPTEUR DE STATIONNEMENT INTELLIGENT SANS FIL INTELLIGENTER DRAHTLOSER PARKSENSOR SENSOR DE APARCAMIENTO INTELIGENTE INALÁMBRICO SENSORE DI PARCHEGGIO WIRELESS INTELLIGENTE
ENGLISH 1 FRANÇAIS 35 DEUTSCHE 67 ESPAÑOL 99 ITALIANO 131
ENGLISH FenSens Smart Wireless Parking Sensor User Manual FenSens Product Support Online: http://FenSens.com Email: info@ FenSens.com
TABLE OF CONTENTS Introduction 5 Important Safety Instructions 5 Package Contents 5 FenSens Overview 6 Features 8 Powering On 8 Setting Up The Mobile App 9 Mounting Device 9 Magnetic Car Mount Installation 11 Adjusting Sensor Positions 12 Adding TAP QuickLaunch Button 14 Backing Up Safely 16 App Features And Functions 18 Specification 21 Factory Reset 22 Troubleshooting & FAQ 23 Warranty 31 RF Exposure Statement 32
INTRODUCTION Read all safety and operating instructions before using this Bluetooth Smart Wireless Parking Sensor. IMPORTANT SAFETY INSTRUCTIONS Read all safety and operation instructions before using the device 1. Device is suitable for -40°C and 55°C, but it is not recommended to store or keep the device in below 0°C or above 45°C temperatures. 2. Do not submerge the device underwater. Note: It is suitable for rain and car washes. However, large raindrops or snow on the sensors may cause some false readings just like with parking sensors on new vehicles. 3. Use only accessories and attachments as supplied and designated in the instruction manual. 4. Do not attempt to open or modify the device in any way. 5. Store the device in a cool, dry place when not in use. 6. Always dispose of the packaging and unit in accordance with the local regulations and in a responsible manner. PACKAGE CONTENTS • • • • • • FenSens Smart Wireless Parking Sensor User Manual Smartphone Mount QuickLaunch Button Custom Security Screwdriver (Prevents theft) Universal Screwdriver 5
FENSENS OVERVIEW 16. Tap QuickLaunch Button 5. Security Screw Mounts 1. Left Sensor 2. Right Sensor 6. Battery (Unscrew) 9. Sensor Visual Display 10. Car App Launcher 8. AudioAlertsOn/Off 6
11. Alert Settings 13. Account Settings 12. Clearance Settings 14. Add New FenSens Device 15. Adjust Device Placement 1. Left Sensor 2. Right Sensor 5. Security Screw Mounts 6. Battery 7. Front/Back Sensor Switcher 8.AudioAlertsOn/Off 9. Sensor Visual Display (Not actual coverage area) 10. Car App Launcher 11. Alert Settings 12. Clearance Settings 13. Account Settings 14. Add New FenSens Device (Back or Front) 15. Adjust Device Placement (On App) 16. Tap QuickLaunch Button 7
FEATURES 1. Wireless Parking Sensor: Wireless parking sensor utilizes Bluetooth 4.1 technology to send instant audio, visual, and vibration alerts to your phone. 2. Auto-launch: Tap the included launcher button to launch the Android app instantly (whenphonescreenisunlocked)orreceiveapushnotification(iOS)to launch your Apple app. 3. Universal Battery: Enjoy 5 month battery life with average use. Batteries can be replaced with standard universal AA batteries. 4. Easy Install: Installs in 5 minutes with included custom security screws to prevent theft. 5. Portability: Bring your FenSens with you to your next vehicle purchase or hand it down to your next of kin. 6. Hands-free alerts: Mount your phone with the included phone mount and utilize audio alerts or the visual display to assist you with parking. Turn on your vibration settings to utilize vibration alerts if your phone is in your pocket. POWERING ON Place the batteries in the device and it will turn on. Afterwards, the device will continue to sit in low power mode thereafter and you will not be required to turn the device on again. After turning on the device, please download the app in the app store (iOS and Android only) and follow the setup instructions. Note: You may have to remove the batteries and place in the device again to reset the device. 8
SETTING UP THE MOBILE APP 1. Download the app on the Google Play or Apple iTunes App Store 2. Select whether the device will be mounted on the front or back of yor vehicle. Select only one option for now, but you can choose a second device to the front or back after the initial setup process. 3. Adjust the clearance for your device, especially if it is placed on yourback license plate. This is to compensate for the bumper or hitch possibly sticking out past the position of the sensors. 4. Make sure your smartphone Bluetooth settings are turned on, then pair your smartphone with the FenSens device and the QuickLaunch button. Make sure you accept all permissions required by the app. On iOS the TAP QuickLaunch feature works best if you have the app running in the background and your location settings turned to “Always On”forFenSens.Lastly,pleaseallowpushnotificationsfromourapp. 5. Launch FenSens anytime you want to use it by simply opening the app, hitting the sensor icon within the app’s navigation bar, or tapping the included QuickLaunch button. MOUNTING DEVICE 1. Place included batteries within the smart parking sensor device’s bottom panel, then seal it up with the provided set of safety screws. It is best to set up the mobile app and pair it with the device before installing on the vehicle. 2. After setting up the app, place the FenSens frame onto the front or back of your car by aligning the holes on the bumper with the holes on the frame and securing with the included set of screws. We have included white washers if you need something to screw into, for 9
instance if you must drill 2 extra holes for your device to be mounted. 3. Once the frame is mounted onto the car, slide the license plate up between the side tabs and underneath the top tabs, pushing until snapped into place. 4. Take the bottom panel and align the tabs on the back-end with the slots onthebottomoftheframe.Pressfirmlyalongthepaneltosnapitinto place. Then use the 3 provided security screws to secure it to the frame. Use the included custom screwdriver to screw them into the device. It’s important to use the custom security screws included with your kit as these screws will help prevent people from stealing your device. Fully tighten the screws so the device is secure. 5. Make sure your registration tabs and plate numbers are fully visible to stay legally compliant. Please refer to local rules and regulations regarding license plate visibility. 6. Wiggle your device to ensure it is fully screwed in and secure. 2 4 3 10
MAGNETIC CAR MOUNT INSTALLATION There are three ways to apply the adhesive metal plate (1a). Select the most suitable one according to the size of your smartphone and install it on the back of your device, your phone case (1b), or between the device and the phone case. Do not forget to remove the adhesive if necessary. 1b 1a 2 Insert next the car magnet mount (2) into the air vent of the car and put the phone over it. After installation, you can rotate your smartphone and swivel your display with your preference. The metal plate might not be compatible with any Qi wireless charging product. 11
ADJUSTING SENSOR POSITION The sensors can be adjusted up or down if you need them to be. We recommendthisifyourplateishigherthan90cmoffthegroundoryou are concerned about catching low hanging objects, such as curbs. Please adjustthesensorstoapositionyouarecomfortablewithusingtheflat ground as a reference. You do not want the sensors to be hitting the road and providing false readings. Thescrewholescanbeidentifiedintheimagebelow.Besuretouse the special tool that’s included with your kit to unscrew and adjust the sensors up or down. Tighten the special sensor screws after making an adjustment so they do not change position while in use on your vehicle. Sensor adjustment screws 1.5mm 12
Please note: FenSens is not recommended for vehicles with a license plate higher than 4 feet off the ground. The higher your smart wireless license plate is placed off of the ground, the more clearance you need to set within the app. Please refer to feature 12 in the Features section along with the diagram below. *Please adjust the clearance on your app according to the chart below. 1.2m Away 90 cm (actual) PLATE HEIGHT Adjust the clearance on your app* 30 cm Bumper/hitch clearance distance only 45 cm 6cm + Bumper/hitch clearance distance 60 cm 9cm + Bumper/hitch clearance distance 75 cm 16cm + Bumper/hitch clearance distance 90 cm 18cm + Bumper/hitch clearance distance 1m 23cm + Bumper/hitch clearance distance 1.2m 30cm + Bumper/hitch clearance distance 1.2m And Above Not recommended 13
ADDING TAP QUICKLAUNCH BUTTON To make sure your TAP quicklaunch button works properly, do not hit the button before attempting to pair, this will put it into advertising mode. You can, however, hold the button down for 5 seconds to put the button into Bluetooth pairing mode. If you do not hit the button, the button should be available within 1 minute by going to Settings > Manage Devices > TAP > Add TAP > Select The TAP Button By Name To Highlight It > Connect TAP 14
Next make sure your Bluetooth setting is on in your phone and FenSens has “Always On” permissions from your location settings and also allows pushnotificationsfromyourphone’ssettings.OnAndroid,ifyouare near the button and device, if you hit the TAP button it will open the app automatically if you do not have screen lock on. If you are on iOS you shouldgetapushnotificationwhenyougetnearyourcar,hitthepush notificationtolaunchtheappandusesthesensors.Lastly,oniOS,ifyou use the TAP button it’s best to have the FenSens app running in your phone’s background and the above mentioned permissions. Tapping the button will send a push noti cation on your phone that launches the app automatically if it pressed. If the APP is not in the background hit the TAP button once to pull it into the foreground, wait one second, then hit the TAPbuttonagaintoreceivethepushnotificationtolaunchtheapp. Mount the include TAP QuickLaunch button on your steering wheel or carefully take it out of the button holder by pinching the ring of the buttonholder,thenusingtwofingerstogentlypulloutthebutton. This button can be placed anywhere in the vehicle with the included 3M tape from the screw kit. 15
BACKING UP SAFELY Please note: the mobile app display is for visual purposes only and does not represent exact dimensions for the Smart License Plate Frame. Always use precaution when driving, checking for blind spots while operating or parking your vehicle. FenSens is best used for backing up or pulling forward into a parking spot. Please visually check the spot before making a parking maneuver. Listen for audio alerts from your phone if something should suddenly appear in front or behind your vehicle (depending on sensor placement). You will only receive sensor alerts from the side of your vehicle that the device is mounted on. If the device ever disconnects from your smartphone’s Bluetooth, you will see a red B (back) or F (front) that designates that the sensor is not connected. Please pay attention to this warning and proceed with caution or halt the parking maneuver. The warning will disappear as soon as the sensor reestablishes a connection with your smartphone. Refer to the diagrams below before using FenSens so that you can fully understand thefieldofvisionforthedevice.Pleasenotethatthecornersofthe bumperarenotcoveredandthefieldofvisionisbestusedforobjects directly in front or behind the vehicle, which can be seen best by moving your vehicle forward or backward in a straight line. 16
SENSORIAL DEVICE • • 3m Longitudinal Range Max. gap Allowed 15cm 3m 2 SENSORS 1.2m Radial Range 17
APP FEATURES AND FUNCTIONS Launch your device by tapping the QuickLaunch button included with your FenSens kit. The button will automatically launch your app on Android ifyourscreenisnotlockedanditwillsendapushnotificationifyouare using an iOS device. If your Android is on screen lock or you are using AppleiOS,pleasetapthepushnotificationtoopentheFenSensappto begin displaying sensor data. Make sure all permissions are enabled for this to work properly. See troubleshooting FAQ section if you have trouble. 9. Sensor Visual Display (Not actual coverage area) a. Visual indicators: Use these visual indicators to know how far away an object is from your vehicle. Practice caution when you see that you are in the orange and red areas. For proper use, make sureyourclearanceisproperlyconfigured(See19).Pleasenote that these sensor displays are not the actual coverage area, but rather visual clarity to understand how far away an object is from your vehicle. See the section Backing Up Safely to understand the exactfieldofvisionforthedevice. b. Sound Icon:Thisiconwilltoggleaudioalerts(beeps)on/off.For fulleffectiveness,werecommendthatyoukeepthealertson,but alsooffertheoptiontokeeptheaudioalertsturnedoff. 10. Car App Launcher a. Hold your Tap button for 3 seconds to pull up the car app launcher or access it directly by selecting the home icon on the app’s lower navigation bar.. 11. Alert Settings a. Vibration:Thisswitcheson/offthevibrationalerts.Thesealerts are useful if the phone is in your pocket when you tap the Tap QuickLaunch button. 18
b. Sound notifications:Similartofigure17C,thistoggleson/off audio (beeps) alerts. c. Bluetooth:TurnoffyourBluetoothconnection(notrecommended while driving). 12. Clearance Settings d. Adjust your clearance settings to compensate for your bumper sticking out past the sensor or for smart wireless license plate framesplacedhigherthan60cmofftheground.Pleaseadvisethe “Adjusting sensor position” for further instructions. 13. Account Settings e. Email/Password: Change the email or password associated with your account. f. Device: See details regarding your device battery life and more. 14. Add New FenSens Device (Back or Front) g. Add new FenSens: Afteraddingyourfirstdevice,youcanaddan- other sensor on the front or back of your vehicle. It will guide you through the same setup process. 15. Adjust Device Placement (On App) h. Place of installation: Changing your device from the back to the front of your vehicle? Be sure to adjust this setting so that your sensor data displays correctly on your app. 19
9. Sensor Visual Display 10. Car App Launcher 8. Audio Alerts On/Off 11. Alert Settings 13. Account Settings 12. Clearance Settings 14. Add New FenSens Device 15. Adjust Device Placement 20
SPECIFICATIONS Bluetooth version Bluetooth V4.1 Bluetooth profiles GATT Operating distance 10 m Battery time About 5 months (5 times per day) Sensore range Approx. 3 m Battery type AA (Can replace with any AA battery) APP iOS7.1+preferred. Android 5.0 preferred, 4.4 minimum. Dimension 520 mm X 110 mm – 120 mm Weight 680g Battery capacity 3000mAH 21
FACTORY RESET Warning: Performing a factory reset on the FenSens device will delete any previous pairings and will restore the device to factory default settings. Note: This does not change the registration of your mobile device to the FenSens device. You can share access to the device from your app profilesettings. Only perform this if you are experiencing any issues with the product. • Remove the batteries from the casing for 3 seconds, then put them back into the license plate frame. This will factory reset the device, but it will still be registered to you. Note: After the factory reset is complete, the memory is now cleared. However, the device will still be registered only to your mobile device or anyone that you have shared your code with. When reopening the app, you will be prompted to login and walk through the setup process once more. 22
TROUBLESHOOTING & FAQ 1. Unable to pair with smartphone or tablet If you have yet to follow the setup instructions, please walk through the setup process to pair your FenSens device with your smartphone. The app will connect with your device when in range automatically as long as your smartphone’s bluetooth setting is turned on 2. FenSens device keeps dropping signal If your device signal keeps dropping, please close out of the app and open it up again or press the included Tap launcher button to auto-launch. 3. Lost or damaged accessories If you have lost or damaged one of the included accessories, please contact info@FenSens.com. The custom security screwdriver will require a replacement if it becomes lost, but the other screws can be easily removed using a standard screwdriver kit. 4. Device has blind spots on the corner of my vehicle Please refer to the “Backing Up Safely” section on the sensor’s fieldofvision.Pleasenote:FenSensisa“ParkingAssist”deviceand does not prevent accidents. Always check in the front and the back of your vehicle before driving, proceeding with caution of your surroundings throughout the entire duration of your trip. FenSens is recommended for backing up or pulling forward and receiving alerts when an object/person suddenly appears in front or behind your vehicle. FenSens does not possess peripheral abilities. 23
5. How Do You Prevent Theft? FenSens comes with a set of security screws. FenSens owners are the onlyoneswiththeunique(included)screwdriverthatcantakeitoffthe license plate. Also includes anti-theft software where device only works with your phone and tracks your car if it’s lost or stolen, right on your app. 6. How Long Is The Battery Life? The battery lasts about 5 months and replacing the battery is as simple aspoppingoffthebatteryhousing.BatteriesareuniversalAAsizeand can be replaced with any AA battery. 7. Do I Have To Do Anything After Installing To Use It? The included QuickLaunch button launches Android application instantlyorsendsapushnotificationtoopentheappifyouareusing iOS. The Android app starts providing you feedback without you having to do anything and the iOS app works by simply clicking the push notificationyoureceive. 8. My Device Takes Too Long To Connect We have found this is typically because the user attempts to turn on theirBluetoothsettingswhileinthecar.IftheuserturnsoffBluetooth and then goes in the car, turns on the Bluetooth again, and opens the APP when they want to park, It might need a few seconds to connect the sensor device. If the signal is not strong in the car, it might need more time to connect. We suggest to turn on Bluetooth all the time which doesn’t use much battery at all from the phone, the APP can then connect to device when the user gets close to car and the app will connect much more quickly. Our device has a powerful antennae, but not every phone 24
does, so it takes a bit to connect usually on the smartphone side. Avoid this by having your Bluetooth turned on already. 9. What Is The Effective Range Or Object Detection Capabilities? The FenSens can detect objects about 3m away and guide you safely to less than 30cm away from them. When an object is detected, the response is very quick, but please pay attention to any feedback warnings and always back up carefully. While FenSens helps assist in safe parking, please pause for one second, look behind to see if your path is clear, then move. 10. What Type Of Vehicles Does It Work For? FenSensisperfectforallconsumerandcommercialfleetvehiclesnot exceeding 9.14m in length. If your car has a recessed license plate frame above the bumper, you might need the FenSens Truck version, which has the sensors positioned at the top of the FenSens device. We advise the owner of any vehicle with a license plate frame higher than1.2moffthegroundtotesttheverticalrangeofthesensor before using, as it may have trouble seeing objects below 60cm feet. 11. Can I Pair Multiple Phones To It? Multiple users can be connected to one FenSens device. The original account holder can go to “Manage Devices” from in their settings menu, click on the device, and copy the share code to send to friends and family. While signing up the friends or family input that code during “LOGIN”. When using the device the TAP QuickLaunch button will work for theregistereduserthatconnectstoitfirst.ForAndroid,whoeveris inrangefirstwillbepromptedandcapableoflaunchingtheappon their phone when the TAP button is launched. For iOS both users willreceiveapushnotificationwheninrangeofthedevice,whoever 25
hitsthenotificationtoconnectfirstwillauto-launchtheappontheirhitsthenotificationtoconnectfirstwillauto-launchtheappontheir phone. 12. The TAP Button And Auto-Launching The App The TAP button automatically launches your app on Android and sendsyouapushnotificationoniOSthatyoucanusetotap(the notification)andlaunchtheiOSapponyourphoneinstantly.Pair your TAP button from the “Manage Devices” section, which you can access from the settings page in the app itself. DO NOT CLICK THE TAP BUTTON BEFORE LAUNCHING as this will put the button in an advertising mode and it will not be discoverable by your app. If you do hit the button, you will have to wait more than one minute before you can establish pairing again. Add the TAP button from the “Manage Devices” page where it says “TAP Buttons”, then click “Add TAP Button” to look for a nearby button you can pair with and use to auto-launch the app going forward. 13. How Do I Use The Included Smartphone Mount? Place the air vent phone mount on your air vent in your car. Place the magnetic sticker on your phone or behind a smartphone case, then place your smartphone on the air vent smartphone holder to safely use your app hands-free while driving. Use the included TAP QuickLaunch button to auto-launch the app without touching your phone. 14. My TAP Doesn’t Launch For any button related issues, please see above FAQ’s and make sure to check all permissions in APP. You should also turn on Location Services on your phone as our beacon uses this to determine if you areclosetothedeviceandsendapushnotification. 26
15. I’m Not Receiving Audio Alerts Or TAP Button Notifications For any button related issues, please see above FAQ’s and make sure to check all permissions in APP. You should also turn on Location Services on your phone as our beacon uses this to determine if you are close to thedeviceandsendapushnotification. Here are the best ways to troubleshoot your audio alerts not working: 1. Turn on the sound from the mute switch to the left side of the iPhone. 2. Turn on the sound on from within the parking page in APP. 3. Adjust the volume to a maximum in the parking page. 4. Make sure there is a target within 2.5 to 3 meters from your car. The app will only beep if an object is detected in that range, but not further. 16. Can I Take The Button Out Of The Holder? Yes, the button is fully removable from the holder. Simply pinch the holderbacktoloosenthebutton,thenusebothfingerstocarefully pluck the button from the button holder. Use the included 3M tape that came with your screw kit to place the button anywhere you want in the vehicle. 17. How Do I Use The TAP Button? The TAP button launches the app automatically on Android and will sendyouapushnotificationoniOS.Forbestoperability,pleasemake sure you accept all permissions the app asks for and for iOS have the app running in the background. One tap on Android will launch the parking sensor page, another tap will take you out of the parking page to the home screen. A long hold of 4 seconds on Android or iOS will put the button into pairing mode if you are having trouble pairing with the button. 27
18. How Do I Set The Sensor From Front To Back (Or Vice Versa) You can set your sensor to the front or back during the setup process initially and anytime from the “Manage Devices” section of the Settings page. On the “Manage Devices” page, click “FenSens” under the devices section. This will pull up a screen that shows the paired devices, click the one you want to reposition, hit the delete button, then add it again, but this time to the back of the vehicle when it walks you through setup. 19. TAP QuickLaunch Isn’t Working On IOS Make sure you accept all the necessary permissions in the app and set your Location settings on your phone to allow FenSens to use location “Always”, not while using. The TAP button performs best when you have the FenSens app on in the background of your phone. If you are having issues pairing, then make sure to do a 5 second hold on the button to put the button in Bluetooth pairing mode. The button should appear available to pair with under Settings > Manage Devices > Tapp > Add Tap > Connect. 20. It’s Asking For A Share Code, What Do I Do? Make sure you record your share code from Settings > Manage Devices > FenSens > Click On The Device. You should be able to see your device details and the share code associated with this. Provide this share code to friends and family for them to use when signing up and connecting with your device. 21. What’s The Best Way To Use 3 Or More FenSens Devices? Each FenSens account is designed to manage 2 devices on 1 car for now. We will likely update this in the future, but for now we would 28
recommend connecting only up to 2 FenSens devices (Front And Back) to 1 vehicle on one user account. 22. Trouble Adding Two Sensors? FenSens is designed to have 2 devices on 1 car (front and back) or with one mobile phone or user account. You can place multiple devices on other cars, but we would recommend a separate mobile phone or user account to be used with each car that has devices on it. This is so FenSens can properly tell that you back sensor on car #1 is differentthanthebackupsensoroncar#2 23. I Don’t Want To Mount The TAP Button On My Steering Wheel The TAP button can be taken out of its included holder and placed anywhere in the vehicle. Carefully pinch the bottom ring of the button holder to loosen the top, then carefully pop the button out of the holder. Use the included 3M tape from the screw kit to mount the button anywhere you would like in the car. 24. I’m Not Receiving Audio Alerts Or TAP Button Notifications If your app is saying the device is in “Sleep Mode”, it means the device is not connected to the app. This could be one of several issues, but typicallyit’sbecauseyourBluetoothsettingisofforyouareoutof range of your device. Here are some troubleshooting tips if you suspect a bigger issue. When the app is not connecting to device after paired, it may have one of the problems below: 1. App problem: App can not connect to device. (Try to reboot the App and/or the phone itself.) 2. Device problem: The device can’t connect. (Try to re-power the device). 29
3. Bluetooth signal: The distance between phone and device is too far and the signal is not good enough for communication. Lastly, the antenna in the product could be defective and it would be covered by hardware warranty. 30
WARRANTY One Year Limited Hardware Warranty FenSens, Inc hereby warrants to the customer of record that this product is in good-working condition and free from defects in material or workmanship under normal use for a duration of 1 year after the date of purchase. The product has been tested to meet the highest quality standards in each testing category. In the unlikely event that the product proves to be defective, FenSens will repair or replace the product free of charge. If replacement is required and if FenSens, Inc then no longer carries the same product, then FenSens, Inc reserves the right to substitute the product with a replacement product of like quality and size, suitable for the intended use. This warranty is limited to repair or replacement of the mentioned product only, is non-transferable and does not extend to any product damaged by misuse, natural disasters or any other circumstances beyond FenSens, Inc’s control. The warranty does not cover or provide for the reimbursement or payment of incidental or consequential damage resulting from breach of the limited warranty described above. Except forthelimitedwarrantydescribedabove,weoffernootherwarranties expressed or implied. Aside from limited warranty expressly contained herein, we hereby disclaim any and all warranties, including without limitationanyimpliedwarrantiesofmerchantability,suitabilityorfitness for a particular purpose. If your product is not functioning or you have any concerns, please contact FenSens Support before returning the product to us. 31
RF Exposure Statement When using Smart Wireless Parking Sensor, maintain a distance of 20cm from the body to ensure compliance with RF exposure requirements. Model No: FENEU1 The QuickLaunch Button has been evaluated to meet general RF exposure requirement, and can be used in portable exposure condition without restriction. Model No: FEN-BTTNV1 32
EU Regulatory Conformance Hereby, FenSens, Inc Corporation declares that this device is in compliance with the essential requirements and other relevant provisions of Directive 2014/53/EU. For the declaration of conformity, visit the Web site FenSens.com/certification. Online Support / Contact Us Please visit us at http://FenSens.com for support information. You may also reach us with the contact information provided below. Online: http://FenSens.com Email: info@FenSens.com
FRANÇAIS FenSens Capteur de stationnement intelligent sans fil Mode d’emploi Antenne Bluetooth Côté de la voiture Batterie Capteurs de proximité Plaque d’immatriculation Assistance Du Produit FenSens Online: http://FenSens.com Email: info@ FenSens.com
TABLE DES MATIERES Introduction 37 Instructions importantes sur la sécurité 37 Contenu de l’emballage 37 Aperçu de FenSens 38 Caractéristiques 40 Mettre sous tension 40 Configurationdel’applicationmobile 41 Dispositif de montage 41 Installation du Support Voiture Magnétique Pour Téléphone Réglage des positions des capteurs 43 44 Ajouter le bouton TAP QuickLaunch 46 Stationner en toute sécurité 48 Fonctionnalités de l’application 50 Spécification 53 Réinitialisation 54 Dépannage et FAQ 55 Garantie 63 Déclaration sur l’exposition aux radiations RF 64
INTRODUCTION Lisez toutes les consignes de sécurité et d’utilisation avant d’utiliser ce capteurintelligentdestationnementsansfilBluetooth. CONSIGNES DE SECURITE IMPORTANTES Lire toutes les consignes de sécurité et d’utilisation avant d’utiliser l’appareil 1. Le dispositif est approprié pour -40 °C et 55 °C, mais il n’est pas recommandé de garder l’appareil en dessous de 0 °C ou au-dessus de 45 °C. 2. Ne pas immerger l’appareil sous l’eau. Remarque : il convient à la pluie et aux lave-autos. Cependant, de grandes gouttes de pluie ou la neige sur les capteurs peuvent causer de fausses lectures tout comme des capteurs de stationnement sur les véhicules neufs. 3. N’utilisez que les accessoires et pièces jointes fournies et indiquées dans le manuel d’instructions. 4. N’essayezpasd’ouvriroudemodifierl’appareildequelquefaçonquecesoit. 5. Rangez l’appareil dans un endroit frais et sec lorsqu’il n’est pas utilisé. 6. Faut toujours disposer l’emballage et l’unité conformément aux réglementations locales et de manière responsable. CONTENU DE L’EMBALLAGE • • • • • • CapteurdestationnementintelligentsansfilFenSens Manuel d’utilisation Montage de Smartphone Bouton QuickLaunch Tournevis de sécurité personnalisé (empêche le vol) Tournevis universel 37
APERÇU FENSENS 16. Appuyez sur le bouton QuickLaunch 5. Montage de vis de sécurité 1. Capteur gauche 2. Capteur droit 6. Batterie (dévissez) 9. Affichagevisuelducapteur 10. App de voiture 8. Alertesaudioon/off 38
11. Paramètres d’alerte 13. Paramètres du compte 12. Réglage d’écart 14. Ajouter un nouveau périphérique FenSens 15. Ajuster la position de l’appareil 1. Capteur gauche 2. Capteur droit 5. Montage de vis de sécurité 6. Batterie (dévissez) 7. Sélecteur de capteur avant / arrière 8.Alertesaudioon/off 9.Affichagevisuelducapteur 10. App de voiture 11. Paramètres d’alerte 12. Réglage d’écart 13. Paramètres du compte 14. Ajouter un nouveau périphérique FenSens 15. Ajuster la position de l’appareil 16. Appuyez sur le bouton QuickLaunch 39
CARACTÉRISTIQUES 1. Capteur de stationnement sans fil: LecapteurdestationnementsansfilutiliselatechnologieBluetooth4,1 pour envoyer des alertes audio, visuelles et vibratoires instantanées à votre téléphone. 2. Lancement automatique: Appuyez sur le bouton du lanceur pour lancer l’application Android instantanément (lorsque l’écran du téléphone est déverrouillé) ou recevoir unenotificationpush(IOS)pourlancervotreapplicationApple. 3. Batterie universelle: ProfitezdeLongévitédelabatteriede5moisavecuneutilisationmoyenne. Les batteries peuvent être remplacées par des piles universelles standard AA. 4. Installation facile: Installez en 5 minutes avec des vis de sécurité personnalisées incluses pour empêcher le vol. 5. Portabilité: Prenez votre FenSens avec vous lors de votre prochain achat de véhicule ou remettez-le à votre prochain parent. 6. Alertes mains-libres: Montez votre téléphone et utilisez les alertes audio ou l’écran visuel pour vous aider lors du stationnement. Allumez vos paramètres de vibration pour utiliser des alertes de vibration si votre téléphone est dans votre poche. MISE SOUS TENSION Placez les batteries dans l’appareil et il s’allumera. Ensuite, l’appareil continuera à rester en mode batterie faible. Vous n’aurez pas besoin de le rallumer. Après avoir allumé l’appareil, s’il vous plaît téléchargez l’application dans l’App Store (iOS et Android seulement) et suivez les instructions de configuration.Remarque:vousdevrezpeut-êtreretirerlesbatteriesetles remettre dans l’appareil pour réinitialiser l’appareil. 40
CONFIGURATION DE L’APPLICATION MOBILE 1. Téléchargez l’application sur Google Play ou Apple iTunes App Store 2. Choissez si l’appareil sera monté à l’avant ou à l’arrière de votre véhicule Sélectionnez une seule option pour l’instant, mais vous pouvez choisir un deuxième périphérique à l’avant ou à l’arrière après le processus d’installation initial. 3. Réglez l’espace de votre appareil, surtout s’il est placé sur la plaque d’immatriculation arrière. Il s’agit de compenser le pare-chocs qui peut dépasser la position des capteurs. 4. Assurez-vous que les paramètres Bluetooth de votre smartphone sont activés, puis couplez votre smartphone avec le périphérique FenSens et le bouton QuickLaunch. Assurez-vous d’accepter toutes les autorisations requises par l’application. Sur iOS la fonctionnalité «’TAP QuickLaunch » fonctionne mieux si vous avez l’application en cours d’exécution en arrière-plan et les paramètres de votre position activé à “Alwayson”pourFenSens.Enfin,s’ilvousplaîtautoriserlesnotifications push de notre application. 5. Lancez FenSens chaque fois que vous voulez l’utiliser en ouvrant simplement l’application, en frappant l’icône du capteur dans la barre de navigation de l’app, ou en tapant le bouton QuickLaunch. DISPOSITIF DE MONTAGE 1. Placez les batteries incluses dans le panneau inférieur du dispositif intelligent de détection de stationnement, puis scellez avec les vis de sécuritéfourni.Ilestpréférabledeconfigurerl’applicationmobileetde la coupler avec l’appareil avant de l’installer sur le véhicule. 2. Aprèslaconfigurationdel’application,placezlecadreFenSenssur l’avant ou l’arrière de votre voiture en alignant les trous sur le pare- chocsaveclestroussurlecadreetenfixantavecl’ensembledevis. Nous avons inclus des rondelles blanches si vous en avez besoin, par exemple si vous devez percer 2 trous supplémentaires pour que votre appareil soit monté. 41
3. Une fois que le cadre est monté sur la voiture, faites glisser la plaque d’immatriculation vers le haut entre les languettes latérales et sous les languettes supérieures, en poussant jusqu’à ce qu’elles soient bien placées. 4. Prenez le panneau inférieur et alignez les languettes sur l’arrière avec les fentes au bas du cadre. Appuyez fermement le long du panneau pour le mettre en place. Utilisez ensuite les 3 vis de sécurité fournies pourlafixeraucadre.Utilisezletournevispersonnaliséfournipour les visser dans l’appareil. Il est important d’utiliser les vis de sécurité personnalisées incluses avec votre kit car ces vis empêcheront les gens devolervotreappareil.Serrezcomplètementlesvisafinquel’appareil soit en sécurité. 5. Assurez-vous que vos onglets et numéros de plaque d’immatriculation sont entièrement visibles pour rester juridiquement conformes. Veuillez-vous référer aux réglementations locales concernant la visibilité de la plaque d’immatriculation. 6. Secouez votre appareil pour vous assurer qu’il est complètement vissé et bloqué. 2 4 3 42
INSTALLATION DU SUPPORT VOITURE MAGNÉTIQUE POUR TÉLÉPHONE Il y a trois méthodes pour l’installation de la plaque en métal (1a). Sélectionner la plaque la plus adaptée à la taille de votre téléphone and placer la entre le téléphone et l’étui (1b), à l’extérieur de l’étui, ou directementàl’arrièredutéléphone.N’oubliezpasderetirerlefilm adhésif si nécessaire. 1b 1a 2 Glisser ensuite les pinces en caoutchouc du support magnétique (2) sur l’une de vos grilles d’aération et attachez le téléphone au support. Apres l’installation, vous pouvez pivotez ou inclinez votre téléphone à votre guise. La plaque en métal pourrait avoir des interférences avec les rechargementssansfil. 43
REGLAGE DE LA POSITION DU CAPTEUR Les capteurs peuvent être réglés vers le haut ou vers le bas. Nous recommandons cela si votre plaque est plus haute que 90 cm du sol ou si vous êtes préoccupé par la capture d’objets à faible pendage, tels que les bordures. S’il vous plaît ajustez les capteurs à une position que vous serez bien à l’aise avec l’utilisation de la terre plate comme une référence. Vous ne voulez pas que les capteurs touchent la route et fournissent de fausses lectures. Lestrousdevispeuventêtreidentifiésdansl’imageci-dessous.Assurez- vous d’utiliser l’outil spécial fourni avec votre kit pour dévisser et ajuster les capteurs vers le haut ou vers le bas. Serrez les vis du capteur spécial après avoir fait un réglage de sorte qu’ils ne puis pas changer de position lors de l’utilisation sur votre véhicule. Vis de réglage du capture 1.5mm 44
Note-S’il vous plaît : FenSens n’est pas recommandé pour les véhicules avec une plaque d’immatriculation supérieure à 4 pieds du sol. Le plus votre plaque de licence sans fil intelligente est haute, le plus d’écart vous auriez besoin dans l’application. Veuillez-vous reporter au schéma ci-dessous *Veuillez ajuster l’écart sur votre application selon le tableau ci-dessous 1.2m Away 90 cm (actual) HAUTEUR DE LA PLAQUE Ajuster l’espace dans votre application* 30 cm Distance restante jusqu’au pare-chocs/attelage seulement 45 cm 6cm + Distance restante jusqu’au pare-chocs/attelage 60 cm 9cm + Distance restante jusqu’au pare-chocs/attelage 75 cm 16cm + Distance restante jusqu’au pare-chocs/attelage 90 cm 18cm + Distance restante jusqu’au pare-chocs/attelage 1m 23cm + Distance restante jusqu’au pare-chocs/attelage 1.2m 30cm + Distance restante jusqu’au pare-chocs/attelage 1.2m et au-dessus Non recommandé 45
AJOUTER LE BOUTON TAP QUICKLAUNCH Pour vous assurer que votre bouton TAP QuickLaunch fonctionne correctement, ne touchez pas le bouton avant de tenter de coupler, cela le mettra en mode publicitaire. Vous pouvez toutefois appuyer le bouton pendant 5 secondes pour mettre le bouton en mode Bluetooth. Si vous ne touchez pas le bouton, le bouton devrait être disponible dans un délai de 1 minute en allant aux paramètres > gérer les périphériques > Appuyez sur > Ajouter TAP > sélectionnez le bouton TAP par le nom pour le mettre en surbrillance > connecter TAP 46