Mastering Table Insertion and Management in Document Editing
100 likes | 207 Vues
This lesson guides you through the essential skills for inserting and managing tables in your documents. You'll learn how to insert tables using various methods: the Insert Table button, Tables and Borders button, and the Insert Table dialog box. Gain the ability to navigate through table cells, merge selected cells, and easily insert or delete rows and columns. By the end of this lesson, you will feel comfortable working with tables, allowing you to enhance your document presentation effectively.

Mastering Table Insertion and Management in Document Editing
E N D
Presentation Transcript
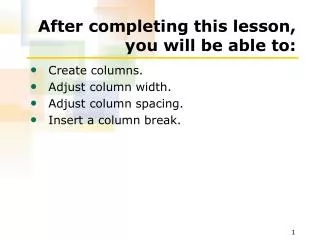
After completing this lesson, you will be able to: • Insert a table. • Navigate and select cells within a table. • Merge table cells. • Insert and delete columns and rows.
Inserting a Table To insert a table using the Insert Table button • Click to position the insertion point where you want to insert the table. • On the Standard toolbar, click the Insert Table button. • On the Insert Table menu, drag the mouse pointer over the boxes and click the desired number of rows and columns.
Inserting a Table To draw a table using the Tables and Borders button • On the Standard toolbar, click the Tables and Borders button. • Drag the mouse pointer diagonally to create the table boundaries. • Drag the pointer to create vertical and horizontal lines, which create the columns and rows. • Click the Tables and Borders button again to stop drawing.
Inserting a Table To insert a table using the Insert Table dialog box • Click to position the insertion point where you want to insert the table. • On the Table menu, point to Insert and click Table. • In the Number of columns box, type the number of columns that you want in the table. (continued)
Inserting a Table To insert a table using the Insert Table dialog box (continued) • In the Number of rows box, type the number of rows. • Click OK.
Moving Around and Selecting Cells in a Table To navigate within a table • Click the desired cell. • Type the cell information. • Press Tab to move to the next cell. Or • Press a key combination to move to the desired location.
Moving Around and Selecting Cells in a Table To select cells in a table • Press a key combination. Or • Click the selection area to the left of a row. Or • Click the top of a column. Or • Click the bottom left corner of the cell.
Merging Table Cells To merge cells • Select the cells that you want to join. • On the Table menu, click Merge Cells. Or • Click the Merge Cells button on the Table and Borders toolbar.
Inserting and Deleting Column and Rows To insert columns or rows into a table • Click in a cell next to where you want to insert the row or column. • On the Table menu, point to Insert and click Column to the Left, Column to the Right, Rows Above, or Rows Below, as desired.
Inserting and Deleting Column and Rows To delete columns or rows into a table • Click in the column or row that you want to delete or select multiple rows or columns. • On the Table menu, point to Delete and click Columns or Rows, depending on whether you want to delete rows or columns.