Download
1 / 52
530 likes | 769 Vues
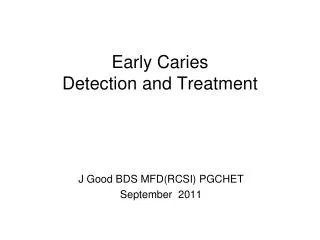
Early Caries Detection and Treatment. J Good BDS MFD(RCSI) PGCHET September 2011. Learning Outcomes. Following this lecture you should be able to: discuss the carious process describe how to recognise ‘early carious lesions’ and ways of detecting them

E N D
Early CariesDetection and Treatment J Good BDS MFD(RCSI) PGCHET September 2011
Learning Outcomes Following this lecture you should be able to: • discuss the carious process • describe how to recognise ‘early carious lesions’ and ways of detecting them • discuss the principals involved in the management of early carious lesions
The Carious Process Four factors are necessary to produce dental caries: • ? • ? • ? • ?
Dental caries is: • a disease of the calcified tissues of the teeth • caused by the action of micro-organisms on fermentable carbohydrates • characterised by demineralisation of the mineral portion of enamel and dentine followed by disintegration of their organic material
In its early stages the disease can be arrested since it is possible for remineralization to occur ALSO This disease is not inevitable as it can be completely prevented by relatively simple measures
Susceptible Sites Sites on the tooth surface which favour plaque retention and stagnation are particularly prone to decay:
Approximal enamel smooth surfaces just cervical to the contact point.
Enamel of the cervical margin of the tooth just coronal to the gingival margin
The margins of restorations, particularly those that are deficient or overhanging
Tooth surfaces adjacent to dentures and bridges which increase the areas where stagnation can occur.
Why is diagnosis of caries in its ‘early stages’ important. • The carious process can be modified by preventive treatment so that the lesion does not progress If caries can be diagnosed at the stage of a ‘white spot lesion’ the balance can be tipped in favour of arrest by: • ? • ? • ?
What is thePOINT OF NO RETURN • When a cavity is actually present • A hole in the dental tissues is not expected to calcify up from the base
How can dental caries be diagnosed in its ‘EARLY STAGES’ • Sharp eyes • Good lighting with clean, dry teeth • Isolate teeth with cotton wool rolls, slow suction & buccal pad. Question With what type of probe should you check for caries?
Interproximally on anterior teeth: • Operating light is reflected through the contact point with the dental mirror • Carious lesion appears as a dark shadow following the outline of the decay
Interproximally on posterior Teeth: • Stronger light source is required eg fibre-optic light with beam reduced to 0.5mm diam. (FOTI) • Small diam. reduces glare and therefore reduces loss of detail • Useful technique where you want to avoid radiation eg pregnancy or where teeth would appear overlapped on x-ray due to crowding.
Good bitewing radiographs are also essential in diagnosis • A film holder is used so that the x-ray beam passes at right-angles to the long axis of the tooth and tangentially through the contact area
Tooth separation Uses orthodontic separating elastics After a few days the teeth are separated and presence of a cavity can be assessed by: • Direct vision • Gentle probing with blunt probe • Elastomer impression material
Occlusal Caries • Direct vision – discolouration, cavitation and the grey appearance of enamel undermined by caries • Bitewing radiographs – will only show more advanced lesions • Caries Dyes • Electronic caries monitors - can be used to help diagnose occlusal caries
Work using the principal of electrical resistance since intact enamel is a good insulator • During the carious process, moisture filled porosities act as conductive pathways causing the resistance to fall • These measurements may be repeated at recall appointments and comparative readings may indicate whether a region is growing or not.
Diagnosing ‘AT RISK’ patients • Caries is a reversible process • If the dentist can diagnose the process early then the patient can be advised on instituting preventive measures to tip the balance in favour of arrest • Diagnosis is more than simply recording the decalcified areas, their location and their appearance
The dentist needs to know whether the patient is likely to develop new cavities and/or whether existing cavities are likely to progress. • To help make these decisions a Caries Risk Assessment should be carried out. What would this involve?
Caries Management Once caries has been diagnosed, the dentist must decide how the process should be treated: • Use preventive measures to attempt to arrest the process OR • Surgically remove and replace the damaged tissues and prevent recurrence
Prevention On smooth surfaces: • Dietary advice • Use of fluoride • Improve plaque control • REASSESS
Pits and Fissures: Difficult to diagnose in early stages so Fissure Sealing susceptible teeth as soon after eruption as possible is often the choice
Indications for FS • High caries risk • Stagnating plaque • Newly erupting molars • (Stained and decalcified deep fissure patterns)
Isolation Very important • Cotton wool rolls • Slow suction • Buccal pads • Rubber dam
Clean occlusal surface with a wet prophy brush Then wash and dry using 3-in-1
Wash for 10 secs and then dry with 3-in-1
Apply FS • Note the use of the ball-ended burnisher
Light Cure • Note orange protective shield should be in place!!! • 470nm wavelength light for 20 secs
Check the occlusion • Clear unfilled resins – will adjust with occlusion unless excessive material has been used • White filled resins – need to be adjusted at chairside for the patient
Indications for Preventative Resin Restoration (PRR) • High caries risk • Stained and decalcified deep fissure patterns • More than 2 other carious lesions in the mouth • Enamel biopsy shows that lesion is confined to enamel
Procedure for PRR Follow similar steps as for a Fissure Sealant BUT After the prophy brush is used, the stained enamel must be removed using a tapered diamond bur in the fast handpiece. Any decay is then removed using a round bur in the slow handpiece.
The tooth surface can then be restored using one of the following options: • Flowable composite • GI and flowable composite • Composite • amalgam
Approximal Surfaces A lesion limited to the enamel on B/W radiograph should be treated preventively: • Diet advice • Fluoride • Plaque control
Unless the caries risk is very high,time is on the patient’s side: • Research has shown that progression of a lesion through enamel, if it occurs, can be very slow, taking 2-6years before it is evident in dentine radiographically Ref – Pitts, N.B. (1983). Monitoring of caries progression in permanent and primary approximal enamel by bitewing radiography. A review. Community Dent. Oral Epidemiol., 11, 228-35.
Radiographically just through enamel and into dentine: In a young patient or high- & medium-risk patients – advice is to treat operatively In a low-risk patient – treat preventively. Show the patient the radiograph and suggest that it should be repeated in 6 months.
Root Caries: • Early diagnosis very important as advanced lesions can be difficult to manage • Meticulous plaque control • Dietary control • Use of topical fluoride (as a varnish &/or mouthwash)
Diet Advice • No snacking between meals • Aim for 2-3 sugar attacks per day • Never sugar before bed • Avoid fizzy drinks but if not possible then chose diet variety Each patient is an individual and will require specific advice
Cariostatic Mechanisms of Fluoride • Post-eruption - inhibits demineralization and promotes remineralization • Depending on its pH and concentration, fluoride can also exert a bacteriocidal or antienzymatic effect. • Pre-eruption – may alter morphology making fissures more self-cleansing.
Modes of Fluoride Application Patient may be receiving fluorinated water or taking fluoride tablets. These facts would be important to know before prescribing any further fluoride treatment – WHY?
Topical application of Fluoride falls into 2 categories: • Frequent-use, low-concentration preparations i.e. Toothpastes and mouthrinses • Periodic-use, high-concentration preparations i.e. fluoride varnishes, gels and prophylactic pastes
Toothpastes (525 -1450ppm F) • Mouthrinses – daily ?% NaF weekly ?% NaF • NaF varnish (Duraphat) ?%F painted on in the surgery • APF gel ?%F – swabbed onto the tooth surface or applied in closely fitting trays • Prophylaxis paste ?%F – applied in surgery with a rubber cup
Plaque Control • Toothbrushing • Dental floss/tape • Woodsticks • Interdental brushes • Single tufted brushes