Download
1 / 18
180 likes | 312 Vues
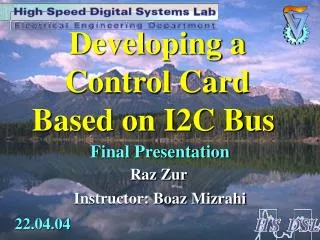
Developing a Control Card Based on I2C Bus. Final Presentation. Raz Zur. Instructor: Boaz Mizrahi. 22.04.04. Presentation Contents:. Introduction – Project's Purposes. General Background. Block Division. Hardware and Blocks Specifications. Software Structure.

E N D
Developing a Control Card Based on I2C Bus Final Presentation Raz Zur Instructor: Boaz Mizrahi 22.04.04
Presentation Contents: • Introduction – Project's Purposes. • General Background. • Block Division. • Hardware and Blocks Specifications. • Software Structure. • Working according to Schedule. • Summary and Conclusions.
Key Pad LCDDisplay Fans Control Intrusion Alert LED Control I2C BUS Serial EEPROM Temp. Sensor יחידת שליטה Introduction–Project's Purposes: • Building a monitoring and control card, to be installed in a stand-alone system. • The card will perform a few routines that monitor and control the system, according to the output of sensors that are installed in the system. • The communication between the devices of the card will be implemented using the I2C serial communication protocol.
General Background: • Today's world of technology requires monitoring and control. • One of the better solutions – building a "monitoring" system apart from, and parallel to the "original" system. • The advantages – system resources, development and maintenance, simplicity. • The idea – maximum monitoring and control with minimum interference. • Implementation – with a serial protocol. • Technological solution – the I2C serial communication protocol. • I2C - Short for Inter-IC, a type of bus designed by Philips Semiconductors in the early 1980s, which is used to connect integrated circuits (ICs).
Blocks Division: • The POWER Block:Power supply. • TheCONTROLBlock:The “Brain” – the control unit. • TheSENSE Block:Temperature sensing, fans control, and intrusion sensing. • TheMMI Block:User interface – display unit, keypad, and LEDs. • TheEEPROM Block:Designated memory.
Hardware and Blocks Specifications: • The POWER block: • Voltages supply – entrance voltage 12V, lowering to 3.3V and 5V, using regulators (LM1085). • Protections – diode bridge (DF005M) for protection against inverted voltage, and a fuse for protection against shortcut current. • Noise reduction – capacitors and coils circuits.
Hardware and Blocks Specifications: • The CONTROL block: • Microprocessor - PIC18F252, the I2C master. • 4MHz oscillator – clock frequency for the microprocessor. • Voltage translator – between 3.3V and 5V. • MAX232 – a-synchronic communication with an outer computer.
Hardware and Blocks Specifications: • The SENSE block: • LM75 – a device with I2C interface, which is a temperature sensor with 0.5 °C resolution. • LM87 – a device with I2C interface, which includes D/A for control of the fan speed, measurement of the fan speed, intrusion alert, entrances for far temperature sensors, and measurement of voltages in the card.
Hardware and Blocks Specifications: • The MMI block: • LCD screen – LK12-162, Display unit with I2C interface. • Keypad. • PCA9553 – a device with I2C interface for LEDs control.
Hardware and Blocks Specifications: • EEPROM block: • Designated memory – FM24C16U, serial EEPROM with I2C interface.
Bus speed: 100KHz. Devices are addressed completely by software. The maximum allowable capacitance is 400 pF (about 20 to 30 devices). Software Structure: The I2C protocol:
Software Structure: The I2C protocol:
NO Is it an exit key? YES NO Has a key been pressed? YES Software Structure: System initialization Start Carrying out the routine Outer loop: calling to a routine according to the user's choice from the menus that appear on the display – temperature reading, card's voltages reading, fan speed, setting temperature threshold, turning off intrusion alert, or exiting. Inner loop: sensing the system's data, and control accordingly Finish: exit or reset the system
Software Structure: • Main screen: Displaying choices menu – temperature, voltages, fan speed and intrusion alert. • Temperature screen: Displaying temperature, and an option of setting a temperature threshold through the terminal of an outer computer (the new threshold will be saved in the EEPROM). • Voltages reading screen: Displaying the voltages in the card – 3.3V, 5V and 10.5V. • Fan speed screen: Display the fan speed. • Intrusion alert screen: Display option of turning off intrusion alert. • Finish screen: "Press RESET or shut down the system".
Software Structure: • Green light: Flickering slowly – the system is functioning properly, and in the main loop.Off – the system exited the main loop by the user. • Red light: Flickering fast – the system sensed an intrusion, intrusion alert has been set (a message is being sent over and over to the terminal of the outer computer).Off – intrusion alert is off. • Yellow light: On – the temperature is above the threshold set by the user.Off – the temperature is below the threshold set by the user. • Bright Green light: Flickering fast – the system is communicating with the terminal of the outer computer (waiting for a new temperature threshold from the user).Off – the system finished communicating with the terminal (the system sends update messages on every change in the system's state).
Working according to Schedule Done in part A according to the targets: • Detailed design in ORCAD. • Building the card and wiring it with "wire-wrap". • Building the full system case. • Writing basic software for the microprocessor (USART). Done in part B according to the targets: • Programming software for operating the PCA9553. • Programming software for operating the LM75. • Programming software for operating the EEPROM. • Programming software for operating the LM87. • Programming software for operating the LCD and the keypad. • Programming software for user settings by connecting to a terminal of an outer computer. • Programming the main software and integrating between all the modules.
Summary and Conclusions: Building a technological project according to defined stages, from the idea to a final product, while having targets – a unique enriching experience in various fields: technological, academic, professional and interpersonal. Thanks to the lab's staff, and a special thanks to the instructor.