Download
1 / 34
340 likes | 484 Vues
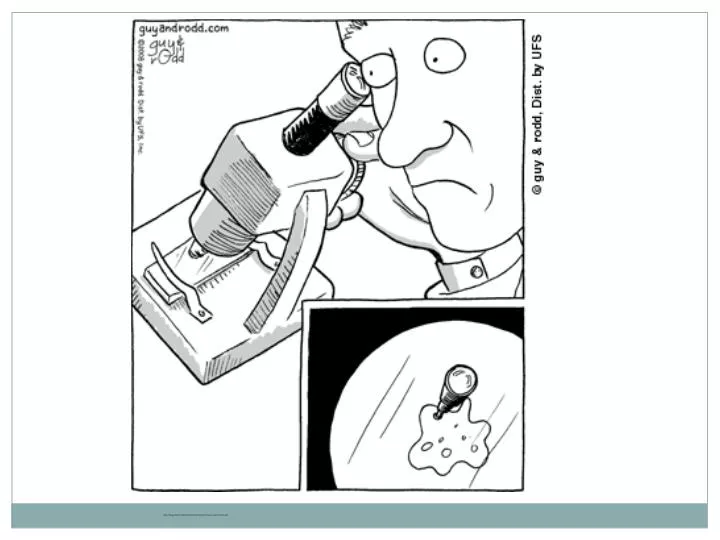
http://blogs.besd.net/jamie-kent/files/2010/12/microscope-Comic1.gif. Reflect and Connect Pg 255. 3a. What do you know about atoms? 3b. What do you know about cells? Appearance and function. 3c. Draw and label sketches to show how you think they may be related. Atoms:

E N D
http://blogs.besd.net/jamie-kent/files/2010/12/microscope-Comic1.gifhttp://blogs.besd.net/jamie-kent/files/2010/12/microscope-Comic1.gif
Reflect and Connect Pg 255 3a. What do you know about atoms? 3b. What do you know about cells? Appearance and function. 3c. Draw and label sketches to show how you think they may be related.
Atoms: • Think of an atom as the basic building block of all matter. • You cannot see individual atoms with a magnifying glass or even a powerful optical microscope. • Cells: • basic structural, functional and biological unit of all known living organisms. • Cells are the smallest unit of life that can replicate independently • Cells are made up of many atoms grouped into molecules, which are collections of atoms. • Can be seen with microscopes
What is an organism? an organism is any living system (such as animal, plant, fungus, or micro-organism). all organisms are capable of response to stimuli, reproduction, growth and development may either be unicellular (single-celled) or be composed of, as in humans, many billions of cells grouped into specialized tissues and organs. multicellular (many-celled) describes any organism made up of more than one cell
Single Cell/Many Cells/Not a Cell? Chicken egg Single Cell: technically the cell is the tiny spot you can sometimes see on an egg yolk, as small as it is it’s still larger than most cells. The rest of the egg provides life support that would be necessary if the egg had been fertilized http://www.forumazur.com/images/stories/HouseGarden/Animals/Chicken/ChickenEggs.JPG
Single Cell/Many Cells/Not a Cell? Water Not a Cell: water is a polar molecule composed of hydrogen and oxygen atoms http://www.admc.hct.ac.ae/hd1/english/probsoln/water.jpg
Single Cell/Many Cells/Not a Cell? Tree bark Many Cells: Many plant cells combined to create the bark of a tree http://www.bing.com/images/search?q=tree+bark&qpvt=tree+bark&FORM=IGRE&adlt=strict#view=detail&id=8186A05986782BF7C2EEDA13860B24B06360808E&selectedIndex=98
Single Cell/Many Cells/Not a Cell? Amoeba Single Cell: an amoeba is a single celled organism. Amoebais Protozoa that consists of unicellular organisms which do not have a definite shape http://dpgitr7uxxopj.cloudfront.net/wp-content/uploads/amoeba-2695978355.jpg
Single Cell/Many Cells/Not a Cell? Bacterium (plural is bacteria) Single Cell http://www.fallingpixel.com/products/6035/mains/bacteria.jpg
Single Cell/Many Cells/Not a Cell? Human egg Single Cell The egg cell is the largest human cell. http://www.paranormalstories.com/images/bieggsperm2.jpg http://pictures.funny16.com/wp-content/uploads/2011/12/human-eggs.jpg
Single Cell/Many Cells/Not a Cell? Virus Not a Cell: Not a Cell: Living cells can extract energy from their environment. Viruses have no metabolic capacity of their own, but rely the host cell for all functions http://www.bioquellus.com/interface/assets/images/content/Influenza_virus_2008765.jpg
Single Cell/Many Cells/Not a Cell? Sperm Single Cell The sperm cell is the smallest human cell. http://www.babyhopes.com/articles/wp-content/uploads/2008/08/sperm.jpg
Single Cell/Many Cells/Not a Cell? Chloroplast Not a Cell: Not a Cell it is an organelle within a cell to help with cell functions http://4.bp.blogspot.com/-GLpOYsrH7HE/Tnp3h09i97I/AAAAAAAAAE8/QNlmlI1T9Qw/s1600/Chloroplast.jpg
Day 2: Microscope Skills • Learning Targets: • Care and use of a compound microscope • Learn how to prepare a wet mount • Learn how to use low and high power on the microscope • Rate your level of understanding using the rubric
Types of Microscopes Light Microscope - Found in most schools, use compound lenses to magnify objects. The lenses bend or refract light to make the object beneath them appear closer Common magnifications: 40x, 100x, 400x *Oil Immersion lenses can improve quality of focus and magnification
You will be tested on this!!! Microscope Parts Eyepiece BodyTube RevolvingNosepiece Arm ObjectiveLens Stage StageClips Coarseadjustment knob Diaphragm Fineadjustment knob Light Base
Microscope “Quiz” Name of part? Eyepiece BodyTube RevolvingNosepiece Arm ObjectiveLens Stage StageClips CoarseFocus Diaphragm FineFocus Light Base
The Light Microscope Guidelines for Use: Alwayscarry with 2 hands Only use lens paper for cleaning Do not force knobs Always store covered Keep objects clear of desk and cords (leave your backpacks at the front tables)
Magnification • Your microscope has 3 magnifications: • Scanning • Low • High • Each objective will have the magnification written on it. In addition to this, the ocular lens (eyepiece) has a magnification. The total magnification is the ocular x objective
With your partner go to a lab station Your partner is the person sitting next to you Two people per microscope
Focusing Specimens • 1.Always start with the scanning objective. • Odds are, you will be able to see something on this setting. • Use the Coarse Knob to focus, image may be small at this magnification, but you won't be able to find it on the higher powers without this first step. • Do not use stage clips, try moving the slide around until you find something.
Focusing Specimens 2. Once you've focused on Scanning, switch to Low Power. • Use the Coarse Knob to refocus. Again, if you haven't focused on this level, you will not be able to move to the next level. 3. Now switch to High Power. • (If you have a thick slide, or a slide without a cover, do NOT use the high power objective). At this point, ONLY use the Fine Adjustment Knob to focus specimens.
Focusing Specimens DO NOT SKIP STEPS!!!! Recap: 1. 2. 3. Scanning --> use coarse knob Low power --> use coarse knob High power --> use fine knob Eyepiece BodyTube RevolvingNosepiece Arm ObjectiveLens Stage StageClips Coarse adjustment knob Diaphragm Fine adjustment knob Light Base
Your slide MUST be focused on low power before attempting this step Click the nosepiece to the longest objective Do NOTuse the Coarse Focusing Knob, this could crack the slide or the lens Use the Fine Focus Knob to bring the slide into focus Using High Power?
Drawing Specimens • Use pencil – • you can erase and shade areas • All drawings should include clear and proper labels • (and be large enough to view details). Drawings should be labeled with the specimen name and magnification. • 3. Labels should be written on the outside of the circle. • The circle indicates the viewing field as seen through the eyepiece, specimens should be drawn to scale - ie..if your specimen takes up the whole viewing field, make sure your drawing reflects that.
Making a Wet Mount • Gather a thin slice/piece of whatever your specimen is. • If your specimen is too thick, then the coverslip will wobble on top of the sample like a see-saw, and you will not be able to view it under High Power. • Place ONE drop of water directly over the specimen. • If you put too much water, then the coverslip will float on top of the water, making it hard to draw the specimen, because they might actually float away. (Plus too much water is messy) • Place the cover slip at a 45 degree angle (approximately) with one edge touching the water drop and then gently let go. • Performed correctly the coverslip will perfectly fall over the specimen. Do not drop the slip vertically; instead, set one edge down and let the other side drop.
Cleanup Store microscopes with the scanning objective in place. 2. Wrap cords and cover microscopes. *Double check to make sure you didn't leave a slide 3. Wash slides in the sinks and dry them, placing them back in the slide boxes to be used later. 4. Throw coverslips away. (these are not reusable) *Be careful not to drop these in the sink, they will clog the drain. 5. Place microscopes in their designated location.
Troubleshooting Occasionally you may have trouble with working your microscope. Here are some common problems and solutions.
Troubleshooting 1. Image is too dark! Adjust the diaphragm, make sure your light is on. Eyepiece BodyTube RevolvingNosepiece Arm ObjectiveLens Stage StageClips Coarseadjustment knob Diaphragm Fineadjustment knob Light Base
Troubleshooting 2. There's a spot in my viewing field, even when I move the slide the spot stays in the same place! Your lens is dirty. Use lens paper, and only lens paper to carefully clean the objective and ocular lens. The ocular lens can be removed to clean the inside. The spot is probably a spec of dust. Eyepiece BodyTube RevolvingNosepiece Arm ObjectiveLens Stage StageClips Coarse adjustment knob Diaphragm Fineadjustment knob Light Base
Troubleshooting 3. I can't see anything under high power! Remember the steps, if you can't focus under scanning and then low power, you won't be able to focus anything under high power. Start at scanning and walk through the steps again. Eyepiece BodyTube RevolvingNosepiece Arm ObjectiveLens Stage StageClips Coarseadjustment knob Diaphragm Fineadjustment knob Light Base
Troubleshooting 4. Only half of my viewing field is lit, it looks like there's a half-moon in there! You probably don't have your objective fully clicked into place.. Eyepiece BodyTube RevolvingNosepiece Arm ObjectiveLens Stage StageClips Coarseadjustment knob Diaphragm Fineadjustment knob Light Base
Chapter 6, Day 2: Microscope Skills Packet Read Part I: Complete Part II: Using the Microscope Part III: Using High Power Follow ALL directions carefully!!! Answer ALL questions in complete sentences. Make sure all sketches are clear, labeled, and legible. Complete the Reflect & Connect on the back.
Reflection • Learning Targets: • Care and use of a compound microscope • Learn how to prepare a wet mount • Learn how to use low and high power on the microscope • Rate your level of understanding using the rubric Did you improve? In your notebook discuss your level of understanding and tell me what helped you to increase your knowledge of this concept.