Building a Collimator Irradiator with Cesium Material in FLUKA Simulations
This guide provides step-by-step instructions for constructing a collimator irradiator using SimpleGeo and FLUKA. It includes creating a lead container, implementing a radioactive source with proper encapsulation, and generating Cesium as a custom material not present in the standard list. Users will learn how to define materials with numerical IDs, set properties, and utilize boolean operations to create complex regions. Step-by-step tutorials facilitate understanding of external and internal voids, material assignments, and visibility management for geometric bodies.

Building a Collimator Irradiator with Cesium Material in FLUKA Simulations
E N D
Presentation Transcript
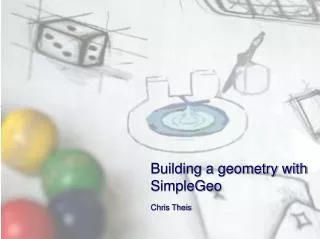
Building a geometry with SimpleGeo Chris Theis
What we would like to build… Collimators Irradiator with a lead container, a radioactive source including its encapsulation and some collimators Source
Creating an additional material We need to create Cesium, which is not included in the list of standard materials. Do not forget to specify the physical property of the material with the created numerical ID in the input file for FLUKA! • Select “Edit” in the the “Materials” menu. • Press “New” in the material property dialog • Enter Cesium & set the color properties • A material with ID 26 will be created. This material database will be stored in the same directory as your geometry. They mustbe kept in one place!
More on materials… • In FLUKA Materials are assigned by a numerical ID or name. • By default SimpleGeo >4.1 uses names in the exported FLUKA input file (can be changed via “File Export Settings”. • For PHITS or MCNP(X) the materials are assigned via numbers. The respective material density can be specified in the material dialog that can also be used to define the color.
External & internal void Bodies • External void -> Cylinder: X = 0, Y = 0, Z = -200, R = 400, H = 600 • Name = ExtVoid • Internal void -> Cylinder: X = 0, Y = 0, Z = -150, R = 250, H = 400 • Name = IntVoid • AirOut -> Cylinder: X = 0, Y = 0, Z = -100, R = 200, H = 300 • Name = AirOut Regions • External void: Type = Difference (ExtVoid – IntVoid), • Name = RExtVoid • Material = Blackhole
Creating a region Add difference Change the name Existing bodies in the CSG tree Hint: Edit fields for numerical parameters like position, size, radius etc. can evaluate mathematical expressions! For example one can enter “305 +(25*3)” which will evaluate to 380.
Creating a region Drag “ExtVoid” and drop it over “RExtVoid”. Do the same with “IntVoid”. The difference of ExtVoid – IntVoid has been finished.(The first body in a difference is always the one which is subtracted from)
Material assignments • Regions consisting of 1 body only: Select the material in the property view • Regions made up of boolean operations: Select the top-most node of the region (a boolean operator) and select the material in the property view
Creating a region with references Regions • Internal void: Type = Difference (IntVoid – AirOut), • Name = RIntVoid • Material = Air One of these bodies exists and is alreadyused in another region description! Reference nodes They share the geometry, position, orientation etc. but NOT the material!
Creating a region with references • Create a difference with the name RIntVoid • Select the body IntVoid in the region RExtVoid. • Press the Shift key and drag IntVoid and drop it over RIntVoidwhile holding Shift pressed! • Also drag and drop the body AirOut over RIntVoid • Finally you’ll have References are marked by the envelope icon and automatically have a R_ prefix
Visibility Hint: Selected (sub)regionsare always shown with red contours Now turn off the visibility be clicking on the checkbox of the upper-most node
Create the next bodies/regions Bodies • Lead container -> Cylinder: X = 0, Y = 0, Z = 0, R = 18, H = 45 • Name = LeadCon • Air inside 1 -> Cylinder: X = 0, Y = 0, Z = 16, R = 5.5, H = 31 • Name = AirIn1 • Air inside 2 -> Cylinder: X = 0, Y = 0, Z = 7, R = 8, H = 10 • Name = AirIn2 Regions • Lead container: Type = Difference (LeadCon – AirIn1 – AirIn2), • Name = LeadCol • Material = Lead
Creating another region with references Regions • Air outside: Type = Difference (AirOut –LeadCon – AirIn1) • Name = ROuterAir • Material = Air All of these bodies exist and are alreadyused in other region descriptions! We need reference nodes again
Creating a region with references • Create a difference with the name ROuterAir • Press the Shift key, drag and drop the body AirOut over ROuterAir while holding Shift pressed! • Select the body AirIn1 in the region LeadCol. • Press the Shift key and drag AirIn1 and drop it over ROuterAirwhile holding Shift pressed! • Repeat step 4 with LeadCon • Finally you’ll have • Turn off the visibility of ROuterAir
Creating further bodies/regions Bodies • Air inside 3 -> Cylinder: X = 0, Y = 0, Z = 16.5, R = 3.5, H = 30 • Name = AirIn3 • Collimator 1 -> Cylinder: X = 0, Y = 0, Z = 17, R = 4.5, H = 2 • Name = Coll1 You can clone a body pressing Ctrl + C. But don’t forget to change the parametersandthe name! • Collimator 2 -> Cylinder: X = 0, Y = 0, Z = 21, R = 5.5, H = 2 • Name = Coll2 • Collimator 3 -> Cylinder: X = 0, Y = 0, Z = 25, R = 4.5, H = 2 • Name = Coll3 • Collimator 4 -> Cylinder: X = 0, Y = 0, Z = 29, R = 5.5, H = 2 • Name = Coll4 • Collimator 5 -> Cylinder: X = 0, Y = 0, Z = 33, R = 4.5, H = 2 • Name = Coll5 • Collimator 6 -> Cylinder: X = 0, Y = 0, Z = 43, R = 5.5, H = 2 • Name = Coll6
Creating further bodies/regions Regions • Tungsten collimator: Type = Union • (Coll1 – AirIn3) | (Coll2 – AirIn3) | (Coll3 – AirIn3) | (Coll4 – AirIn3) | (Coll5 – AirIn3) | (Coll 6 - AirIn3) • Name = TungColl • Material = Tungsten Don’t forget to use references for already existing bodies! You can clone existing bodies and references by dragging and dropping them while holding the Ctrl key.
Creating further bodies/regions Bodies • Cs source cover -> Cylinder: X = 0, Y = 0, Z = 8.4, R = 1.9, H = 4.2 • Name = CsCover Regions • Air inside: Type = Union • (AirIn1 – Coll1 – Coll2 – Coll3 – Coll4 – Coll5 – Coll6) | • (AirIn3 ) | • (AirIn2 – CsCover – Coll1) • Name = InnerAir • Material = Air
Creating further bodies/regions Bodies • Cs source inside -> Cylinder: X = 0, Y = 0, Z = 8.5, R = 1.8, H = 4.0 • Name = CsInner • Al separator plane -> Plane: X = 0, Y = 0, Z = 9.8 • Name = CsAlSep Regions • Source: Type = Difference (CsInner - CsAlSep) • Name = Source • Material = Cesium • Source cover: Type = Difference (CsCover - CsInner) • Name = SourceCov • Material = Iron • Al part of the source: Type = Intersection (CsInner x CsAlSep) • Name = AlSrcPart • Material = Aluminum
Export to FLUKA SimpleGeo supports the following formats for exporting to FLUKA Old syntax with numbers New syntax with names and without parentheses New syntax with names and with parentheses In the export dialog you can select the respective format from the drop-down list at the bottom of the dialog. In this case select the option FLUKA input new syntax (*.new.inp) * If “new-syntax without parentheses” has been selected a check will be performed to see if no parentheses are required. In case this check fails the user will be notified and the exported format will be adapted automatically.
PHITS & MCNP(X) export By default a conversion from “names” to “numbers” will be performed. Thus, there is no restriction on the names used in SimpleGeo. This is in contrast to FLUKA which only allows namesup to 8 characters! Please keep this in mind if you want to export the same geometry for different codes! Region importances can be defined and will be exported Currently the assignment of magnetic fields is no yet supported for PHITS but for FLUKA only (starting with SG version 4.2).
In the end… Final version of the geometry with one part removed
You can find more examples in the gallery on the website Website: www.cern.ch/theis/simplegeo