
Comprehensive Guide to PVB Valve Modification and Service for ¾” to 2” Sizes
This overview details the modification and service processes for the ¾” to 2” PVB valves initiated in 1995, with significant updates in July 2005. Key procedures include canopy and bonnet removal, float servicing, and check valve assembly. The inclusion of a spring clip for serial numbers P0001 and above enhances maintenance. Additionally, the guide covers essential replacements, such as the rubber seal and check valve components. For optimal performance, follow the reassembly instructions carefully, ensuring all parts are correctly positioned.
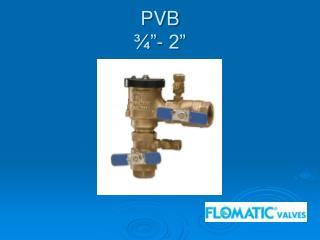

Comprehensive Guide to PVB Valve Modification and Service for ¾” to 2” Sizes
E N D
Presentation Transcript
Modification Overview • Production for the ¾” – 1” PVB began in 1995 and is current. • The body of the ¾” – 1” PVB was modified in July of 2005. A spring clip was added under the float assembly forserial numbers P0001 or larger. • 1½” and 2” sizes were added in 2008. (Refer to the Wilkins 720A)
Canopy Removal • The canopy is secured by two screws.
Bonnet Removal • The bonnet is threaded into the body and sealed by an o-ring. • Unscrew the bonnet counter clockwise. • There is no spring load.
Float Removal and Service • The float and float spring are free once the bonnet has been removed. • Replace the rubber seal by pulling it from the groove on the float.
Check Valve Removal • The spring clip must be removed on versions made after July 2005. • Pinch the ends of the spring clip together and pull out of the body. ** Note: Use pliers if necessary.
Check Valve Removal • The check valve is a module. • The check valve is threaded into the body and sealed by an o-ring. * * Note: A special tool is needed to remove the check module.
Check Valve Disassembly • The check module is spring loaded. • Hold the check firmly while removing the retaining screw.
Check Disc Replacement • Replace the rubber disc by pulling it from the groove on the poppet.
Check Seat Replacement • The check seat is free once the module is disassembled. • If the seat is damaged, the check module must be replaced.
Reassembly Notes • Reassemble in reverse order. • Make sure the bonnet spring is in place. • Make sure the guide stem is inserted into the center of the float.