Download
1 / 79
1.1k likes | 1.64k Vues
Safety Equipment. Safety equipment. Wherever you operate your boat you will be required to carry certain items of safety equipment. The quantity and type of equipment varies depending on how far offshore you travel, and it is important to understand that these are minimum requirements.

E N D
Safety equipment • Wherever you operate your boat you will be required to carry certain items of safety equipment. • The quantity and type of equipment varies depending on how far offshore you travel, and it is important to understand that these are minimum requirements.
Keep it maintained • All safety equipment must be maintained in very good condition and be accessible at all times. • To maximise your chances of survival on the water, you and your passengers need to know: • where it is stowed; • how to use it; and • when to use it.
Know where it is stowed • As skipper, you must brief everyone on the boat about where the safety equipment is kept. • It should be stowed where it is easily reached and preferably visible. • Keep the following points in mind every time you load and stow your equipment aboard: • life jackets need to be accessible and ready for use, not locked away in a cupboard or under bunks; • flares need to be kept dry and accessible (use a waterproof container that will float); and • an EPIRB should be positioned in the cockpit or near the helm where it can be reached quickly in an emergency.
Know how to use it • Make sure everyone on board knows how to use the safety equipment. • Have everybody practice putting on life jackets in good conditions so they are familiar with how they feel and how they do up. • Make sure you are familiar with the instructions for use of EPIRBs, flares and the fire fighting equipment. • You may not have time for a crash course in an emergency.
Know when to use it • ‘In good time’ sums it up. Life jackets take time to put on, so do not hesitate to wear them in deteriorating weather. • Your radio lets you pass on varying degrees of urgency to a sea rescue group, so do not wait for full-blooded distress before calling for help.
Required safety equipment • The quantity and type of equipment varies depending on how far offshore you travel, and it is important to understand that these are minimum requirements.
Bailer / Bilge Pump All vessels must carry some form of bilge pump or bailing equipment. Bailers • Vessels under seven metres may have a bailer instead of a pump. • Depending on the size of the vessel, a strong bucket with two metres of rope attached makes an excellent addition to your gear list. As a safety item, it is useful both for bailing water out and fighting fires. Bilge pumps • Bilge pumps are required for boats seven metres and over, may be manual or power operation, and must be capable of pumping four kilolitres per hour. • If you fit an electric bilge pump with an automatic switch it must have an indicator to show when the pump is working. • Check its operation regularly, and keep it well maintained. • The bilge pump should be protected by a strainer to prevent choking of the pump suction. • Clean bilges reduce the possibility of blocked pumps.
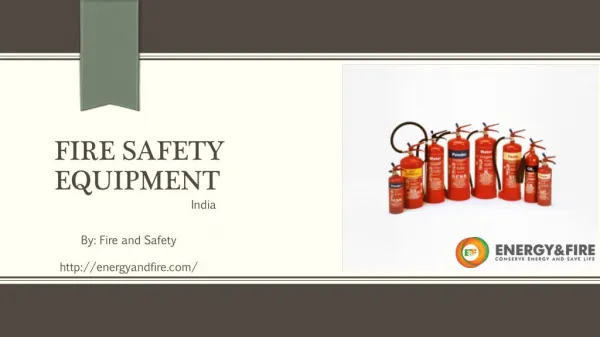
Fire extinguisher • If your vessel is fitted with an inboard engine (personal water craft are exempt) or with cooking, heating or cooling systems that use flames you, must carry an approved fire extinguisher.
Types of fire extinguishers • You make your own choice of extinguisher (provided it is made to Australian Standards) from foam, dry chemical, carbon dioxide or vaporising liquid. • Most trailer boats carry a dry chemical extinguisher, which is a good ‘all-rounder’ and also the most popular with larger vessels. • Some boats with enclosed engine rooms also have a built-in smothering gas or water mist system. • Although a water extinguisher is not acceptable as your sole extinguisher, your bailer will do a fine job for extinguishing burning solids.
Inspections • Fire extinguishers should be inspected at least every six months. All extinguishers other than carbon dioxide have a pressure gauge indicating their state of charge, and a security seal on the trigger. • They should be recharged if the seal is broken or the gauge is not in the green sector of the scale. • Tap the gauge lightly to make sure that the needle is not stuck. • The dry chemical extinguisher should be periodically taken off its bracket and shaken. • This is to prevent the powder inside from compacting. • A carbon dioxide extinguisher needs to be checked by weight. • If the loss is more than 10 per cent of the net weight of the contents, it needs to be recharged. • Fire extinguishers must be maintained in a servicable condition, check that the marker in the gauge is in the green position.
Anchors • If you are operating in unprotected waters (outside the waters contained by any breakwater or in any lake, river or estuary other than the waters of Cambridge Gulf or Lake Argyle) you must carry an efficient anchor and line. • The anchor must be of a type that will hold in all sea beds and with enough line to suit the depths in which you usually operate.
Types of anchors • Provided it is a type that will hold in all seabeds, the choice of anchor is up to you. Most people choose one of the following high holding power designs: Danforth • This is the most common type for trailer boats that do not stow the anchor below a bowsprit. It has excellent holding power in most bottoms, especially sand and is modest in price.
Types of anchors Plough or CQR • This is more expensive than the Danforth because of its more complex construction. Its holding power is similar, but it has a better reputation for holding in mud. Also, it is better suited for self-stowing under a bowsprit.
Types of anchors Bruce or spade • This is the best of all for bowsprit stowage and is gaining in popularity. However for small boats, where the anchor is stowed within the vessel, it is very cumbersome.
Types of anchors Standard Stockless - Admiralty • The sailors’ cap badge anchor looks old fashioned, but it is the best at piercing weed beds and its also works well in mud. Weight for weight it is one of the best all round anchors, but it can be inconvenient to stow.
Types of anchors Reef or grapnel • Effectively a bundle of mild steel rods bent to make a grapnel, the reef anchor is too specialised to be acceptable as a boat’s sole anchor. • For anchoring on a rocky bottom, though, it is a useful extra. Unlike a normal anchor, which can be near impossible to retrieve from rock, this will straighten out under a heavy load and withdraw.
Anchor cable • An anchor cable may be all chain, or rope with a piece of chain joining it to the anchor. • The chain is necessary for its weight, it allows a more horizontal pull on the anchor and acts as a shock absorber. • It also reduces chafe of the rope. • The best anchor rope is nylon because it has a lot of stretch and great strength; next best is polyethylene silver line. • If the rope is nylon, you will need at least two metres of chain; other rope will need at least three metres. • Your anchor and cable should always be ready to run freely at a moment’s notice.
Anchoring Weather • Check both the existing and forecast weather before anchoring. • This could influence whether you will use more cable, or even decide to move elsewhere. • Strengthening winds blowing on shore (technically giving you a lee shore) should especially influence your decisions.
Anchoring Selecting a site • If you have a choice of bottom in which to anchor (in other words it is not an emergency), sand is ideal, firm mud next best. It is better not to anchor on a weed bed both for environmental reasons, and because most anchors find it difficult to grip. • Check that when have let your cable out you will have enough room to swing to wind or tide without hitting the bottom or other vessels. • If you are in a tidal area, ensure that you will have enough depth at low water.
Anchoring Preparing to anchor • Having picked the spot to anchor and determined that you have enough cable, at low speed turn your boat to face the wind (on a low wind day face the current, if any). • Put the motor in neutral, then in reverse for long enough to get the boat moving astern.
Anchoring Lowering • Lower the anchor (do not throw it) to the bottom, and pay out cable as the boat moves astern with the wind. Setting • When the full scope is out, secure the cable and give the engine a short burst in reverse to ensure that the anchor has bedded in.
Anchoring The scope • The scope is the ratio of the length of cable used for the depth of water. • The absolute minimum is three times the depth of water, and five or seven is better. • Strong current or wind or a choppy sea put more load on the cable and make a bigger scope more desirable. Recommended scope ConditionScope Calm – fair 3:1 Fair – moderate 5:1 Moderate – rough 7:1
Anchoring Monitoring • Once the anchor has set and bedded in, you should take a few bearings or line up some objects (transits) to check that the anchor is not dragging. • If you notice that you are drifting off the bearing and you suspect that the anchor is dragging, place your hand on the cable and feel for any signs of the anchor bouncing along the bottom. • If the anchor is dragging and you have enough room, try paying out more cable. • In most cases by decreasing the angle between the anchor and the boat (ie, letting out more line) will be all that is required to get the anchor to bite.
Anchoring Securing the anchor line • The very end of the anchor cable should be secured within the vessel to prevent loss of the anchor. • If you’re not using the whole cable, the chosen length should be secured to deck hardware.
Anchoring Retrieving the anchor • There is no need to over exert yourself by pulling the boat up to the anchor: let the motor do the job while you – or your winch – retrieve the cable. • You may need to indicate to the driver which way to steer.
Anchoring Snagged • When the cable is vertical, it may be necessary to take a turn of it around the bitts and let the engine power break the anchor out of the bottom. • If the anchor will not break out, slacken the cable, back off, and approach the anchor from different directions.
Anchors Maintenance • Your anchor and its cable (rope and chain) are part of your safety gear and should be ready to run at any time. • A common problem with free running is the way the rope is coiled. • If you coil the rope on the deck or ground and then drop it into the cable well or box, you must make sure that when the anchor is dropped it will be taking rope from the top of the coil – this may require you to turn the coil over. • Taking the rope from the bottom of the coil will cause kinks and tangles.
Anchors Keep chain / rope tidy • Coil the rope and chain clockwise (rope may develop kinks otherwise) into the cable well or the dedicated box – ready for instant use. • It is best to secure the anchor separate from the cable to prevent it passing through a loop and tangling.
Anchors Rules and regulations • Channels and leads • Anchoring is prohibited in any channel, fairway, passage or leading lines unless you are in distress or obtain the permission of the Department. • Submarine cables • Anchoring is prohibited in the vicinity of telephone, submarine and power cables laid on the seabed. These are marked on marine charts, an area is also marked where anchoring is forbidden. • Mooring areas • Anchoring is not recommended in mooring areas. You could foul your anchor on the moorings and, because the spacing of moorings is usually only a little more than needed for the vessels on them to swing clear of each other, you would be likely to hit other boats. • Ports • Ports have individual rules for small craft using their waters. The overwhelming intent is to avoid any conflict with large commercial vessels, so ensure that you do not anchor anywhere near where these vessels pass.
Life jackets • Life jackets and other buoyancy garments are called PFDs – personal flotation devices. • Vessels operating in unprotected waters (outside the waters contained by any breakwater or in any lake, river or estuary other than the waters of Cambridge Gulf or Lake Argyle) must carry an approved life jacket for each person on board. • Each life jacket must suit the weight of the person for whom it is intended, be maintained in good condition and kept in an easily accessible place.
Types of life jackets AS/NZ Standard • Only the PFD Type 1 is acceptable as a life jacket • Types 2 and 3 are buoyancy vests and are intended for sports such as sailing and water skiing. • Type 1 jackets are orange or yellow colour,have a flotation collar, and reflective tape. • Type 1 life jackets are bulkier and are designed to keep the body afloat for long periods of time. • Somewhere on it will be a label with the Australian Standards brand and the number AS 1512.
Types of life jackets COASTAL and SOLAS life jackets • These jackets are specified for commercial vessels, but should be carried on any vessels operating long distances from shore. • Their disadvantage is that they are cumbersome to wear out of the water. • They have reflective tape, a whistle and light attached.
Choosing a life jacket Size and weight • Infants: because of the varying weight distribution of babies it is difficult to put flotation in the right places; children less than about a year old cannot be adequately catered for and should not go afloat. • For older children, there are three main things to look for: • the weight range on the life jacket’s label agrees with the child’s weight; • the life jacket is a snug fit (loose life jackets work poorly); and • the child is comfortable while wearing it. • For adults, too, a snug fit is important.
When to wear a life jackets • Besides wearing them in emergencies, you also enhance safety if you wear life jackets in the following circumstances: • at the first sign of bad weather; • between sunset and sunrise or during restricted visibility; • when operating in unfamiliar waters; • when operating with a following sea; • when boating alone (this is especially recommended); • at all times on children under 10 years; or • if you are a poor swimmer. • Practise putting them on in the dark and in the water – it is harder than you think!
Maintenance Maintaining life jackets • You should check the condition of your life jackets periodically. Check for cuts and tears that could let water enter the jacket and rot the buoyant material. Check that the tabs are in good condition and not frayed. • If you have inflatable life jackets, the manufacturers will specify intervals when you should return them for servicing.
Distress flares • All vessels operating outside protected waters must carry flares. Which type you need depends on how far offshore you go. • For Inshore Waters (within five nautical miles of the shore), you will need: • two hand-held red flares or two parachute flares; and • two hand-held orange smoke flares or one orange smoke canister. • For Offshore Waters (more than five nautical miles off the shore), you will need: • two parachute flares; and • two hand-held orange smoke flares or one orange smoke canister. • If you operate both inshore and offshore you only need to carry the offshore set of flares.
Standards AS/NZ Standard • There are three main types of distress flares approved for use in Western Australia. • All of them must be manufactured to either the Australian Uniform Shipping Laws Code or to Australian Standard AS2092.
Red hand-held flares Red hand-held flares • These are designed for use both night and day and burn for about 45 seconds at 15,000 candle power. • Potential sighting range at night is 10-12 km and about 4-6 km during the day.
Orange smaoke flares Orange hand-held smoke flares • Are designed for day use only and have no luminosity. • They emit a cloud of orange smoke. • Orange hand held flares burn for about 60 seconds. • The buoyant canister, which is safe for use in petrol or oil covered water, burns for about three minutes. • Potential sighting range by day is 4 km, although this can drop to less than 1 km in a fresh breeze. • These flares are especially visible from aircraft, even on windy days.
Red parachute distress flares Red parachute distress rockets • Are designed for use both night and day. • They project a rocket to 300 metres high and then deploy a parachute-suspended red flare, which burns for about 40 seconds at 30,000 candle power. • Potential sighting range is 15 km by day and 40 km at night.
Red parachute distress flares Red parachute distress rockets • Know how to use them. • Flares are best used when you believe there is chance of it being seen. • The method used to fire flares vary widely between flare types and between manufacturers. • The firing instructions are always printed on the flare, and you should be familiar with your own flares’ methods. • Hand-held red flares, especially, burn very hot and may spill glowing embers. • When using them hold them downwind so that nothing spills into the boat, and tilt them in your hand so nothing burns you.
Handling and storage Handling and storage • Flares should always be readily accessible, stored in a waterproof container, in a place where they don’t receive too much pounding in rough conditions, away from dampness and heat sources and readily accessible. • Avoid storage above 60 degrees Celsius.
Expiry dates Expiry dates • There will be an expiry date on your flares. This date applies to flares used on commercial vessels, but it also gives you good advice. • Consider getting more flares when your existing flares reach that date, but keep both old and new. • Your flares must be maintained in serviceable condition at all times, check them regularly to ensure they have not been rendered un-serviceable by exposure to moisture. • Mildew, or bubbling of paper coatings may indicate this.
Disposal of distress flares Disposal • Do not discard un-serviceable flares in general rubbish collections or land fill. Please hand them in to the Department or the Fire and Emergency Service (FESA) so they may be destroyed safely.