Download

1 / 26
260 likes | 530 Vues
Logon to your Living Room. Shubham Mukherjee Lara Stoll ECE 345 May 2003. Purpose. To create a system for homeowners so that they can change the settings on their home appliances and check on their status Some benefits: Safety (make sure all dangerous appliances are off)

E N D
Logon to your Living Room Shubham Mukherjee Lara Stoll ECE 345 May 2003
Purpose • To create a system for homeowners so that they can change the settings on their home appliances and check on their status • Some benefits: • Safety (make sure all dangerous appliances are off) • Money (make sure all electric appliances are off when you’re away) • Peace of mind (you are always in control of the things in your home)
Review of our design Remote computer Home server via Internet Parallel port Wireless channel frequency 1 frequency 2 Appliance 1 Appliance 2
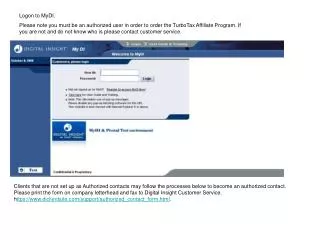
Remote Computer to Home Server • Logon page with password protection provides security so you, and only you, can have access to the appliances in your home • User console enables the user to specify settings on 2 appliances, as well as get feedback on them. Login page Project page Used HTML for web programming
Remote Computer to Home Server • Information from user console sent to the home server through CGI • A C program was used to extract what the user requested, and then process it appropriately
Parallel Port Interface • Our C program took the user’s requests and outputted the corresponding data through the parallel port (TTL logic) • 2 output pins for the “motor” appliance (4 possible speeds) • 1 output pin for the “light” appliance (on / off) • 1 input pin for each appliance’s feedback • Getting around Windows security restrictions for port access required several extra steps. More on this in “challenges” section. • We soldered a parallel port adapter together so we could plug the output pins directly into the protoboard for a seamless parallel port / TTL protoboard transition.
General overview of the software Database of allowed username / password combinations is stored Check password Passed to server with CGI Get data from user 0/1 output on pin assigned to light 00, 01, 10, or 11 on pins assigned to motor Output data on parallel port Feedback requested? Get feedback Time sample the pulse width modulated signal so you can tell how long it is on for, and how long it is off for during a given period. This will tell you whether the motor is high, low, medium, etc. For a light, it is an easier process. Logout
LINX Modules • Why HP-2 LINX Modules? • Can transmit both analog and digital information • Good range (with antenna) • Easy to use • 8 channels (frequencies) available • Properties of LINX modules • Need to send a continuous stream of data (can’t just send 8 bits, for example) • Output of receiver is high (5 V) when nothing is being sent – leads to use of inverters in design
PWM Module – Functionality • Used so LINX modules can transmit data successfully (PWM outputs square wave – unlike original design that used shift registers) • Control light using all 4 PWM inputs: all high = light on, all low = light off • Control motor speed using the two most significant bits of PWM input (two least significant bits are wired to ground): 00(00) = off, 01(00) = low, 10(00) = medium, 11(00) = high
Motor Circuit • LINX Transmitter/Receiver pair for the motor uses frequency of 903.37 Hz • LINX Transmitter/Receiver pair for the feedback uses frequency of 912.37 Hz • Op amp and transistor are used to drive the motor from the TTL output
Light Circuit • LINX Transmitter/Receiver pair for the light uses frequency of 921.37 Hz • LINX Transmitter/Receiver pair for the feedback uses frequency of 912.37 Hz
Test procedures – Software • 1) Confirm communication between the web page and our C program • 2) Confirm that we can get the parallel port to output / input with C • 3) Test overall system: monitor output pins with all the combinations of user requests
Test procedures - Hardware • Step 1: Get LINX transmitter/receiver pairs working • Used function generator as input at transmitter and used oscilloscope to check the output of the receiver • Step 2: Test to make sure the PWM output is correct • Used multiplexer with manual switches to interface as the input to the PWM module
Testing Hardware (continued) • Step 3: Test motor using power supply • Got reasonable estimates for necessary characteristics of amplifier circuits • Step 4: Test amplifier circuit with motor • Optimized performance by changing resistor values (trial and error) • Step 5: Integrate all hardware using manual inputs to PWM circuits • Verified behavior of motor and LED
Performance • Overall performance was good. All appliances responded to user requests perfectly, and provided user with feedback properly. • Problems arose during the demo. More on this in the “Challenges” section. • Other functional criteria: • Range: ~45 feet. Had we made an antenna circuit, the theoretical range would be about 900 feet. • Interference between appliances: Insignificant
Performance (continued) • Other functional criteria: • Amplifiers for motor • Operational Amplifier: Measured gain of ~2.7, also served as a buffer to protect our circuit. • Transistor: Drew about .3 mA with an output voltage of 3 Volts (operating in saturation) • PWM • Duty cycles of 0/16, 4/16, 8/16, 10/16, and 15/16 provided “observed” voltages of 0, 1.4, 2.7, 3.8, and 5.2 Volts respectively.
Successes • We got the overall project to work. Appliances changed on command, and feedback was sent correctly. • Initial budget projections for parts and labor were very close to accurate. (We did not need any additional major parts, only minor chips and components) • We learned a lot of things we knew nothing about before the project • Web and CGI programming, interfacing the computers I/O ports, using LINX modules, implementing various circuitry that we had only learned about in theory during our coursework, and more.
Challenges • Parallel port interfacing • Windows XP / 2000 have new protections which are not conducive to parallel port access. • LINX transmission • The transmission scheme was not as simple as we thought.
Challenges (cont) mishap • Demo day • Motor: Low, medium, and high settings worked as expected (i.e. motor changed speeds when user requests came in). When user requested “off,” motor kept on going. • Light: When user requested On, the light turned on brightly. When user requested Off, the light flickered. • Overall, the system was behaving in a very glitchy way. • Our theory: Some kind of frequency interference? • The LINX modules operate in the lower 900 MHz band. This is extremely popular for portable RF communications devices (e.g. cordless phones, …. ) • Perhaps someone somewhere in range was doing something to cause the weird behavior. • We tested all other components of the system, and isolated the problem to the LINX transmission channel. It had to have been either interference or bad LINX chips. It is unlikely that all chips blinked out at the same time. • It was a frustrating experience, but we are glad that the system was at least somewhat responding so that the communication between all of our subsystems was properly demonstrated.
Recommendations / future improvements • Incorporate user ID so neighbor systems don’t interfere with each other • Build an antenna circuit to increase range • Perform interference testing
Summary • Successful interface between web site, host computer, and parallel port • Some initial difficulties with wireless transmission between LINX modules – problem solved, except for interference issues on day of demo • All in all, a good learning experience