Download
1 / 14
150 likes | 389 Vues
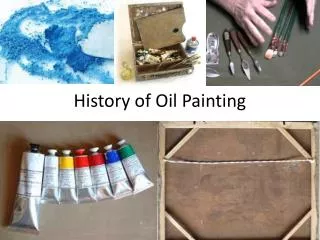
History of Oil Painting. What is oil paint?. Very simply, oil paint is an oil, such as linseed oil or walnut oil, mixed with finely ground pigments to produce a paste.

E N D
What is oil paint? • Very simply, oil paint is an oil, such as linseed oil or walnut oil, mixed with finely ground pigments to produce a paste. • The oil does not dry or evaporate, (unlike tempera or watercolour paint) rather it cures. It therefore takes a long time to go from a liquid to a solid form. • The most universally used paint by artist.
History • During the Early Renaissance (1300-1500), most painting was done using the fresco or tempera mediums. These suited the times, as most painting was done for the walls of a church, chapel or large private abode or on a panel such as an altarpiece
History • Things changed however… during the later Renaissance (1500-1600) the increase in wealthy private patrons demanded smaller, more portable art works, particularly for a more domestic setting. Oil paint, which was made popular firstly by the Flemish artists spread through Europe as the medium of choice… The garden of Earthly Delights. Heironymous Bosch. 1480-1505. Oil on panel
History • This medium took off through Italy, the ‘heart’ of Renaissance Europe. It was championed by the the greats of Renaissance painting, Ie. Leonardo, Raphael, Botticelli.. • The paint was usually prepared by apprentices. • To better understand the benefits of oil paint, lets compare in to the Tempera and Fresco mediums….
Fresco… • Is the application of pigment in water to freshly prepared lime-plaster. As the plaster dries the pigment is absorbed into the plaster, becoming a permanent part of the wall. • This suited the mural requirements particularly of the Church and for the monumental architecture being built during the renaissance • Fresco required great skill and speed. The process required artists to plan ahead, to think of space as subdivided into sections, and to think of design in terms of strong shapes. This leads to a new appreciation, especially in early Renaissance Florence, of the monumental, of powerful and large forms
The process… • STEP 1: scaffolding. • STEP 2: prepare the wall. You’re going to apply plaster to the wall and you want it to stick, so you rough up the surface with a small pick-axe. • STEP 3: ARRICCIO • Arriccio is a layer of rough plaster made of a mixture of lime paste and large granules of sand. You smear it onto the wall and let that dry overnight.
STEP 4: MAP OUT THE DRAWING • The 14th century artist would sketch out the major outlines of his painting with a reddish-brown paint directly onto the arriccio. This part is called the SINOPIA, an underlayer of the fresco that can sometimes be uncovered through restoration and is sometimes displayed in museums. Sometimes you may actually see sinopia on walls where the top layer of the fresco has been ruined. This preparatory drawing in sinopia is a handy guide for the artist and also a way to show patron what he’ll be getting. Later in the 15th century, the practise of direct sinopia painting was used less often. As drawing became more important in the practise of the visual arts, many artists made a series of preparatory designs culminating in a CARTOON, a life-size drawing on paper. They pricked the cartoon with a needle and held it up to the arriccio; this page was then “pounced” with a sack of carbon so that a black outline was made. There were other ways to transfer drawings and to keep them in mind during the process, though these are the two most popular.
STEP 5: INTONACO • The day to paint has arrived. Obviously it’s not all done at once – each day’s work is called a GIORNATA. This corresponds to a plaster patch that is the amount of work the artist could do in one day. You prepare your intonaco plaster, which is made of the same lime and sand as the first layer, but the sand is a finer grain and there is more lime. This mixture is then spread onto the space you intend to work on that day. Interestingly, this covers up the underpainting (or charcoal outline), which the artist had to keep in his mind! If you look closely, sometimes you can see the giornata divisions in a fresco; these were applied judiciously to try to hide the lines but are usually around major shapes.
STEP 6: PAINT • The paint is applied directly to the plaster while it is wet, which is only a 2-4 hour window of opportunity, after which the plaster starts to dry and it gets very difficult to paint. You work from the top down (because the paint drips!) and try to do large areas like sky all at once because it’s very difficult to match colours the next day. This process is very difficult because once you apply the paint, it’s there and you can’t make mistakes. In fact, paint layers are thin to transparent, so the pigment was added in layers. Colours could also be mixed by doing this. • Only certain types of colours are good for fresco painting. These are chemically stable EARTH PIGMENTS like terraverde, yellow ochre, red, white, charcoal black. Other pigments would react with air and discolour – lead white turned black over time, azzurite blue turns green.
STEP 7: A SECCO • Finishing touches were applied after it all dried and tend to be less permanent and fall off with time. Blue pigment was applied often over red underpainting, while gold leaf was applied last, being stuck on with fish glue. Sometimes the finest details in faces and other sections were done a secco. This means that if you see a red sky or a face with no detail, chances are you are looking at a fresco that has lost its a secco treatment.
PRESERVATION • Because of their chemical composition, frescoes are permanent unless they are affected by damaging outside forces. The main one is sulfur, which turns limestone and marble into dust. Sulfur attacks frescoes through air pollution and water. Water also causes blistering and mold. Of course, the ravages of time can also be damaging. The fashions of later centuries meant that often perfectly good frescoes that we would admire today were overpainted or simply white-washed! Vasari did this to Giotto’s frescoes in Santa Croce, which is why they are not in great condition now. Bombings, in Italy mostly from WWII, caused serious damage in other areas, as did the flood of 1966.
Tempera… • Preparing the board/panel with gesso (gypsum and animal glue) medium… a white plaster-like sealant. Know as the ‘ground’. • Pigments are selected and ground to a fine powder and mixed with egg yolk. • Fast drying, difficult to blend colours. • Artists tended to work in layers of colour, painting small areas at a time.