Introduction to LaTeX
350 likes | 520 Vues
Introduction to LaTeX. Thomas Gorry. A typesetting system used to produce professional looking documents. Particularly good at handling mathematically oriented manuscripts. Can be used to produce a variety of document types, including presentations, articles and reports.

Introduction to LaTeX
E N D
Presentation Transcript
Introduction to LaTeX Thomas Gorry
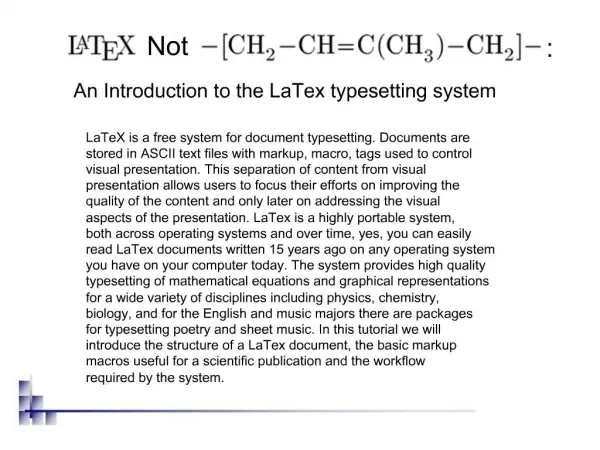
A typesetting system used to produce professional looking documents. • Particularly good at handling mathematically oriented manuscripts. • Can be used to produce a variety of document types, including presentations, articles and reports. • LaTeX is also good for management of a bibliography. What is Latex?
The area between \documentclass{...} and \begin{document} is called the preamble. It normally contains commands that affect the entire document. • After the preamble, the text of your document is enclosed between two commands which identify the beginning and end of the actual document: Structure
LaTeX needs to know the type of document the author wants to create. • class specifies the type of document to be created. • The options parameter customizes the behaviour of the document class Document Classes
LaTeX allows the user to specify a range of different document classes, these are some of the more common ones you will most likely use. • The most common options for the standard document classes are listed on the next slide. Document Classes
You can enhance the capabilities of LaTeX using packages. • These packages are defined in the preamble section of the document. • Package is the name of the package. • Options are a list of keywords that trigger special features in the package (options are not always necessary). Packages
A comprehensive list of packages and documentation for them can be found: http://www.ctan.org/ Here are some of the more commonly used packages that you may find useful: • \usepackage{amsmath} – most important for math environments (\align) • \usepackage{graphicx} – essential for inserting figures (\includegraphics) • \usepackage[a4paper]{geometry} – adjust margins of a certain page • \usepackage{hyperref} – makes citations “clickable” in the .pdf document Packages
\title{Title Here} \author{Thomas Gorry\\ Department of Computer Science,\\ University of Liverpool\\ \texttt{t.gorry@Liverpool.ac.uk} } \date{\today} \maketitle • The double backslash (\\) is the command for a forced line break. • The \textttcommand formats the e-mail address using a mono-spaced font. • The \today command is used to insert the current date. • To omit the date simply leave the braces empty. Title Page
\documentclass{article} \begin{document} \begin{abstract} Here is where you would write some nice abstract. \end{abstract} \end{document} • Appears at the top of the main body of the document, but before the other sections. • Available for the article and report document classes, not the book class. Abstract
\documentclass{article} \begin{document} \section{Introduction} Some text here… \section{PhD aims} \subsection{Variation to the model} \subsubsection{Agent Variations} \subsubsection{Environment Variations} \end{document} • Sections can be used to help structure a document to make it more readable. • Think of these like chapters or section headings. • Text placed in the brackets will appear as headings on the document. • Sections are also useful when creating a contents page. Sections
Once you have your sections set up correctly you can then include a table of contents in your work. To do this simply insert the following command where you would like your contents to appear in the document. \tableofcontents You are also able to include a list of figures or tables that you have specified in the document in a similar way using the following commands. \listoffigures \listoftables TOC, LOF, LOT
Bulleted List \begin{itemize} \item Item 1 \item Item 2 \end{itemize} Numbered List \begin{enumerate} \item Item 1 \item Item 2 \end{enumerate} Description List \begin{description} \item[First] Item 1 \item[Second] Item2 \item[Second] Item 3\end{description} Nested Lists \begin{enumerate} \item Item 1 \begin{enumerate} \item Nested item 1 \item Nested item 2 \end{enumerate} \item Item 2\end{enumerate} Lists
\begin{tabular}[pos]{table spec} …table here… \end{tabular} • The table spec argument tells LaTeX the alignment to be used in each column and the vertical lines to insert. • The optional parameter poscan be used to specify the vertical position of the table relative to the baseline of the surrounding text. Tables
Tables Here is a list of basic commands that can be used in the tabular environment: The following symbols are available to describe the table columns (some of them require that the package array has been loaded): You can use the following letters for the posoption:
Basic table example 1: Tables
Basic table example 1: Tables
Basic table example 2: Tables
Basic table example 3: Tables
Basic table example 4: Tables
\usepackage{amsthm} \newtheorem{name}{printed output} …title, begin main body… \begin{name} …some text… \end{name} …end main body • Make sure to enable the amsthm package. • Define the theorem in the preamble. • The first argument is what you will use to reference your theorem. • The second argument is the output LaTeX will print whenever you use it. • For more information on Theorems in LaTeX visit: http://en.wikibooks.org/wiki/LaTeX/Theorems Theorems
There are a number of different methods used to define pseudo code in LaTeX, below is an example using the algorithm2e package but more can be found at http://en.wikibooks.org/wiki/LaTeX/Algorithms To use the algorithm2e package you must declare it in the preamble with the following command: \usepackage{options}{algorithm2e} Algorithms
For more complicated formulas you should use the following package: \usepackage{amsmath} Inline example: $a + b = c$ Displayed example: $$a + b = c$$ There are two basic types of formulas that can used in LaTeX. The first is inline formulas. These types of formulas are the simplest to include are defined and displayed in the text you type. The second are displayed formulas. These are separate from the main text. For greater depth on either of these visit http://en.wikibooks.org/wiki/LaTeX/Mathematics Maths
Basic symbols: + - = ! / ( ) [ ] < > | ' : Beyond these special commands must be used in the form of \command where you want to display the symbols or functions. There are many different commands, a comprehensive list can be found at http://en.wikibooks.org/wiki/LaTeX/Mathematics#List_of_Mathematical_Symbols Maths
Using the double $ symbol to create displayed style equations sometimes produces issues when compiling. Therefore it is best to use the \equation environment. This environment will automatically number your equation so that it is easier to refer to it in your main body of text where someequation is the name you would give your equation and then refer to it that way in the text as shown below. Advanced Maths
Sometimes you may need to use the cases environment is you want to write piecewise functions as shown below. Advanced Maths If you want to add sub- or superscript in summation style symbols with both prime and a limit to a symbol, one have to use the \sidesetcommand as shown here. There are virtualy an unlimited number of combinations that you can put together. More on this can be found here: http://en.wikibooks.org/wiki/LaTeX/Advanced_Mathematics
\usepackage{graphicx} \includegraphics{image.png} \includegraphics[scale=0.5]{image.png} \includegraphics[width=2.5cm]{image.png} • Must use the graphicxpackage to import images. • Use \includegraphicscommand in your text to import the image. • Many customisation options available. • For more customisation visit http://en.wikibooks.org/wiki/LaTeX/Importing_Graphics Graphics
If you want to draw your own diagrams directly in LaTeX you will need to use a specialist drawing package like TikZ. More on this can be found here http://en.wikibooks.org/wiki/LaTeX/PGF/TikZ Or http://paws.wcu.edu/tsfoguel/tikzpgfmanual.pdf Or http://www.texample.net/tikz/examples/ Graphics
\begin{figure}[placement specifier]... figure contents ...\end{figure} • To create a figure that floats, use the figure environment. • The placement specifierparameter exists as a compromise, and its purpose is to give the author a greater degree of control over where certain floats are placed. Figures
\begin{figure}[h!]… figure here … \caption{caption here}\end{figure} • You can create captions for your figures using the \caption command. • For more on figures visit http://en.wikibooks.org/wiki/LaTeX/Floats,_Figures_and_Captions Figures
\section{Hello} \label{sec:hello} Hello! \section{Referencing} Now we can refer to section~\ref{sec:hello}. • You can labels you can reference for your figures, sections and pretty much any object in your document using the \label command. • You can give a page reference in a similar way by using the ~\pageref{marker} command. • For more on figures visit http://en.wikibooks.org/wiki/LaTeX/Floats,_Figures_and_Captions Lables and Referencing
There are two main ways to include a bibliography in your work. • You can store them in an external BibTeX file and then link to them via a command to your current document. This way you can create a file of your references that you can simply link to them when you need. For more information on this method visit www.bibtex.org • However for single documents it is much simpler to embed the references in the file itself. Bibliography
\begin{thebibliography}{99} \bibitem{Gorry13} Thomas Gorry. Introduction to LaTeX. \emph{Doctoral Training Seminar Series}, 2013. \end{thebibliography} • Place all of your references in separate \bibitems. • Then place all of these inside of thebibliographyenvironment. • Usually placed at the bottom of the main body of your document. • Refer to the item in your text by typing ~\cite{Gorry13} Bibliography
When writing a document for publication either in conference proceedings or a journal it is important to make sure your document is formatted according to the publishers standards. Each publisher has its own set of rules and templates that you must use, a few of the more common ones can be found here: • http://www.ieee.org/conferences_events/conferences/publishing/templates.html • https://www.acm.org/publications/submissions/latex_style • http://www.acm.org/sigs/publications/proceedings-templates Formats
Learning LaTeX is best achieved through doing. • Google is very useful when using LaTeX • Compile your PDF frequently as this will help debug any errors that may occur. • If you can then let LaTeX position things like tables and figures automatically. • Error messages are easy to understand, you just need to take the time to read them. • Templates: http://www.latextemplates.com/ Tips