Download
1 / 19
190 likes | 216 Vues
This guide covers tasks and strategies for teaching animation design, including hands-on activities and step-by-step instructions for students of all levels. Explore creative ideas and tools to boost students' design skills effectively.

E N D
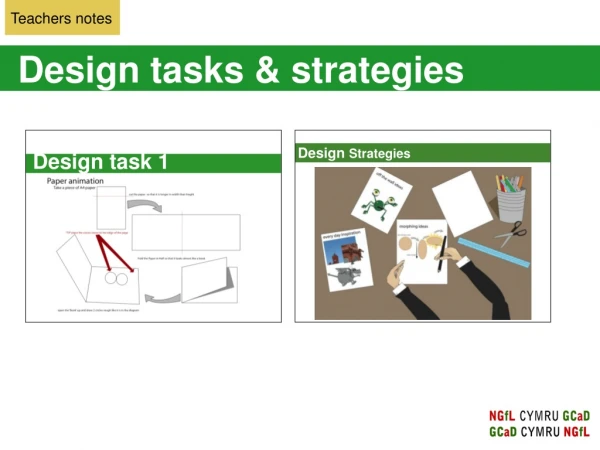
Teachers notes Design tasks & strategies
Teachers notes Design task 1 Design task 1: the concept of this focus task is to explain how an animation functions by quickly flicking from one layer to another. This focus task could be completed at any stage – as a research task, before/during the designing stage. Although we feel it works best & motivates pupils before they start their design work. This simple animation technique can be used for other animations i.e. a boy kicking a ball, bouncing on a trampoline. Other quick animation ideas is to do a flick book that pupils can draw in, however this is dependant on you cutting and stapling paper together and can be resource heavy as if may need 3X A4 pieces per student (as well as cutting and stapling them together for each student) If you have time, get pupils to colour them in to help presentation. Then keep the work as examples of investigations in their booklets.
Teachers notes Design task 2: SerifDraw The idea of this is to familiarise pupils with graphics program - SerifDraw. In the initial lesson all the pupils are shown where the tools and effects of the program are located before they start on the dragon task. The pupils progress through the work sheet, trailing and testing the functions of the identified tools/effects. After this input they begin the task of drawing the dragon. The step by step development of the dragon reinforces the concept of layering objects to create images made from different shapes and how they can look effective together. Pupils develop their skills in a ”safety net” approach but there is enough freedom to allow for differentiation.
Teachers notes Design Strategies: ideas • The next few slides deal with creating and developing initial ideas for pupils. These have been developed to improve pupils design skills and to help those who find designing hard or difficult . To aid this process the strategies/tasks have been split into bite sizeable chunks. As you progress you may want to develop and expand on these ideas. They are only meant as a starting point and depending on teaching styles, you may have different ideas of how to teach these techniques. • In essence the following strategies are used – • Morphing, • Everyday inspiration • Off the wall.
Teachers notes Design Strategies: Morphing Morphing: slide 1/2 is a lead in to the development of the design strategy - Morphing. Slide 3 is a quick slide that communicates how to draw a simple face using techniques – it is broken down so pupils can follow each stage and see that you can make an effective face using basic shapes. Slide 4 - builds on the skills and knowledge of Slide 3 , showing how with some alternation and addition a range of other characters/faces can be developed. It explore the concepts of arrange the simple face to give different expressions or looks. Slides 5&6 are continuing to build on the previous skills – but this time using outline shapes as a design element. In this case how a circle/ square/ rectangle could become a cartoon character and how its outline shape influence the expression or appearance. Slide 5 is a generic slide that can also be seen in other units. This idea is that pupils become familiar with the processes throughout all disciplines, and each discipline feeds the other. The next slide relates the morphing strategy to cartoons. During these it could be an opportunity for the teacher to expand on e.g. what makes a face interesting, what details to add and what story do the pupils want to develop (they may need to refer back to their design specification. Slide 7/8 Uses the morphing techniques but aims to develop further facial features such as hair/ beards/ earrings all to develop a character. The concept is for pupils to develop their own characters through the process of morphing, adding details to create and manipulate the designs until they get a suitable initial idea.
Teachers notes Design Strategy:mix & match and a bit of morphing? Initial ideas Slide 10 is a mix and match idea using a bit of morphing. This could be used as a sort of first aid kit for pupils who need further reassurance to develop characters. The sheet could be printed off and pupils could trace or cut up the facial details, allowing pupils to mix and match them. Print this off so that pupils who are stuck in the design of their characters can cut out details and create own characters.
Teachers notes Design Strategies: everyday Everyday inspiration uses the concept that every thing around us can be an inspiration for a design ideas. In this case, the first slide relates to animals as an introduction for inspiration. You may want to have a bank of images that pupils can use if they are needing inspiration. Often past illustrations and animations by other pupils are used as a stimuli to lead on to this presentation. The next few slides deal with how to simplify an image into simple shapes. Layering up these shapes to create something more complex. Slide 5 deals with this idea showing the process of building the face. It aims is to be humorous and hopefully will appeal to the pupils, showing them how to layer objects and create something visually appealing. (also builds on from morphing strategy - in terms of creating a face with simple outline shapes & layering) The next few slides are about expressions and style, encouraging pupils to develop their own style and by playing with facial expressions and style details. The presentation also refers to how to find inspiration from a number of familiar sources…..buildings/ animals/ pets/ friends.
Teachers notes Design Strategies:Off the wall Off the wall: this is really a gallery of various ideas, plucked from the mind and don’t really relate to any other idea.These are the ideas that we can’t explain but are in our minds and have no real reference to anything. Slide 2 also illustrates the concept of effective design development, and how it is possible to “push the idea too far”, taking it to an extreme , some of the best ideas are a bit a bit of the wall to begin with, but with modification and re-working as frequently successful. Although dealt in another set of slides – it could be an idea to compare the difference between slide 2 and 4 – discussing the difference in style of design development and inclusion or lack of annotation.
Teachers notes Gallery This range of slides have been included as a an exemplar of the sort of stimuli that is used at the beginning of the design stage. It is also useful to use as an evaluation of other designers/pupils work, for critical evaluation.
Teachers notes Final ideas Slide 1 – pupils are encourages to work out and finalise the details of the cartoon character. Once these details have been decide further details regarding dimension, colour, materials, textures etc can be added..Slide 2 – pupils aim to achieve as high as standard of presentation as possible From these sheets pupils are able to select a favourite character. From this point pupils begin to draw their ideas using a computer program e.g. SerifDraw. Slide 4 - Using skills already developed in layering objects together and applying effects and rendering textures pupils compose their final characters.
Teachers notes Annotating your work From the very outset pupils are encourage to make comments about their designs. We formally teach this and it has helped to develop their designing skills. We refer to annotation and explain it as “design chatter” or gossiping to yourself about the design !!! Slide 1 - A list of aspects that they may wish to comment about is suggested to them e.g. comments relating to the shape, size, colour combinations and character detailing. We try to link this concept to the previously taught lesson on product analysis where they were encouraged to use technical language or descriptive explanation/justification. Other comments could also include- possible suitable materials, or if the character appears easy or difficult to make; we are mindful they have limited experience related to these aspects but some pupils are able to project their thinking. Slide 2. Pupils are encouraged to write down their comments as they design, but also to consider the fact that the annotation is complimentary to the designs and should not dominate the page. Further explanations could refer to the fact that good annotation helps to explain some aspects that are sometimes difficult to draw, and it can also explain to another person the depth of their design thinking. Slide 3 – pupils are encourage to make comments as to how effect they think this work is.
Teachers notes Making These slides deal with making of the product. Pupils can use Serif,Draw to drawing backgrounds and characters. They can then produce animations by cloning and moving elements in the frame. To begin the animation concept with pupils, start by doing a simple animation such as a ball bouncing and then develop this further by adding details. First familiarise pupils with the idea of cloning the frame showing where and how to do this They can then begin creating their animations. In the presentations a range exemplars of the pupils work have been include, these could inspire pupils when creating their own animations. Have fun. In terms of SerifDraw it is a very user friendly program and pupils will make good progress very quickly.
Teachers notes Possible handouts
Design and Technology Design task 1
Design Strategies:Everyday Inspiration Here’s some ideas for you, If you can’t think of any for inspiration. Have a go at designing from these everyday images…or if you want think of your own and design them on your page.
Final ideas Final design – presentation drawing. Draw a diagram of final design of the cartoon– use colouring pencils to illustrate the colour and textures of the cartoon. Describe them Add height Give them a personality
Design and Technology Backgrounds Here are some ideas for the background of your story boards/animations