Notebooks
Notebooks. Unit objective: Identify notebook components and features. Topic A. Topic A: Notebook hardware components Topic B: Notebooks displays Topic C: Laptop features. Notebook computer. Small size Light weight Standard client operation system Components modified from desktop.

Notebooks
E N D
Presentation Transcript
Notebooks Unit objective: Identify notebook components and features
Topic A Topic A: Notebook hardware components Topic B: Notebooks displays Topic C: Laptop features
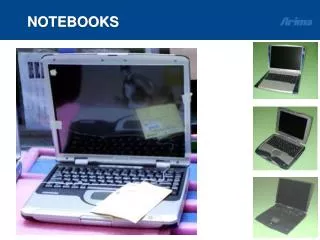
Notebook computer Small size Light weight Standard client operation system Components modified from desktop Monitor Keyboard Touchpad
Typical notebook components CPU Memory Hard drive CD or DVD drive Monitor Keyboard Pointing device Network adapter Modem Peripheral ports One or more slots for expansion cards
Notebooks Not as easy to upgrade as desktops Little compatibility between manufacturers or within a manufacturer’s own lines Typically more expensive than desktops Designed to be small, lightweight, and portable
Netbooks Subcompact notebooks Smaller than regular notebooks Designed for wireless Internet use Lower processing power and storage capacity Easy to travel with Run variety of operating systems
Notebook batteries Vary in size and shape Provide 30 minutes to 8 hours of power
Battery types Nickel cadmium (NiCad) Nickel metal-hydride (NiMH) Lithium-ion (Li-Ion) Zinc air Fuel cell
Power adapters External power cord and transformer Replacements must be model-specific 12-volt power adapters available Computer plug Outlet plug Transformer
Auto-switching Automatically switch between battery and AC power AC power supply connected, notebook runs on external power No AC power supply connected, notebook runs on battery Runs on battery until fully discharged or connected to AC power supply OS monitors battery power and displays low-battery warnings
Power indicator lights Solid light Solid alternate-color light Blinking light
Notebook processors Engineered to: Use less power Generate less heat For up-to-date specs refer to manufacturers’ Web sites: http://www.amd.com/us/products/notebook/processors/Pages/notebook-processors.aspx http://www.intel.com/products/laptop/processors/index.htm NOTEBOOKCHECK Web site maintains CPU benchmarks for mobile processors continued
Notebook processors, continued Heat dissipation Power management ACPI Sleep Hibernate Standby Wireless network connectivity
Notebook drives Hard drive DVD or CD drive Typically no floppy DVD/CD drive might be RW Hard drive Size: typically smaller than desktop Small form factor: 2.5" drive Uses less power than desktop drive Often slower than desktop drive
LCD monitors LCD technology Uses less power Generates less heat Takes up less space Produces less glare
Notebook pointing devices Integrated pointing devices Middle of keyboard Below keys Types Small pointer (like a joystick) with separate buttons; below Spacebar Trackball Touchpad
Touchpad Glide surface Right button Left button
Notebook ports USB and IEEE 1394 ports VGA, DVI, HDMI ports Memory card readers S-Video Microphone port Microphone port Line out Line out Line out Volume controls Volume controls Volume controls Volume controls Volume controls Mute button Mute button Mute button Mute button Mute button Mute button
Wireless communication Use to link devices: PCs Handheld computers Music players Methods: Infrared light Radio waves Bluetooth
Infrared Pulses of infrared light Up to 16 Mbps 1 meter range Direct line of sight No more than a 30-degree angle
Radio Modulated signals sent over radio waves Not line-of-sight Technologies with varying features 802.11n— Theoretical max. 300 Mbps; real-world speeds 100-140 Mbps 802.11g— Theoretical max. 54 Mbps; real-world speeds 22-24 Mbps RF = radio frequency Uses antenna; sometimes hidden in case
Bluetooth Short-range radio (10 meters) Auto-discovery Self-configuring devices Includes an antenna, often hidden inside device Cell phones, PDAs, music players, etc.
PC Card types Type I — 3.3 mm thick Type II — 5 mm thick Type III — 10.5 mm thick Type IV — 16 mm thick; not part of the PCMCIA standards
Bus connections CardBus Zoomed Video eXecute In Place ExpressCard
Notebook memory SODIMM Approx. half size of regular DIMM 6.76 cm x 3.015 cm 72, 100, 144, 200 or 204 pins MicroDIMM Smaller than SODIMM 4.25 cm x 2.5 cm 5.4 cm x 3.0 cm 144, 172, 214 pins
Replacing components Refer to manufacturer’s documentation to find panels or slots Document and label screw locations Organize parts Use appropriate hand tools
Hot-swappable components Can be added or removed without turning the computer off Technologies include: PCMCIA USB IEEE 1394 Fibre Channel Serial ATA Supported in Windows and Linux
Inserting and removing PC cards Inserting Insert straight into slot Pins connect in back of slot Removing Stop services by using Safely Remove Hardware icon Press Eject button Card pops out of slot
Card and socket services Metaformat or Card Information Structure Card Services Socket Services
Non-hot-swappable components Require computer to be shut down Referred to as “coldplug” Often internal components Memory Hard disk Unplug the system and remove the battery Always follow ESD precautions
Mini PCI card Same functionality as PCI card, but smaller format Installed inside notebook
Mini PCIe cards Replacing the mini PCI card on mini-ITX system boards Smaller than mini PCI card by approximately half 30 mm x 51 mm 52-pin edge connector System board mini PCIe slot must support both ExpressCard and USB 2.0
Upgrading memory Location in notebook varies by model and manufacturer Most modern notebooks use standard memory modules Some notebooks use proprietary memory When upgrading, consider shared video memory Configure shared memory in BIOS
Replace an optical drive • Open drive tray slightly, turn off the notebook, disconnect power cord, remove battery • On case bottom, locate and remove screw locking drive in place • Slide drive out of socket • Insert the new drive • Replace locking screw
Keyboard Remove screws holding bottom cover in place. Remove cover. Disconnect connectors that connect the keyboard cables to system board. If keyboard held in by screws, remove the screws. If held in by plastic snaps, gently pry up the edge of the keyboard using a flat-head screwdriver. Gently lift keyboard out. Gently place new keyboard in place. Connect cables to system board. Replace bottom cover and reinsert any screws.
LCD panel and video inverter card Video inverter card – interface between LCD panel and system board If LCD monitor is dim – replace video inverter card If LCD is black – connect external monitor to notebook External display works, LCD does not – replace LCD panel assembly External display doesn’t work – replace video adapter card
Disassembling an LCD panel Disconnect the notebook from any external power source and remove the battery. If necessary, remove the keyboard. If necessary, remove screws in the back of the notebook to release the hinge assembly. Remove the hinge covers. Lift the cover off the notebook. As you do so, disconnect any wires or cables that connect the LCD panel to the system board. continued
Disassembling an LCD panel, continued Remove the screws that hold the LCD panel in the notebook’s top cover. Remove the front bezel and rear cover from the LCD panel. Remove the video inverter card. Reverse the steps to reassemble and reattach the top with a new LCD panel, video inverter card, or both.
Other components CPU Heat sink Fan System board CMOS battery Touchpad or other pointing device Speakers Web camera DC jack Plastics
CPU, heat sink, fan If replacing CPU, update the BIOS. Disconnect the notebook from any external power source and remove the battery. Follow the manufacturer’s directions to remove the hinges, bottom cover plate, and keyboard. Detach the LCD assembly from the bottom. Remove the plate or shell covering the internal components. continued
CPU, heat sink, fan, continued You might need to remove another component to gain access to the processor underneath. Remove the heat sink. (Sometimes the fan and the heat sink will be part of the same cooling assembly.) Unplug and detach the fan. Following the manufacturer’s directions, remove the processor. Remove any thermal compound residue from the bottom of the heat sink and processor (if not replacing the processor). continued