
ViewConn ® Plus
ViewConn ® Plus. Introducing ViewConn Using ViewConn Options Integrated Power Meter Pass / Fail Software Carrying Cases Additional Accessories. Introducing ViewConn ®. ViewConn is the first, and only, hand-held, all-in-one inspection and cleaning device.

ViewConn ® Plus
E N D
Presentation Transcript
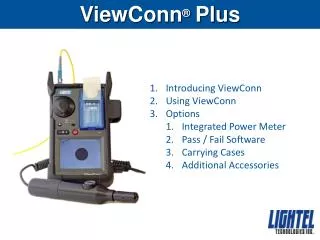
ViewConn®Plus • Introducing ViewConn • Using ViewConn • Options • Integrated Power Meter • Pass / Fail Software • Carrying Cases • Additional Accessories
Introducing ViewConn® ViewConn is the first, and only, hand-held, all-in-one inspection and cleaning device. ViewConn’s integrated operation allows users to quickly and easily inspect, clean and reinspect, ensuring connectors are truly clean prior to mating. ViewConn’s large 3.5” display provides clear, sharp images.
Introducing ViewConn® Plus Save Time The ViewConn Plus dual microscope design lets you easily inspect both male and female mated connector pairs without the time consuming need to change tips.
ViewConn®Plus 1. Fiber Optic Connector VC-6100-PL 2. ViewConn Adapter Tip 18. Cleaning Cassette 17. Accessory Holder 3. Focus Knob (Internal) 4. Ruggedized Cover 16. Power Indicator Light 5. Contrast Button 6. Camera switch 15. USB Portal (not visible) 7. Brightness Control 14. 4-pin Mini-DIN Jack and Socket 8. On/Off Button 9. Display Screen 10. AC Adapter Portal 13. Probe 1. Fiber Optic Connector 12. Focus Knob (External) 11. Probe Adapter Tip
Viewing Connectors Turning on ViewConn Press and briefly hold the red button on the front of ViewConn to turn on the unit. The green power light will be on whenever ViewConn is powered. The +/- control to the left of the on/off switch will allow you to adjust the brightness of the display. If your green power light is on, but the screen is black, briefly touch the red on/off button. The unit may have gone into the power saving, standby mode. Also check to ensure that the camera switch is set to INT.
Inspecting Male Connectors To inspect male connectors (patchcords and jumpers) set the camera switch, above the red on/off button to INT. Use the large black knob to focus the image. If you are unable to focus the image, verify that the tip is fully screwed in and the connector is properly seated in the tip. Ensure that you have the proper tip in the tip receptacle at the top of ViewConn, then place the connector into the tip.
Cleaning Male Connectors Once you have inspected the fiber, if you need to clean it, open the cover of the CC-1 cleaning cassette, and, using moderate pressure swipe the connector ferrule from the top down on a clean section of the CC-1 cassette. Do not scrub the connector back and forth and do not reuse a section of cleaner. Reinsert the connector in the tip to verify that it is now clean. If clean, make sure that the mated connector is also clean, before installing or reinstalling. If the connector was not clean, repeat the procedure and again recheck.
Cleaning Male Connectors Wet Cleaning If you decide you need to wet clean a connector, use a solvent dispenser like the optional Chemtronics Electro-Wash® pen dispenser to lightly wet a clean section of a CC-1 sheet. Less solvent is best. Always go from the wet portion to the clean dry portion. You always want to finish in a dry section of the sheet to be sure the solvent has been removed. Reinspect your connector as before to verify it is clean.
CC-1 Cleaning Cassette When you have used all three slots on a CC-1 cleaning sheet, pull the sheet out to advance it to the next sheet. The cassette cover must be open to advance the sheet. If you wish to tear off a sheet, first close the cover. (A quick twisting motion works best to tear off the sheets.) If you wish to remove the cassette, push up on the small blue plastic tab at the base of the cassette and lift the cassette out. When replacing the cassette, make sure the tab is over the edge of the cassette receptacle. This ensures that the cassette will remain in place.
Changing VC-6100 Tips Universal 2.5mm and 1.25mm tips are available for the VC-6100 in both PC and APC versions. To remove a tip, unscrew it in a counterclockwise direction and lift it out. Installing a tip. There is a small slot in the tip receptacle on the side facing the cap chain. Each tip has a key which fits into the slot. Seat the key in the slot and screw the tip clockwise until tight. There is a matching dot on the tip and the receptacle to help identify the starting position. PC APC
Inspecting Male APC Connectors APC connectors are angled and need tips designed specifically to view them. (Note the angle on the tip stem.) A male APC connector is keyed. The key should be directly to the front of ViewConn to provide the best image. Or you can simply turn the connector until it has the best contrast. Key Alignment Mark Improperly Keyed APC Connector Properly Keyed APC Connector
Inspecting Female Connectors To inspect female connectors (in bulkheads and patch panels) plug the 4-pin jack on your probe into the socket on the side of ViewConn – the flat side of the jack will face the rear – and set the camera switch, above the red on/off button to EXT. With the correct tip installed for the connector type, place the tip of the probe into the adapter and use the focus knob on the probe to focus the image. If you are unable to focus, you may not have the probe tip fully inserted. Make sure it seats fully, and refocus. Remember, when using the probe, focus with the probe knob.
Cleaning Female Connectors After inspecting, you can use the optional IBC cleaner to clean in the adapter. Insert the cleaner and push until it clicks. Remove and be sure to reinspect to ensure the female connector is clean before re-mating the connectors. To easily attach the cleaner to ViewConn hold ViewConn in your left hand and use your thumb to pull the front flap of the accessory holder forward. Then slip the IBC cleaner into place. It will remain securely fastened until you wish to remove it.
Probe Tips Different types of female connectors will usually require a tip designed specifically for that connector type. PC and APC versions will be different, and APC female tips will have a mark to match the key. In addition to standard tips Lightel offers a wide variety of specialty tips to accommodate special situations. APC Key Alignment Mark Ribbon fiber tips Extended tips Angled tips
Powering ViewConn ViewConn comes with a set of 4 AA low self-discharge NiMH camera grade batteries and an external battery charger. These batteries come pre-charged and may be used immediately. The green power light will slowly change to orange to alert you that the batteries are running low. When the light is red, battery power is almost gone. Battery life should be approximately 4 hours with recharging time about 2 hours. Charging a second set of batteries while using the first can give you uninterrupted power. In an emergency, AA Alkaline batteries may be used, but they may last less than one hour and should not be left in ViewConn. It is not necessary to remove ViewConn’s ruggedized cover to install or change the batteries. Simply slide the battery cover off. Make sure you install the batteries in the proper direction and slide the battery cover back into position. When properly positioned, the cover will fit tightly. ViewConn can also be powered using the AC adapter which is included. AC adapters and battery chargers are available with US, European, UK or Australian style plugs.
Capturing Images ViewConn comes with Lightel’s ConnectorView software for viewing and capturing connector end-face images on your Windows® PC. ViewConn is connected to your PC using a standard mini-B USB cable. ConnectorView numbers each captured image individually and can be set to display the fiber cleaning zones automatically. A complete software installation and user’s guide can be found on the CD that comes with ViewConn.
ViewConnAccessory Holder The Accessory Holder will securely hold optional cleaning devices, or …
ViewConn Power Meter ViewConn offers an integrated power meter option. Two versions are available for standard and higher power ranges. The power meter plugs into ViewConn’s 4-pin socket (the same one used by the probe) and is powered by ViewConn. On/Off is controlled by ViewConn’s power button. The power meter can store up to 999 readings and download them through its own USB output. Universal 2.5mm and 1.25mm tips are included. These tips work with both PC and APC connectors. To use the power meter, attach it to ViewConn with the 4-pin jack and secure it to the ViewConn accessory holder. With ViewConn turned on, set the camera switch to EXT. ViewConn with VC6-OPM
ConnectorView Plus Lightel’s ConnectorView Plus software is our optional Pass/Fail analytical software available for ViewConn and other Lightel video microscopes. ConnectorView Plus will automatically analyze the connector condition and provide a report. It can be used with single mode and multimode, male and female, PC and APC connectors. Summary reports can also be generated.
ViewConn Cases Both hard and soft cases are available options for ViewConn.
Additional Accessories Tip boxes Cleaning devices Neck strap