Model MAV9750AWW - features
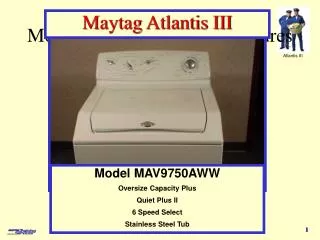
Model MAV9750AWW - features. Maytag Atlantis III. Model MAV9750AWW Oversize Capacity Plus Quiet Plus II 6 Speed Select Stainless Steel Tub. Opening Console. T15 Torx. To Access the Console Control Components: Remove the three T15 Torx Screws from the top of the console

Model MAV9750AWW - features
E N D
Presentation Transcript
Model MAV9750AWW - features Maytag Atlantis III Model MAV9750AWW Oversize Capacity Plus Quiet Plus II 6 Speed Select Stainless Steel Tub
Opening Console T15 Torx To Access the Console Control Components: Remove the three T15 Torx Screws from the top of the console Rotate the top of the console toward the front of the machine and lift
Component Access Wiring diagram On the new Atlantis, the console assembly can be easily removed if necessary
Removing console Disconnect: Lid switch harness 120 volt line cord Console ground wire Main wiring harness Pressure switch hose
Removing Selector Knobs Black tape on blade to protect from scratching To remove selector knobs, use a plastic putty knife or metal knife(taped) and carefully pry off knob
Removing Knob Locking tab The knob pulls off the locking tab
Console Control Components Extended Spin Switch Extra Spin Switch ATC Switch Timer & Chime Wash/Spin Speed Finger Faucet Pressure/ Infinite Water Level Switch Chime Volume Switch Wash/Rinse Temperature
Removing The Lid To remove Lid, first remove one of the plastic hinges
Remove Hinge Remove Hinge Pry top of hinge toward center Push up to release Locking Tab
Removing Lid After removing one of the hinges, cock the lid at an angle and slide the remaining hinge pin out of it’s receptacle
Popping The Top 2 ½” Lift Top Insert putty knife to release spring clip. Repeat process on the opposite side
Top Open Detachable Main Wiring Harness Connector Lid Switch Water Valves ATC Thermostats Dispenser Cup Tub Cover Agitator Spring Clips
Removing Front Access Panel Remove 5/16” screw on each side of cabinet Pull top of panel out and lift off bottom clips 1 2 Clip 3 4
Components Warning sticker – use as position reference Outer Tub Suspension springs Drain Hose Tub Hose Transmission Motor Pump
Bottom of the Machine Pump Motor Transmission pulley Roll belt off transmission pulley to remove
Pressure Hose and Dome Pressure Dome
Lid Switch Components Plunger Guide Tube Lid Cam Screw (2) Lid Switch
Lid Switch Assembly Lid Cam Guide Tube Plunger Lid Switch
Water Inlet Assembly Hot Valve Cold Valve ATC Thermostats
Two locking tabs secure the top of the inlet flume to the base Thermostats come as part of an assembly
Parts breakdown Tub Cover Seal Screw (4) Dispenser Cup Agitator Bolt Inner tub Agitator/Auger ASSY Isolator Screw (4) Outer Tub Screw (6) Gasket Tub/Housing Seal Tub Cover
Removing Agitator The Agitator is held to the shaft with a 1/2” bolt Dispenser Cup Agitator ½” Bolt and seal
To remove tub cover, push down on cover while releasing plastic clips and lift off.
Removing Inner Tub Remove four ½” screws
Nylon Seal on screw Nylon Seal Replace if damaged
When reassembling, position top plate on locating tabs Used with stainless basket
Removing inner tub With top plate removed, lift out inner tub
Spring Tool Part # 22002922 Upper Slot – Older Performa and Brand Washers Lower Slot – Atlantis and 1999 Performa Washers
Remove Six Suspension Springs Start in the front and work toward the rear
With belt, hoses and springs detached, roll out the tub assembly
Top “O” Ring Groove Part #25-7941
Seal Nut Side Top Bottom
Seal Nut Removal Seal Nut Tool 22002898 Wrench 35-2968
“O” Ring Seal Nut Basket Hub Tub Seal Housing Assembly Spin Bearing Transmission ASSY
Lower Bearing Tub Support Tub Brace (3) Suspension Housing Screw (6) Brake Spring Retainer Screw (6) Brake Spring HP Plastic Screw (3) Brake Rotor and Lining Snubber 10-24 x .50 Screw (6) Stator brake Thrust Bearing kit Pulley/Dust Cover kit Cam Washer 1.25 ODX Retaining Ring
Remove six 3/8” screws securing outer tub Take note of the three spring hangers before separating outer tub