False Backgrounds
Click and a piece of the background .....

False Backgrounds
E N D
Presentation Transcript
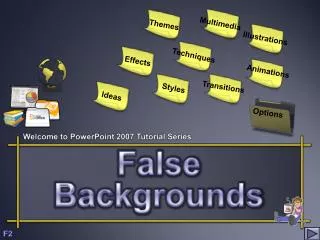
Multimedia Themes Illustrations Techniques Effects Animations Transitions Styles Ideas Options Welcome to PowerPoint 2007 Tutorial Series False Backgrounds F2
The Magic of False Backgrounds 1. Start with a blank layout on an empty slide. 2. Right-click / select Format Background 3. Click the Picture or Texture Fill option. 4. Click the File button to specify an image. 5. Click Close. 6. On the Insert Tab click AutoShapes and insert one of the AutoShapes. 7. Right-click the AutoShape, and choose Format Shape 8. Click the Line Color item on the left, and choose No Line. 9. Click the Fill item on the left and choose Slide Background Fill. This sets the fill of the shape to the background of the slide. 10. This is the very essence of this technique. Click Close. The AutoShape all but disappears, except that it's still selected, so that you can see the handles. Now, you need to animate the shape to create the result that you want. Or you can layer it without animation. See later for some ideas. You can probably come up with others.. PowerPoint Series
Technique 1: Zoom In . In this technique, you use the Zoom In emphasis animation to zoom in to a section of the image. In Step 6 above, insert a circle or ellipse and center it over the area of the image that you want to emphasize Continue with the rest of the steps above. After Step 10 above, click the Animations tab and choose Custom Animation. Choose Add Effect> Emphasis> Grow/Shrink. Leave the default of 150% or choose another option. Play the animation! You'll see a section zoom in and magnify the image. PowerPoint Series
Technique 2: Fly In the Image The image is broken up into 4 pieces. You can vary the animation effect in any way that you want. You can also add thick outlines around the 4 shapes. For Step 6 above, insert 4 rectangles that together completely cover the slide. They need not be precise, again certain effects may be introduced when you vary the size of the shapes! Continue through the rest of the steps above for each of the 4 rectangles. Select each rectangle in turn and add the following animation. Under Custom Animation select Fly In / Medium speed / Direction top left Do the same with all the other rectangles (You might expect the rectangles to always display the part of the image that they cover, but they remember their "final home" location, and display that) PowerPoint Series
Technique 3: Mix Grayscale with Color Like the previous technique, this one layers shapes. The outside area is grayscale, and the area inside the shape is in color. Before Step 6 above, click the Insert tab, and choose Picture. If necessary, resize it to cover the entire slide. Click the Format tab. In the Adjust group, click Recolor and choose Grayscale In Step 6 above, insert the shape that you want to use for the cropping. I used Freeform. Center it over the area of the image that you want to display. By doing these steps in this order, you'll ensure that the smaller shape is on top of the larger image. Continue the rest of the steps to fill the top shape with the background. (now I first inserted my Freeform shape because it needed to fill with the background, then the extra picture to cover the entire slide. Select the freeform shape by moving the mouse off-slide and drag to select Under Format select Bring to Front / I applied a Fade On click Check out the next slide! PowerPoint Series
Click Once Move back again If you missed the effect
In the previous slide I used x4 rectangles to cover the areas that I needed to remain colored / another picture was inserted and re-colored to Grey / Blackish The rectangles was moved to the Front The Church (page 7), was drawn with a Freeform Shape See next slide PowerPoint Series
Click Once Wait
Technique 4: Crop an Object By layering Shapes, you can create a cropping effect. This effect can be static or animated. Before Step 6 above, insert a rectangle that covers the entire slide. It can be opaque, or partially transparent. Remove the outline and choose an appropriate fill color. In Step 6 above, insert the shape that you want to use for the cropping. Center it over the area of the image that you want to display. By doing these steps in this order, you'll ensure that the smaller shape is on top of the larger one. If you want, you can animate an entrance for the larger shape covering the entire slide. (Fade entrance animation works well) Continue the rest of the steps to fill the top shape with the background. PowerPoint Series
Click Esc to Exit Thank you for watching this short Lesson This is just one of several free Lessons available All these Ideas are readily available on the Internet Come back soon! Creator: Frans Kruger 2009 The End http://outoppie-presentations.blogspot.com www.encryptologic.co.za