Download
1 / 17
170 likes | 303 Vues
CIT 256 Dreamweaver Sites and Image Maps. Dr. Beryl Hoffman. Start A Dreamweaver Site. Start Dreamweaver. Choose Dreamweaver Site (not HTML file). Or select New Site from Site menu. Set up Site Location.

E N D
CIT 256 Dreamweaver Sites and Image Maps Dr. Beryl Hoffman
Start A Dreamweaver Site • Start Dreamweaver. • Choose Dreamweaver Site (not HTML file). • Or select New Site from Site menu.
Set up Site Location • Type in a Site Name and browse to your Local Site folder. Hit Open then Select then Save.
File Directory • Your site directory is seen on the bottom right panel. • Right click to create new subdirectories. • Drag to move files. Links will update automatically! • Click on the filename to rename. • Double click on a file to open it.
Web site files • Index.html: the main page, automatically loaded for each directory. • Other pages with .html extensions linked to the index page. • An images directory with all the images of the site.
Navigation • Web sites usually have a navigation bar with links that link to different site pages. • Top or Side Navigation. • Types of links: • Text links, see http://www.elms.edu • Buttons (images), see http://GreenfieldMassage • Text made into buttons using CSS3, see http://apple.com • Menus (Spry/Javascript), see http://elms.readyhosting.com • Image Map with hot spots, see http://localnorthampton.com/
External vs. Internal Links • External Links go to a different website and start with http://. Usually target new/blank window. • Internal Links go to other pages in your web site. Just a page name .html if in the same directory or a relative path. Do not use absolute paths!
3 Ways to Make Links in Dreamweaver • Insert/Hyperlink • Type in text to underline, highlight, type in URL next to Link: in the properties window at the bottom. • Type in the text to underline, highlight, and use the Point to File target button next to the link.
Linking with Point to File • Type in text to link and highlight it. • Click on the Point to File button at the bottom and drag it to the file you want to link to on the right.
Button Links • Insert image for a button. • Click on it to select it. • Type in file name next to Link: in the bottom panel or click on Point To File tool next to the Link textfield and drag to right file. • Rollover buttons created by swapping two images. Easy from Insert menu. • Drawbacks: making all the buttons and updating as needed.
Image Maps • Sometimes the top banner image can have hotspots that can be turned into links. • Click on the image. Click on the Rectangular Hot Spot Tool at the bottom. • Drag a rectangle around the place you want to link. Type or use the File Pointer to point to linked file. • Drawback: hard to do rollovers.
Images folder • Images are usually saved in a subfolder called images in the web site directory. • If you move your images there, Dreamweaver will update all the links to a local path like “images/banner.jpg”.
CSS3 Text made into buttons • Very popular right now. We’ll learn how to do this later. • Advantage: Easy to change text. No extra images. See http://apple.comfor example navigation bar, and http://www.cssbuttongenerator.com/to generate. • Drawback: different browsers do the CSS differently so lots of CSS code variants.
Save CSS Styles into a .css File • Use Page Properties to set the CSS for the site colors which puts css rules in the <style> tags in the <head> section. • Select and right click to cut the css section in <style> tags at the top of your file.. • File/New CSS file to create a blank css file. • Paste the CSS rules into the .css file. • Attach the .css file to your file (see next slide) (Or select properties and right click in right CSS window and move to file.)
Attach a StyleSheet • All pages in the same site can have the same stylesheet attached. • Click on the chain button at the bottom of the CSS panel in the top right side.
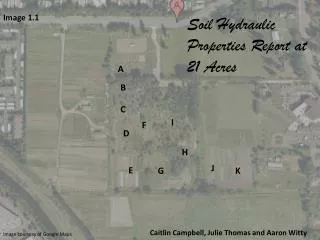
Embed Google Map iframe • Enter an address at http://maps.google.com. • Click on the paperclip icon and copy the generated HTML code to embed in your page. • Back in Dreamweaver, switch to code view to paste in the HTML code from Google Maps into the content area in the HTML code.
Midterm next week during lab on Thu. or Fri. • No class on Monday (Presidents day) • Midterm based on this week’s assignment to create a website with a couple pages in Dreamweaver but with no help. • Open book/open notes.