Understanding the Carbon Cycle: A STEM Approach to Climate Change Education
This engaging lesson introduces students to the carbon cycle through interactive activities that deepen their understanding of key processes such as respiration, photosynthesis, decomposition, and combustion. Students will build an action model of the carbon cycle, use animations to predict changes, and discuss human impacts on carbon levels. Activities include predicting carbon cycle changes and analyzing global warming evidence, culminating in a practical exploration of carbon footprints. This comprehensive lesson promotes critical thinking about climate change and environmental action.

Understanding the Carbon Cycle: A STEM Approach to Climate Change Education
E N D
Presentation Transcript
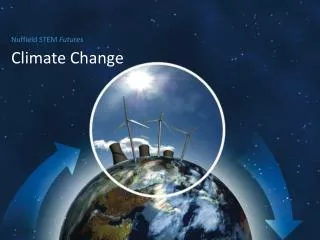
Climate Change Nuffield STEM Futures
Activity 1.1: Building an action model of the carbon cycle Learning outcomes You will be able to: • Explain the main processes in the carbon cycle and the links between them. • Demonstrate understanding of the carbon cycle using an action model.
Activity 1.1: Building an action model of the carbon cycle Why is carbon important? Write two or three sentences that describe how carbon is involved in each of these processes. • Respiration • Photosynthesis • Decomposition • Combustion
Activity 1.1: Building an action model of the carbon cycle Group A Carbon stores (4 pupils): need a bag of 8 carbon beads and an instruction card. Group B Natural processes (7 pupils): need instruction cards to show how carbon is moved around in the carbon cycle. Group C Sunshine (1-4 pupils): do not need cards or beads. This group makes sure the carbon moves around as it should to make the model work.
Activity 1.2:Predicting changes in the carbon cycle Learning outcomes You will be able to: • Use an animated model to make predictions. • Show how humans are affecting the carbon cycle. • Suggest how humans can intervene to reduce the amount of carbon dioxide in the atmosphere.
Activity 1.2:Predicting changes in the carbon cycle Carbon cycle animation link: http://www.nuffieldfoundation.org/futures-animations
Lesson 1: Plenary Discuss: • Which of the two models did you find easier to understand? Why? • Which are the key parts of the carbon cycle that humans are affecting? • What actions should humans take to restore the balance of the carbon cycle?
Activity 2.1: Is carbon dioxide a greenhouse gas? Learning outcomes You will be able to: • Use a laboratory model to illustrate a scientific phenomenon. • Explain how evidence from a laboratory model supports the theory that CO2 causes global warming.
Clamp stand Plasticine Temperature probe 1.5 litre bottle Datalogger Lamp must be the same distance from each bottle. Activity 2.1: Is carbon dioxide a greenhouse gas? • What do the components of this model represent? • What do you expect to happen after 20 mins? • What do the results suggest? • How could this model be improved?
Activity 2.2:What is the evidence for global warming? Learning outcomes You will be able to: • Collate and summarise scientific evidence from text, charts and graphs. • Identify evidence that the concentration of CO2 in the atmosphere is increasing and that it is having an effect on the global climate. • Describe some of the possible effects of climate change.
Activity 2.2:What is the evidence for global warming? Carbon dioxide and climate change Pupil activity Part 1 of 2 • In your group, read the case study you have been given. Examine the graphs and tables. • Write two questions that can be answered using the information in the text. • Write three questions that can be answered using the data in the tables or graphs. Make a note of the answers to your questions (record answers to your questions). • Agree a single statement summarising the most important information shown by the data.
Activity 2.2:What is the evidence for global warming? Carbon dioxide and climate change Pupil activity Part 2 of 2 • Choose some data to support your summary statement. • Swap your recording sheet and case studies with one other group. • Answer each other’s questions. Check the answers to the questions with the other group. • Discuss your summary statements and supporting data with the other group. Make any changes suggested by the other group.
Lesson 2: Plenary Discuss: • Do you think that global warming will have a major impact on your life in the future? • What do you think the main changes might be? • What do you think we should do about it?
Lesson 3Carbon footprints Learning outcomes You will be able to: • Use an electronic carbon calculator. • Make estimates of carbon footprints for familiar activities.
Activity 3.1What’s your carbon footprint? Carbon cycle animation link: http://www.nuffieldfoundation.org/futures-animations
Activity 3.1What’s your carbon footprint? Carry out the tasks in the ‘Footprint calculator’ spreadsheet. To discuss: How does your ranking of activities compare with other people’s? What would be the easiest and the most difficult activities to change to reduce the carbon footprint? What are the main difficulties in working out an individual’s carbon footprint? What additional information would you need to calculate an individual’s carbon footprint for a year?
Activity 3.2One Earth National carbon footprints: Carbon dioxide emissions by nation, 2004
Activity 3.2One Earth Entering a formula into Excel
Lesson 3: Plenary Discuss: • Do you think that the closed loop solutions that you have come up with are realistic and fair? • What would be the main obstacles?
Activity 4.1:Installing a wind farm Learning outcomes You will be able to: • Use a project management tool. • Assemble a 3D exhibition to communicate closed loop ideas to a specific audience. • Produce and work to a plan for a group project. • Justify a wind farm referring to closed loop theory.
Activity 4.1:Installing a wind farm: the challenge You need to convince your community of the value of installing a wind farm. Overview of the challenge • Identify a suitable community for wind-powered energy in your region (roughly 5000 people). • Work out how many wind turbines you would need to supply them with energy. • Identify the site(s) where the turbines might be located. • Plan an exhibition for the town hall to gain public support for your proposal.
Activity 4.1:Installing a wind farm: exhibit brief • Construct an exhibit proposing a wind farm site in your area. Design the exhibit to be displayed in a 3D cabinet measuring 60 cm x 60 cm x 30 cm. • The exhibit must display accurate STEM information and data (research into turbines is needed). • The exhibit must include a map showing where the turbines would be located in your borough. Justify your choice of sites for the turbines. • The exhibit must aim to convince local people of short and long term benefits, by referring to closed loop ideas.
Activity 4.1:Installing a wind farm: criteria • Your project will be judged on how effectively you organise your work. The following criteria will be used to judge your group’s work: • Did you produce a clear project plan? • Was everyone in the team given an appropriate role? • Did the planning of tasks allow the group to carry out the exhibit brief provided? • Did everyone finish their tasks on time? • Did other members of the group help when people fell behind?
Activity 4.1:Installing a wind farm: planning • Choose from planning tools 1 and 2 to plan the work on your exhibit. • Once you have made your plan, swap feedback on your plans with another group.
Activity 4.1:Installing a wind farm: planning tool 1 Plan your project by deciding: What needs to be done? Who will carry it out? By when? (WWW)
Activity 4.1:Installing a wind farm: planning tool 2 Create a timeline of what everyone is doing at each stage in the process.
Activity 4.1 Installing a wind farm: Giving and receiving feedback • Pair up with another group to give and receive feedback on the success of your group’s planning and carrying out. • Refer to the criteria and exhibit brief when giving feedback. • Back in your own group, write down three key points for how you could improve your planning and how you carry out a group project.
Lessons 4 & 5: The wind farmPlenary Discuss: • Do you think that renewable energy can provide for the world’s needs in the Future • What would be the main obstacles? • Do you have any other solutions? Use your Learning Nutshell to record your thoughts about this pod.