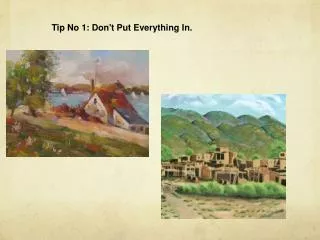
Tip No 1: Don't Put Everything In.
130 likes | 275 Vues
Tip No 1: Don't Put Everything In. Tip No 2: Use Your Imagination. Tip no. 3: Give the Foreground Preference. Tip #4: It's Not Cheating to Buy Green Paints

Tip No 1: Don't Put Everything In.
E N D
Presentation Transcript
Tip #4: It's Not Cheating to Buy Green Paints You're not 'cheating' if you buy green paints in a tube rather than mixing your own. One of the main benefits of doing this is that it means you always have instant access to particular greens. But don't limit yourself; extend the range of 'ready-made' greens by adding blue or yellow to it.
Tip No 5: Get to Know How to Mix Greens To quote Picasso: "They'll sell you thousands of greens. Veronese green and emerald green and cadmium green and any sort of green you like; but that particular green, never." The variety and intensity of greens that occur in nature is quite awesome. When mixing a green, use the fact that greens have either a blue or a yellow bias as the starting point in determining the proportions you mix.
Tip No 6: Instant Muted Greens Mix a little black with various yellows and you’ll see that it produces a range of muted (or ‘dirty’) greens and khakis.
Tip No 7: Do a Series Don't think that because you've painted a particular landscape once, you're now done with it.
Your Surface Before you begin your actual painting, here are two suggestions for preparing the painting surface. You might consider toning your background before painting, using an analogous, complimentary, or neutral color. (The exception is for those using watercolor as working light to dark is optimum.) Another method, is to use a broad brush to quickly cover the canvas with a wash of the scene's actual color. Either of these possibilities will serve to break the stark white of the canvas and tie your painting together, enliven, and allow each color to be "read" instantly as you apply subsequent layers of paint. Underpaint using a brush, paper towel, rag, or sponge. Largest areas of foreground, middle ground and background were placed, and basic values established. Begin including the local colors while blocking-in the main shapes.
IDENTIFY THE FOREGROUND….. IDENTIFY THE MIDDLE GROUND… IDENTIFY THE BACKGROUND…..
I SEE... I WONDER… I LIKE…
Demonstration video of painting a landscape: Step by step drawing of a landscape