Download
1 / 43
430 likes | 673 Vues
RCM-Tool v1.0 Demo. Demonstrates how to perform an actual RCM-analysis in RCM-Tool. Performing RCM-Tool Analysis. Welcome to the RCM-Tool version 1 demonstration. This demo will demonstrate the capabilities and power of the RCM-Tool System. RCM-Tool Reporting.

E N D
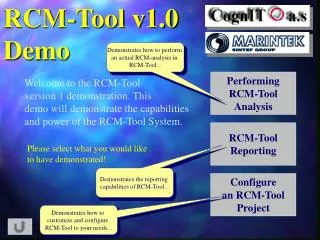
RCM-Tool v1.0 Demo Demonstrates how to perform an actual RCM-analysis in RCM-Tool... Performing RCM-Tool Analysis Welcome to the RCM-Tool version 1 demonstration. This demo will demonstrate the capabilities and power of the RCM-Tool System. RCM-Tool Reporting Please select what you would like to have demonstrated! Demonstrates the reporting capabilities of RCM-Tool... Configure an RCM-Tool Project Demonstrates how to customize and configure RCM-Tool to your needs...
Performing an RCM-Tool Analysis Doing the actual RCM-analysis using the RCM-Tool consists of the following step: • Step 1: Create the Function Go • Step 2: Assign Equipments Go • Step 3: Perform the Function Failure Analysis Go • Step 4: Perform FMECA Go • Step 5: Decide Maintenance Strategy Go • Step 6: Assign Maintenance Task & Spare Parts required Go • RCM-Tool Reporting Go
The RCM-Tool Workspace Explorer Connected equipment/parts to currently selected function Function or system hierarchy may be used Possible to work with several projects at the same time. Step 1: Create a Function RCM steps
Step 1: Creating a New Function Possible to make a system hierarchy by using tag numbers Degree of redundancy may be entered directly and shown in the function hierarchy Redundant functions may be connected to “sibling” function Step 2: Assign Equipment RCM steps
Step 2: Assign Equipment Press button to assign equipment and parts to the new function. RCM steps
Step 2: Assign Equipment Several equipment levels may be entered and connected, to create an equipment hierarchy under the function hierarchy. If similar equipment is analyzed previously, it may be found in the equipment database and copied. The user decides which fields that shall be shown in the equipment assignment dialogue. (This is done during the configuration of the project). Equipment and parts assigned to perform this function Step 3: Perform Function Failure Analysis RCM steps
Step 3: Function Failure Analysis Enter function failures, failure observability and other relevant information. Link equipment/parts to the relevant function failure RCM steps
Step 3: Function Failure Analysis Go to FMECA! You may enter more equipment/parts if necessary. RCM steps
Step 4: Perform FMECA Failure Mode, Effect and Consequence Analysis for the equipment failure leading to the function failure. Criticality assessment Analysis may be saved in the equipment database and used for other projects. RCM steps
Step 4: Perform FMECA - Criticality Assessment Consequence levels are picked from pre-defined dropdown-list Consequence level may be corrected with respect to probability of occurrence and degree of redundancy RCM steps
Step 4: Perform FMECA - Criticality Assessment Acceptable criticality level is pre-defined for the project RCM steps
Step 4: Perform FMECA - Criticality Assessment Criticality results are listed in the FMECA. For critical failure modes, preventive maintenance shall be assigned! RCM steps
Step 5: Decide Maintenance Strategy By using a Decision Logic Diagram, the optimal maintenance strategy is identified RCM steps
Step 5: Decide Maintenance Strategy By answering Yes or No to the questions asked in the Decision Logic Diagram, the user will find the correct maintenance strategy. RCM steps
Step 5: Decide Maintenance Strategy Changes and updates are easy to make. If the question is answered in the FMECA, the answer is given automatically. RCM steps
Step 6: Assign Maintenance Tasks Task description, interval and any logistic requirements are entered by the user. RCM steps
Step 6: Assign Maintenance Tasks - Required Spare Parts Spare parts requirements may be identified for all maintenance tasks RCM steps
Finshed Performing RCM-analysis: The Function Status For all functions, the analysis status can be found in the status bar. RCM steps
RCM-Tool Reporting RCM-Tool has the possiblity to generate reports in several different ways. This demo path shows how you can utilize and customize the reporting capabilities of RCM-Tool to your needs. • Job Sorting - Basic Functionality Go • Job Sorting: Configure your own report listing Go • Generate HTML-report Go
Job Sorting - Basic Functionality The results from the RCM analysis may be sorted in various ways, and grouped together by the user. This makes it easy to export results to the maintenance management system. Reporting
Job Sorting - Basic Functionality New groups are easily made, and given a group name and a longer description. The maintenance tasks that belong together are simply clicked on and added to the relevant group Reporting
Job Sorting - Configure Your Own The RCM results may be sorted in any way, and the user may define his own sorting preferences. All fields in the RCM analysis may be used as sorting criteria, in any order. Reporting
Generate HTML-Report The user decides which part(s) of the analysis to show in the report. Reporting
Generate HTML-Report Reports are generated as web-pages, and may be shown in any web browser. This makes reading and distribution easy and effective. Reporting
Generate HTML-Report Reporting
Generate HTML-Report In the function tree, just click on the function to see analysis information and results.
RCM-Tool Project Configuration With RCM-Tool you are able to configure your project and your RCM-procedure to adapt to your industry segment, as wells as reflect your company’s needs and policies. The configuration process is accomplished in the RCM-Tool Project Configuration Wizard and consists of the following steps: • Configure Project Settings Go • Configure Screens and Data Fields Go • Configure Criticality Go • Configure Decision Tree Go • Build you project! Go • Configure Standard Codes Go
Configure Project Settings Click Next to continue... Config. steps
Configure Project Settings Project information is entered first. This may be altered later. Click Next to continue... You may base the new project on existing projects or on predefined templates, or start from scratch with the master template. Config. steps
Configure Project Settings Click Next to continue... Choose analysis parts to alter. If you want to keep the template as is, just continue without ticking of any of the boxes. Config. steps
Configure Project Settings You may use a function tree with internal numbering, or your own system hierarchy with tag numbers. Click Next to continue... Config. steps
Configure Screens & Data Fields Click Edit to continue... Config. steps
Configure Screens & Data Fields Decide if the field is to be included, and if it shall be required to fill it in. Define input method. (Free text or pre-defined drop down lists) Caption text may be altered as you prefer. Add help text for the user. This will appear as the user points at the field caption. Config. steps Click OK to continue...
Configure Criticality Click “Criticality..” to see criticality configuration... Config. steps
Configure Criticality Click “Frequency Correction” to continue... You may define your own criticality categories. Level tags (consequence levels) may be defined as preferred by the user. Config. steps
Configure Criticality Click on Redundancy Correction to continue... A correction matrix with respect to consequence frequency may be defined. The criticality level may be increased/decreased depending on the frequency. Frequency levels may be defined by the user. Config. steps
Configure Criticality A correction matrix with respect to function redundancy may also be defined. The criticality level may be increased/decreased depending on the degree of redundancy. Click OK to continue... The user may define degrees of redundancy for criticality correction. Config. steps
Configure Decision Tree You may choose between several pre-defined decision logic diagrams. Click “View” to continue... Config. steps
Configure Decision Tree Click here to view another decision tree template... Config. steps
Configure Decision Tree Click here to continue... Config. steps
Build Your Project! If you are certain that you have the project configuration as you want, click finish. The program then builds the project environment after your specifications. Config. steps
Configure Standard Codes Standard codes may also be imorted from an Excel worksheet. You may define the contents of all drop-down lists yourself, or use pre-defined contents. Config. steps
Users and User Rights Assignment For all projects, one ore more users may be defined and given access. Users may be performers, verifiers or administrative users. Adminstrative users should have special training, as they may make changes to the program. Config. steps