
GMVEMSC Database Tutorial
E N D
Presentation Transcript
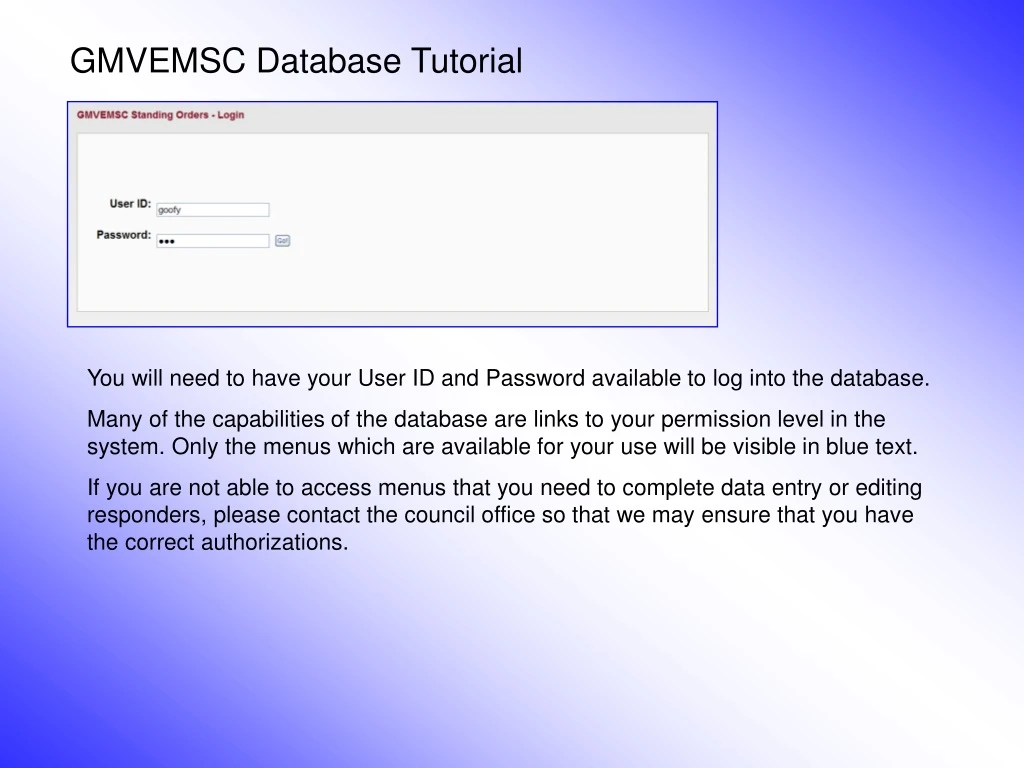
You will need to have your User ID and Password available to log into the database. Many of the capabilities of the database are links to your permission level in the system. Only the menus which are available for your use will be visible in blue text. If you are not able to access menus that you need to complete data entry or editing responders, please contact the council office so that we may ensure that you have the correct authorizations. GMVEMSC Database Tutorial
The first time you log in, you will be directed to and Agency Update Screen for your agency. It will look like this. You will need to add the required fields and click “Update Agency.” In order to keep our records current, updating will be required yearly after January 1. Once you have performed an update, you will be returned to the home screen, and you may then access other areas of the database.
Once you have completed the Agency Update screen, you will be returned to the Homepage screen. Menus that you have access to (depending on your permission level) will be in blue text.
Responder SearchThis feature will allow you to search for a responder or an event within the database.“Events” can be added to track scene responders or to print scene ID badges in the case of a major incident. Events will be discussed later. Clicking on Responder Search will take you to a list of the responders who are linked with your organization.
You may then click on a specific responder to view their information. We have added some new features, including the ability to track additional certifications, and adding photos for printing scene ID badges.These features may be edited under the Standing Orders/Manage Responders menu.
The Standing Orders Menu • Clicking on the Standing Orders Menu will take you to a submenu as seen here: The “Update Agency/Department Information” link can be used at any time to submit or edit information about your agency. If you need assistance with this feature, please contact the council office.
Clicking the “Manage Responders” link will allow you to search for a responder by last name. You can edit responder information and add new responders from this menu. For this tutorial, we are going to search for a responder with the last name “mouse.” Enter the name and click execute. A list of responders with that last name will appear. You can then click the button next to the responder you wish to edit.
You will now see a screen similar to the one you saw under the Responder Search screen, but you will now have access to a button which you can use to edit the responder information, certification level, card expiration dates.
Clicking on Edit Person opens a new screen where you may fill in and update information and add certifications. New Feature: You can also add a photo for ID purposes under this menu.
Clicking on Edit Person opens a new screen where you may fill in and update information and add certifications. To edit the currently listed certification (update expiration dates and verify card) click on the “Click Here” button next to that certification. New Feature: The links at the bottom left allow you to quickly go to tests which have been entered for the provider.
Clicking on Edit Certification opens a new screen where you may fill in and update information . You can click the “Verify” link to go directly to the ODPS Verification Website. Once you have updated the information, click “Update Certification” to save the edited information. You will then be returned to the Manage Responder screen.
You may also add additional certifications from the Manage Responders screen. Click the “Add New Certification” button.
Use the drop-down menu to view the additional certification you may use. New Feature: We have added many new certifications that you can use to track information for your organization. We have included NIMS levels, HazMat, Firefighter, Instructor, and Rescue certifications. Please contact us if you have additional certifications you would be interested in adding. Once you have selected the certification you wish to add, fill in any related fields and click “Update Certification.” Note: The “Other Info” and “Description” fields can be used to make notations. When you have completed the screen you will be returned to the Manage Responder screen.
Adding a New Responder If you have searched for a responder in your agency and they are not in the database, you may add them through the Manage Responder menu. First, you will search to see if they are listed. We are looking for a responder named Daisy Duck. When we execute a search for Daisy, a message returns that “No matching records were found.” We now have access to a button to “Add a New Responder.”
Adding a New Responder Fill in the required information. You may also add a photo for this responder by clicking browse and locating the image you wish to attach. Once she has been added, you can return to the Manage Responders menu, enter the last name and search and she will appear on the list with the ability to edit and add certifications. Note: The field “Full Name” is not editable at this time.
Adding a New Responder Once she has been added, you can return to the Manage Responders menu, enter the last name and search and she will appear on the list with the ability to edit and add certifications. Use the Edit Person button to add certifications for the new responder as previously described.
The Standing Orders Testing • Clicking on the “Standing Orders Testing” will take you to a submenu as seen here: Here is where you will be able to add or edit Skills testing results (note: you may only edit the tests that you have entered). The screen shows the currently entered test results. New Feature: There are drop-downs to select test details. You can select several variables to search for a specific type of test (written or skills) or a specific responder level. This will be helpful for large agencies with multiple screens of providers. Please make sure that the “Proctor” field lists “Select a Proctor” if you are searching for tests other than ones you have administered. We are adding a Skills Test for our new provider, Daisy Duck. To begin click “Add New Test.”
The Standing Orders Testing Add a new Test (Single Test) • You now have the ability to add either single tests or to add multiple tests at a time. • To add single tests: • Use the drop-downs to select the appropriate information, and click Update Test to • complete the test entry. The screen will refresh, and you will have access to a “Next in • Batch” button to add the next test you wish to enter. For your convenience, all previous info will be • retained in the drop-downs for the next test entry.
The Standing Orders Testing (Multiple Test Entry) • New Feature: Add tests results for the agency on a single page • We hope that this feature will be a timesaver! • You can enter multiple test results at once as long as they are the same Result Type (Pass or Fail) • and the same Responder Level. • First, go to the Standing Orders testing screen. Use the drop down to select the Certification • Level you wish to enter, the Test Type, the Proctor, the Data Entry Office, and the Result Type. • Note: All fields except the Responder field must have a selection. • Click Execute Search. You should now have access to a new button “Edit Scores.” Click to enter the • batch screen.
The Standing Orders Testing (Multiple Test Entry) • You can now place the cursor in the box you wish to edit and fill in the test info. Click the Update • checkbox for each test entry and finish by clicking the “Update Scores” button. In this example, we are adding results for only two of the providers, with tests on different dates.
The Standing Orders Testing (Multiple Test Entry) • The updated Standing Orders Testing screen will now show the additional test results. Each result can be edited by clicking the link at the end of the line.