Editing images using Microsoft Photo Editor and Paint
390 likes | 820 Vues
Editing images using Microsoft Photo Editor and Paint. Quick and Easy!. Microsoft Photo Editor and Paint are image-editing software applications that come bundled into Microsoft Office Both have very little of the capability of Adobe Photoshop

Editing images using Microsoft Photo Editor and Paint
E N D
Presentation Transcript
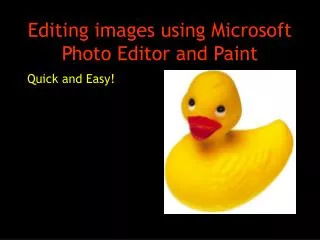
Editing images using Microsoft Photo Editor and Paint Quick and Easy!
Microsoft Photo Editor and Paint are image-editing software applications that come bundled into Microsoft Office • Both have very little of the capability of Adobe Photoshop • But they are “free” with Office and easy to learn.
I will cover: • How to save an image from a webpage • Image file formats • Improving a photo • How to resize an image • What happens when an image is resized from small to large and large to small
I will cover: • How to crop • How to add an effect • How to add type • How to take a sheetshot • How to optimize images
How to save an image from a webpage Let’s go to the NOAA photo libraryhttp://www.photolib.noaa.gov/ • right click your mouse on the homepage photo • select “save picture as” • save file in the same format as it appears on the webpage
How to save an image from a webpage Internet Explorer has a right-click “properties” feature to help you find out the name of a file, its size and its specific location on the remote server
Image file formats • .gif non-photographic graphics • .jpg generally best for photographs • .bmp Microsoft proprietary format: not useful for anything except creating wallpaper for your Windows desktop. Paint will default to saving files in .bmp • This webpage has more information about the difference between .gif and .jpg
Improving a photo Use MS Photo Editor to adjust darkness and lightness of an image and even improve the color balance of an image. Select: • Image • Balance • Decrease or increase brightness • Decrease or increase balance • Use gamma by selecting a color and then adjust the scale to make the photo go red, blue or green
Decreasing brightness Here is the original
Decreasing brightness Here is picture darkened
Decreasing brightness Here is picture with red selected and the gamma increased to 2.0
Auto-balance If you’re not certain how to adjust your photo, use the auto-balance feature
Resizing images • Always “constrain” the dimensions of your image • “Constrain” means keeping the dimensions in the same ratio • If your software doesn’t automatically provide resizing, note the exact dimensions of your image • Photo Editor defaults to a constrained sizing but width and height need to be changed the same percentage
Resizing images The duck picture as an original: It is 500 pixels wide and 546 pixels high
Resizing images The duck picture as an original: Resized image lost its ratio: I clicked “allow distortion,” Changed the ration and Dimensions are now: 475 pixel wide and 409 pixels high
What happens when an image is resized from small to large and large to small The original is a medium-sized image at 500 x 546 pixels (width is given first and then height: this is standard)
What happens when an image is resized from small to large and large to small Reduced to 200 pixels, the image still looks fine but it wasn’t that big to begin with. Let’s reduce it to 50 pixels to make a small graphic
What happens when an image is resized from small to large and large to small Reduced to 50 pixels, the image is hard to read but not too fuzzy or distorted. What happens if we try to resize the image back up?
What happens when an image is resized from small to large and large to small The 50 pixel image is resized to 200 pixels. Now it is fuzzy and unusable
The adage(s) of this story • Always copy your image files before manipulating them in case they get “ruined” • Start with an image file the appropriate scale to your purpose. E.g. use a small file for icons • It’s ok to reduce an image but blowing it up often doesn’t work.
Cropping images • First define what part of the photo you are saving by using “define” • Use your mouse to change width and height
Cropping images • I have selected only the duck’s head for cropping • Select “image” • Select “crop” • Use the defaults on the menu
Cropping images The duck’s head only
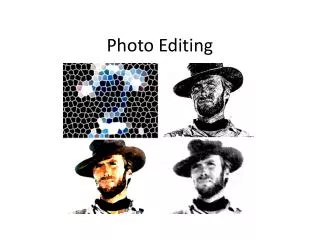
Add an effect Under “effects,” select an effect I choose “chalk and charcoal” to make my photo into a non-photographic graphic image
Add type Photo Editor doesn’t let the user add type BUT Paint does have this function Close your image in Photo Editor and then open your image in Paint
Add type Here is the original image in Paint
Add type • Click on the icon of the letter ‘A’: this lets you add type • A cross with a dot in the middle will appear on your image. Use it to create a text box by dragging it across and up and down to size the box.
Add type • Control the font size and type using the fonts menu (1) • Add the text in the text box (2) • Control the color of the font using the color palette (3)
Add type • Notice how the type box is over the image? • That is because the toggle to have the text box over the image is on (look for the arrow) • Select the option below it for an “invisible” text box.
Add type The process is repeated but this time, select the second option for the text box (look for the arrow on the image)
Add type • The process is repeated but this time, select the second option for the text box (look for the arrow on the image) • Paint doesn’t let us center the type or position it flush right
Screenshots Screenshots are easy and very useful for tutorials. Just hold down • CONTROL • ALT and • PRINT SCREEN simultaneously
Screenshots Paste your screenshot into Photo Editor Save your original. Copy it and and then crop it so it isn’t too large. Typically a screenshot is about 800 pixels across. I suggest reducing the size 50%. I often name my files to show their size. The original might be called duckyorig.jpg and the version that is 400 pixels across is called ducky400.jpg. This helps me quickly identify the different scales of the image.
How to optimize images • Try not to load images over 60K for webpages • Always optimize your images for faster loading • Use shareware or • Websites that provide this service • Photoshop provides optimization