Final presentation winter 2014
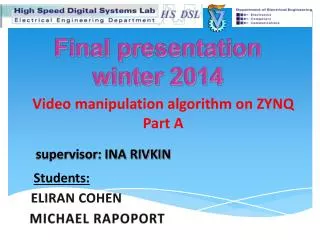
Final presentation winter 2014. Video manipulation algorithm on ZYNQ Part A. supervisor: INA RIVKIN. Students:. ELIRAN COHEN. MICHAEL RAPOPORT. Motivation.

Final presentation winter 2014
E N D
Presentation Transcript
Final presentation winter 2014 Video manipulation algorithm on ZYNQ Part A supervisor: INA RIVKIN Students: ELIRAN COHEN MICHAEL RAPOPORT
Motivation The goal is to build an embedded system witch can receive video, process the video by hardware and software and finally send it out to a monitor. The system is based on the ZYNQ component of Xillinx. embedded system
Project goal • Add the ability to receive and draw out video signals to the embedded system. • Add the ability to process the video signals by hardware, software and both. HDMI IN FMC module Zed Board HDMI OUT
Background The board that we working on him calls ZedBoard. The main component in our project is the ZYNQ. The ZYNQ consists two main parts: first is the FPGA (programmable logic), second is the ARM dual proccessor. .We consider the above to be an embedded system The ZYNQ component
Work environment • Hardware design: • Vivado2014.1 – for Xillinx FPGA design/Plan ahead 14.6 • IP integrator – part of vivado. • Software design: • Software Development Kit (SDK) • Debugging • Chipscope. • SDK
The block diagram of the ZedBoard The left peripherals belong to the ARM. The right peripherals belong to the FPGA. We use the color peripherals. The ZYNQ component
The HDMI Input/Output FMC Module The FMC module connects to an FMC carrier in the ZedBoard, and provides the following interfaces: 1) HDMI Input 2) HDMI Output 3) The interface for the ZedBoard The interface for the ZedBoard HDMI OUTPUT HDMI INPUT
Processing in software/hardware Part b Part a Empty Block Empty Block IN camera VIDEO IN FMC FPGA AXI BUS ARM Screen VIDEO OUT OUT ZYNQ
Work stages The first stage was to build a short pass.
Work stages The second stage was to add the VTC module which enables the Hardware processing.
Work stages The third stage was to add the AXI Monitor module in order to observe the information flow.
Work stages The final stage is to add the VDMA module which enables information flow to our processing unit and hence the software processing. We can notice the second VTC module appears, it is actually to enable two different timings for our system, Pre software processing timing and post software processing timing.
VDMA component The main component which enables us to send information flow to the processors is the VDMA module This core is a DMA engine, specialized for video application. It works as a router to/from the AXI4 bus from/to external memory, thus effectively a video frame buffer.
How VDMA works The AXI Video Direct Memory Access (AXI VDMA) core is a Xilinx IP core that provides high-bandwidth direct memory access between memory and AXI4-Stream type video target peripherals.
Next step PS PL Connection between the PL (programmable logic)and PS(processing system).
OUR VTC component In this stage our VTC component is merely a clock controller
DMA block diagram We use the DMA as is
Our processing block location(will be utilized in part b) Logic block Timing block
Block diagram Our Hardware processing block AXI block VDMA Logic block Timing block VTC
Work frequency We set our clock to 150 MHZ since the actual HDMI video input/output is 148.5 MHZ In future we might use even faster frequency depending on the Hardware processing block we will choose to build. For Software processing it is much alike, with the one difference of memory usage ,that is, we can create a video buffer which will allow longer processing.
Software processing PS We use the Zynq processor and memory in order to build a Software processing block VDMA
Frame size Axi_vdma memory frame size is 64k The addresses are from 0x43000000 to 0x4300ffff
Memory for manipulation Total useable memory as defined by hardware is 512M The addresses are from 0x00000000 to ox1fffffff
System possibilities • The system can receive and send the following resolutions, which are defined by the frequency received from the vtc • "VGA", 480 // VIDEO_RESOLUTION_VGA • "480P", 480// VIDEO_RESOLUTION_480P • "576P", 576 // VIDEO_RESOLUTION_576P • "SVGA", 600 // VIDEO_RESOLUTION_SVGA • "XGA", 768 / VIDEO_RESOLUTION_XGA • "720P", 720// VIDEO_RESOLUTION_720P • "SXGA", 1024// VIDEO_RESOLUTION_SXGA • "1080P", 1080// VIDEO_RESOLUTION_1080P • "UXGA", 1200 // VIDEO_RESOLUTION_UXGA
Difference between resolutions • The marked numbers in the previous slide are responsible for the quality of the output frames • Those numbers are defined by the number of pixels use light horizontally and vertically (can be different numbers) * In order to refresh the higher pixels number we need a higher frequency rate
Software structure • The software is build by two types of blocks • The first type is header files which are responsible for interpreting hardware data. • The second type is an algorithm blocks which are responsible for the functional part of our software.
The algorithm blocks Video detector-Responsible for possessing input signals Video resolution-Defines resolution according to vtc frame buffer-consists of two video frame buffer Video generator-Responsible for generating the output signals
Block diagram Software block ARM Hardware block VDMA FPGA Video in Video out
Software Block diagram Software Video resolution Frame buffer Video generator Video detector Video in Video out
Hardware Block diagram Hardware block Video out VDMA AXI4S_out AXI4S_in ? Video in VTC_1 VTC_0
The full system Frame buffer DDR Software block Hardware block Video detector AXI AXI4S_in HDMI in VTC_0 Video in Video resolution FMC interface VDMA Frame buffer HDMI out AXI VTC_1 Video out Video generator AXI4S_out
The video manipulations The first and basic manipulation we used the software structure in order to add delay to output video
The video manipulations The second manipulation we did was to define a second frame buffer which receives all the information it needs, but we read from it in opposite direction ,that is, from end to start. the outcome of this manipulation is screen swap.
Frame buffer frequency We know our frame buffer size is 64KB The bit stream arriving from the vdma by the AXI bus is 32 bit If the frequency of 1 bit is ~150MHZ We can calculate the arriving frames frequency 64*8(Kb)/32(b)=16K 150(MHZ)/16(K)=9.3(KHZ) frame frequency
What’s next? Hardware block Video out Video in ? VDMA AXI4S_out AXI4S_in VTC_0 VTC_1 *We built the full system that allowed us to learn the system. *We have done two simple processing manipulations on the video signal. *We would like to do a complex manipulation in hardware on the video signal. *The complex video manipulation Will be performed in the yellow block in our next project……