Software Development Tools Lecture 6
Software Development Tools Lecture 6. COMP220/COMP285 Sebastian Coope Eclipse and Java. These slides are mainly based on “ Java Development with Eclipse” – D.Gallardo et al., Manning Publications., 2003. Eclipse. Eclipse is a quite complicated Software Development Kit ( SDK ),

Software Development Tools Lecture 6
E N D
Presentation Transcript
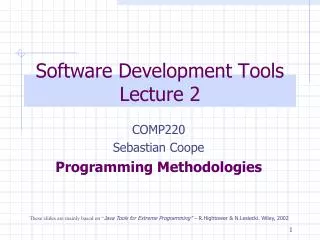
Software Development ToolsLecture 6 COMP220/COMP285 Sebastian Coope Eclipse and Java These slides are mainly based on “Java Development with Eclipse” – D.Gallardo et al., Manning Publications., 2003
Eclipse • Eclipse is a quite complicated Software Development Kit (SDK), • We will cover only • The general description of Eclipse • including the Java quick tour in Eclipse • Using JUnit from inside of Eclipse • Using Ant from inside of Eclipse (at the very end of our lectures after learning Ant)
General description of Eclipse • Eclipse is a Software Development Kit (SDK) • It, may be compared to a blacksmith's shop, where you can • not only make products, • but also make the tools for making the products.
General description of Eclipse • At the most fundamental level, Eclipse is actually the Eclipse platform which • integrates software development tools as Eclipse plug-ins. • Except of a small runtime kernel, • everything is a plug-in or a set of related plug-ins.
General description of Eclipse • Most important plug-in is JDT (Java Development Toolkit) • for writing and debugging Java programs. • In this form Eclipse is just Java IDE (Integrated Development Environment). • This is what most people use Eclipse for. • We too, because we will not create in these lectures our own plug-ins. • However, we will usealready existing plug-ins for JDT, Junit and Ant.
General description of Eclipse • Anyway, you should know that Eclipse contains PDE: • Plug-in Development Environment • it makes Eclipse easily extensible by other plug-ins.
General description of Eclipse • Although Eclipse is written in Java and mostly for creating Java projects, it is language neutral : • additional plug-ins are available for other languages, such as C/C++, Cobol, and C# • But it is not strongly platform neutral : • it uses the operating system's native graphics.
General description of Eclipse • The Eclipse platform consists of • a small platform runtime kernel, • workbench (GUI: menus, toolbars, perspectives, views and editors), • workspace (to contain and manage projects), • team support components, • help
JDT PDE Your tool here Workbench Help Workspace (projects, files) Team support Platform runtime kernel The Eclipse Architecture General description of Eclipse Except for small runtime kernel, everything in Eclipse is a plug-in or a set of related plug-ins
General description of Eclipse • Team support (plug-in): • Facilitates the use of a version control or configuration management system. • The Eclipse platform includes a client for Concurrent Versions System (CVS): • a source control tool • invaluable if two or more people work together on a single set of files – to coordinate changes.
Eclipse Workbench • Workbench • main window which shows a perspective • Perspective: • set of panes • Pane contains • view(s) which can be tabbed • One pane serves as an editor
Eclipse Workbench - Resource perspective Pane – tabbed view “Project Explorer” Pane – typiclly used for an editor Pane – tabbed view “Outline” Pane – contains tabbed view “Tasks”; There can be many tabbed views in a pane
Eclipse Workbench • Resource Perspective is sometimes considered as home perspective: • a general purpose perspective for • creating, viewing, and managing all types of resources • contains, in particular, Project Explorer (Navigator) view showing • a hierarchical representation of the workspace and all the projects in it
Eclipse Workbench • Other perspectives are available • either by clicking on perspective switcher icon (choose Other…) or • on a perspective icons on shortcut toolbar in the right up corner • or via Window > Open Perspective > Other… • perspective switcher can be put, e.g., along the left side (as in the Eclipse book) by right clicking on .
Eclipse Workbench • Changing how a perspective looks like: • Temporary supersizing a view by double-clicking on the title bar of the view • moving views around by dragging their title bars • adding a new view:Window > Show View • closing a view • restoring the perspective to its default appearance: • Window > Reset Perspective • saving your customized perspective: • Window > Save Perspective As
Eclipse Workbench • There are severalstandard types of projectsin Eclipse: • Java– the choice for developing a Java program • Plug-in Development • for creating your own plug-ins for Eclipse (will not be considered) • etc.
The Java quick tour in EclipseCreating a Javaproject • Right-click in the Project Explorer view in Resource perspective (or in the Package Explorer view in Java perspective )and select New > Project > Java Project > Next to start New Java Project Wizard. • Enter the Project name, say Hello. • Choose “Create separate folders for sources and class files”. • Otherwise your sources and (compiled) class files will be in the same root directoryHello. • (Note that clicking Next would take you to a dialog box that lets you change a number of Java build settings. For this example we don’t need to change anything.) • Click Finish. • Confirm switching to Java Perspective.
The Java quick tour in EclipseCreating a Javaproject • Createanother similar project Proj-Joint-Source-Classes now with choosing “Use project folder as root for sources and class files” We will see the difference and use this version in a later exercise. • See the result of your actions in the next slide
The Java quick tour in Eclipse:Creating a Javaproject • New Java Perspective appears • containing Package Explorer view (instead of the similar Project Explorer view) with two new rojects • Helloand • Proj-Joint-Source-Classes; • Package Explorer • understands Java packages and • displays them as a single entry rather than as a nested set of directories (as we will see soon).
The Java quick tour in Eclipse: Creating a Javaclass • It is a good practice to organize Java classes into packages. (We will see this later also in Ant.) • E.g., the package for Java classes in our project Hellomay be named org.eclipseguide.hello • In your Labs (for the future Lab Test) you should choose, instead, your own package consisting of combinations of your surname.first_name.ID123456.hello (use your personal ID) possibly in a different order; not all your packages should coincide. THIS IS COMPULSORY REQUIREMENT FOR YOUR FUTURE WORK WHICH WILL BE NEEDED FOR YOUR CLAS TEST Note that pure sequence of digits (123456) is not allowed as a package component (between dots) because package names start with a letter
The Java quick tour in Eclipse: Creating a Javaclass • In Java perspective , follow these steps to create new Javaprogram (class): • Right-click on the project name Hello and select New > Class • Enter the package namelike org.eclipseguide.hello (actually, use your personal package as described above!!) • Enter the class nameHelloWorld • Check stub method : public static void main(String[] args) • Check “Generate comments” (see next slide)
Pay attention to the automatically chosen source folder Hello/src • Click Finish, and look at the automatically generated result in the next slide.
The Java quick tour in Eclipse:Creating a Java class • Examine: • Contents of the workspace directory - in your lab machines it should be H:\eclipse • Package Explorer view in JavaPerspective, • Project Explorer view in ResourcePerspective.
The Java quick tour in Eclipse:Creating a Java class • Pay attention how the package and filesHelloWorld.java and HelloWorld.class are posed in directories/views. • Note that neitherResource PerspectivenorJava Perspective show default bin directory for compiled classes. • In the editor area we see the stub Java codeHelloWorld.java (with an empty main() method) generated by the wizard.
The Java quick tour in Eclipse: Creating a Java class • Code-completion/code-generation features: • Add a line to main() method System.out.println("Hello, World!"); • Eclipse helpfully inserts closing parentheses and double quotation marks; • Code-completion feature, code assist, presents a list of proposals – the methods and attributes for the class; • Code assist may also be invoked by Ctrl-Space; • For example, typesysout followed by Ctrl-Space to get System.out.println(); • These features are easy to customize via Eclipse’ssettings and preferences as we will see later.
The Java quick tour in Eclipse: Creating a Java class • Repeat the same in the project Proj-Joint-Source-Classes • This project directory (unlikeHello project) serves as joint directory for source code and for compiled classes. • USE the same package name as above and similar class name Hello to HelloWorld. We will use this project and new Helloclass later.
The Java quick tour in Eclipse:Running a Java program • SelectHelloWorldsource in the editor – click. • To run this program, • selectRun > Run As > Java Application. • Eclipse can prompt you to save changes before it runs the program. • Click OK. • Consoleview appears and displays the program output: Hello, World!
The Java quick tour in Eclipse:Running the Java program • To re-run the chosen file, click Run button • or select Run > or hit Ctrl+F11, • No separate step is required to compile! • Compiling goes while editing!
The Java quick tour in Eclipse:Syntax Errors • Eclipse JDT includes a special incremental compiler and evaluates your code as you type it, • by creating .class file automatically. • It can highlight things such as syntax errors and unresolved references as you type. • TRY it: • by deliberately creating some syntactical errors, • and experimenting with red signs in the left and right border of the editor.
The Java quick tour in Eclipse:Debugging the Java program • Eclipseinterprets the code in a more comprehensive way than a simple editor can. • Eclipse’s ability to run the code interactively is one of major benefits. • By using the JDTdebugger, you can • execute your Java program line by line and • examine the value of variables at different points in the program. • This process can be invaluable in locating problems in your code. (Window > Open Perspective > Other… > Debug).
The Java quick tour in Eclipse:Preferences and other settings • Eclipse’sdefault settings can be changed or restored by selecting Window > Preferences… • These are, for example, • Code Style: Java>Code Style • formatter, • code templates for generating code or comments, • Adding classpathentries and User Libraries via Java>Build Path • We will consider only some of these settings.
The Java quick tour in Eclipse:Preferences and other settings • Exporting and importing preferencescan be done via File > Import > General > Preferences File > Export > General > Preferences • Javadoc commentsmay be changed as follows: • Select Window > Preferences > Java > Code Style > Code Templates • Select Code > New Java Files, and click Edit • Change the text to the following (by using Insert Variable buttons): /* ${file_name} * Created on ${date} */ ${filecomment} ${package_declaration} ${typecomment} ${type_declaration} • Click OK in the Edit Template dialog box (continued on the next slide) Added Original
The Java quick tour in Eclipse:Preferences and other settings • Javadoc comments changes (continued): • Select Comments > Types (in the same box),and click Edit • Change the text to the following: /** * Add one sentence class summary here. * Add class description here. * * @author ${user} * @version 1.0, ${date} * * ${tags} */ • Click OK in the Edit Template dialog box • Note, that you can always use Restore Defaults button. • Click OK again. • To see all your changes, create a new classTest in org.eclipseguide.hello package with checking Generate Comments. • TRY it. (See the next slide for illustration of the above steps.)
Changing Javadoc comments and code style
The Java quick tour in Eclipse:Preferences and other settings • Format style • Select Window > Preferences > Java > Code Style > Formatter • Click Edit button, • then choose, for example, Braces tab • Choose one of the options: Same line, Next line, Next line indented, Next line on wrap • and see how format style changes. (see the next slide)
Changing Format style (brace positions) Try You will be prompted to change profile to, e.g., MyProfile
The Java quick tour in Eclipse:Preferences and other settings • Code generation templates(to be invoked by Ctrl-Space). • Templates for flow control constructs (like do whilestatement) are found in Window > Preferences > Java > Editor > Templates (see the next slide)
The Java quick tour in Eclipse:Preferences and other settings
The Java quick tour in Eclipse:Preferences and other settings • Create template to produce simpleforloop: • Select (as above) Window > Preferences > Java > Editor > Templates • Click the New button. • Choose Context Java statements. • Enter • for as the name of new template, • Simple for loop as the description, and • the pattern on the next slide (by using Insert Variable):
The Java quick tour in Eclipse:Preferences and other settings Finally, • Click OK in this New Template dialog box, • Click OK in the Preference dialog to return to the Workbench. • TRYnew version of forof Simple for loop just created with using Ctrl-Space.
The Java quick tour in Eclipse:Preferences and other settings • SettingClasspaths and classpath variables: • Select Window > Preferences > Java > Build Path > Classpath Variables • Click the New button. • Enter the classpath variable name, (just for example), MYSQL_JDBC. • Either browse or enter manually, (just for example, even if it does not exist in your computer) the path C:\mysql\jdbc\lib\mm.mysql-2.0.14-bin.jar • Click OK twice to save and return to Workbench.
The Java quick tour in Eclipse:Preferences and other settings • AddingJARclasspath or classpath variable (such as MYSQL_JDBC)to a project: • right-click on the project name (Hello), • select Properties, then Java Build Path, and Libraries tab, then • eitheradd the JAR explicitlyby selecting Add External JARs… from your file system, • or select Add Variable, clickMYSQL_JDBC, and OK • In our case, MYSQL_JDBCpoints to non-existing location, so Eclipse does not allow to add this variable. • Similarly, we could add classpath variable JUNIT4_EXTERNAL (- external to Eclipse, which has its own JUnit3 and JUnit4) for our independent of EclipseJUnit4 C:/JAVA/junit4.8.2/junit-4.8.2.jar • Alternatively, if we want to use Eclipse’s internal plugin for JUnit, we could click AddLibrary... and choseJUnit3 or JUnit4.
The Java quick tour in Eclipse: Importing pre-existing Eclipseprojects into workspace • Some Eclipseproject (s) can be • created by another developer or • deleted from the workspace by yourself (without complete deleting the project contents on disk; e.g. you can temporary delete your Hello project and then import it back). • To import such a pre-existing Eclipse projects from some other workspace into your current workspace, select File > Import > General > > Existing Projects into Workspace > Next • Choose Select Root Directory (i.e., a pre-existing - another or the current - workspace) containing existing projects and click Browse to find it. • Choose project/subdirectory to import.
The Java quick tour in Eclipse: Importing pre-existing Eclipseprojects into workspace • You can additionally decide whether to Copy Projects into Workspace by ticking the appropriate box (if it is not in the current workspace) or not copy That is, a content of a directory on disk can be dealt with as a part of our abstractWorkspace but non necessarily physically contained in the Workspace directory on disk. • Click Finish.
The Java quick tour in Eclipse:Conclusion notes • Thus, we know how to • start a project in Eclipse, • create a stub Java class by using a wizard, • use the simplest Code-completion/code-generation features of the editor (Ctrl-Space), • run and re-run a Java program in Eclipse, • that Eclipse editor highlights and helps to correct syntax errors and unresolved references (discussed later), • that Eclipse has a special Debug perspective to facilitate debugging a Java program (details omitted), • use Preferences for • code formatting style (positions of braces was considered)), • templates for generating code (or comments – details omitted for self-study), • adding classpath entries (details omitted for self-study), • etc. • import some pre-existing Eclipseprojects into workspace
The Java quick tour in Eclipse:Conclusion notes • Eclipse is available from http://www.eclipse.org