Download
1 / 12
120 likes | 197 Vues
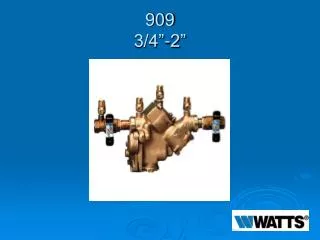
Learn valve maintenance tips for .9093/4”-2” modification, covering check valve and disc replacement, RV cover removal, stem removal, seat removal, rubber replacement, and reassembly notes. Keep your valves running smoothly!

E N D
Modification Overview • Production began in 1979 and is current. • The 909M1 (1989) in the 11/4”-2” sizes only. Change was in the body only- internal components are the same.
Check Cover Removal • Cover is o-ring sealed. • Check valve assembly is attached to the cover and spring is contained. • Pull cover and assembly straight out of the body. (Do not twist)
Check Valve Removal • The check valve is attached to the cover with a bayonet locking system. • Check valve assembly is spring loaded. • Holding the assembly in both hands, rotate the seat (cage) ¼ turn.
Check Seat Removal • Once the cover and check valve are removed the seat or (cage) is free. • Seat is sealed by an o-ring.
Check Disc Replacement • Check disc and disc holder can be replaced as one piece.
Check Valve Reassembly Notes • Reassemble check valve in reverse order. • Apply lubricant to seat o-ring and lid o-ring.
RV Cover Removal • RV Cover is sealed by the diaphragm. • Spring load is contained.
RV Stem Removal • The stem subassembly can be pulled straight out of the body.
RV Seat Removal • Unless damaged, there is no need to remove the RV seat. • The RV seat is threaded and sealed by an o-ring. • A special tool is required to remove seat.
RV Rubber Replacement • Replace diaphragm and RV disc assembly. * Simply unscrew the stem cap from the stem. • Replace stem o-rings. • Apply lubricant to o-rings.
RV Reassembly Notes • Insert RV stem assembly into body. * Carefully guide and depress spring tension until the piston is completely into position. * Insert screw driver up into vent opening to hold stem in place. • Bolt cover down evenly.